Migrate Legacy Assemblies into EPDM Using Vaulted Reference Files
When working outside of a PDM system, it can be common to have multiple copies of the same component floating around on the system. Working across the network can make it slow to include files from a network share in your assembly, so instead you pull down copies of hardware or other components that are used across multiple projects.
When you move into a PDM system, such as SOLIDWORKS Enterprise PDM, this is no longer the best practice. Multiple copies of a file make it nearly impossible to maintain revision control. Instead, you should have a single file for a common component. This file can be referenced by multiple assemblies, and they all get updated information when the component is changed.
This can cause a challenge when migrating files into the EPDM environment. Moving in the first assembly that uses common components is easy. But when you start moving subsequent assemblies into the vault, it raises a few questions:
- How do you know which files already exist in the vault?
- How do you prevent multiple instances of the same file name in the vault?
- How do you update all the references in the new assembly to use the files that are already in the vault?
This video will show you how to use EPDM’s built-in tools and safeguards to overcome these challenges. It shows a method to move the file into the vault, identify the files that already exist, and update the assembly references to use those new files. The steps below summarize the basic methods involved.
When using this method, it is important that the first files moved into the vault are the most recent or best models for those particular files. Any assemblies added later will be modified to use the already vaulted files, so you want to make sure they are using the best models.
Steps To Add An Assembly That Uses Already Vaulted Components
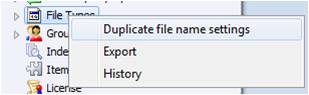
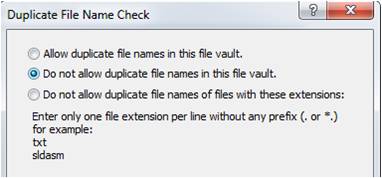
1. Set Duplicate File Name options to “Do not allow duplicate file names in this vault”
2. Copy files into vault
The video shows the use of Pack and Go. This is useful if you have references across several folders. If you know where all your referenced files are, you can also use copy-paste or click-and-drag
3. Check in all files that are allowed
Files that already exist will show “File name is not unique”. Check the warnings to make sure this is the only reason that files are not being checked in. If files are skipped for some other reason, they may be incorrectly deleted in the next steps
4. Delete files that could not be checked in because they were duplicates
The easiest way to identify these files is that there is no State listed in the State column.
5. Check out the remaining files so that changes can be made to them
6. Open any assembly that is missing components
This will force the assembly to realize that it is missing references.
- In the dialog box shown when you open the file, suppress all missing components
- Save and close the assembly. This saves the fact that there are missing files. DO NOT check in the file at this time
7. In the Windows Explorer interface, select an updated assembly, run the “Update References” tool
- Select any “File Not Found” row (or multiple rows) and select “Edit –> Find Files” to locate a replacement file
- Finalize selections and update references to modify the reference paths inside the assembly files
8. Open the assembly to verify the parts were found, mates are working, etc.
9. Save and check in file
Blog Post By: Jeff Rau