Using Folders in SOLIDWORKS EPDM
The use of folders is a convenient and powerful way of organizing files and projects in Enterprise PDM. One of the best aspects of folders is being able to push values from the parent folder into files.
Suppose you have a folder card with common variables filled out:
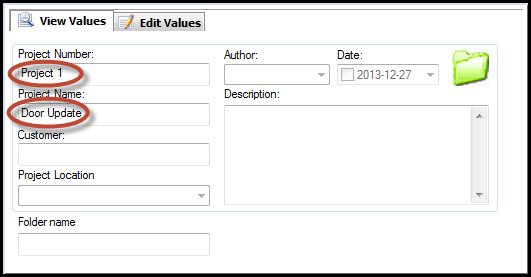
Figure 1
You want these values applied to all the files within this folder. You know that you can use the “Default Value” on the Data Card to automatically link new files to the folder variables. However, you also have a number of existing files with either the wrong values or no values at all.
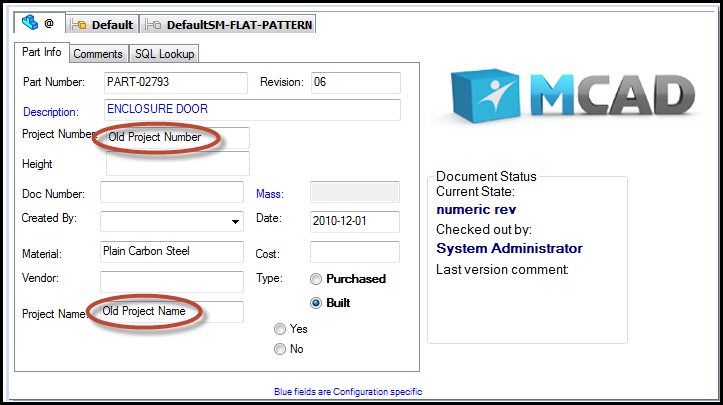
Figure 2
Alternatively, you may have been very careful in setting up your data cards and you filled in all the values as you created your files. But, now the real world has interfered with your diligence and some files have to be moved to a different folder. Or, the values of the parent folder itself have to be updated. The “Default Value” option can’t help you now, because that’s only applied when the file is initially added to the vault.
You are sad and you wonder how you ever got yourself into such a predicament.
Fortunately, your despair is short-lived, because EPDM has a tool for just this occasion. The “Update Values in Files” tool will push information from the folder card to all the files below it (or, to only a defined subset, if you so desire).
To start, make sure the variables you want to propagate exist on both the Folder Card and the File Cards.
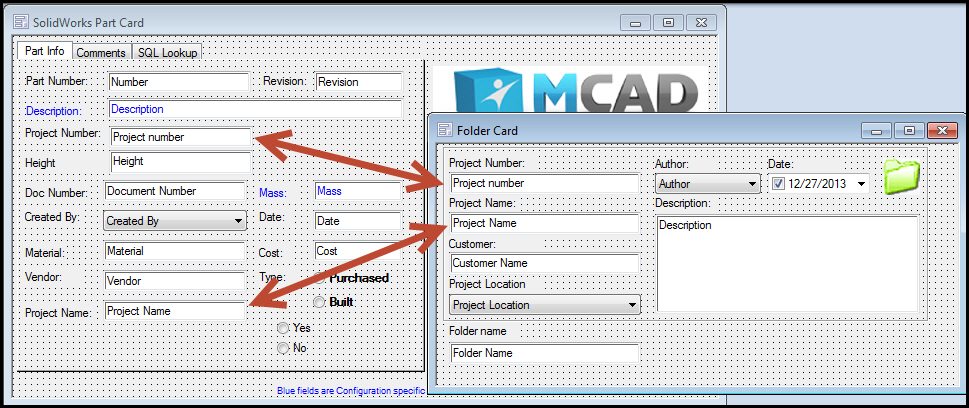
Figure 3
Next, check out any files within the folder that you want to update. If you don’t want to update them, leave them checked in. There will be 3 more steps in this tool where you can fine-tune your file selection.

Figure 4
To access the “Update Values in Files…” tool, navigate to the folder that you want to update. Select the folder then pick Modify -> Update -> Values in Files…
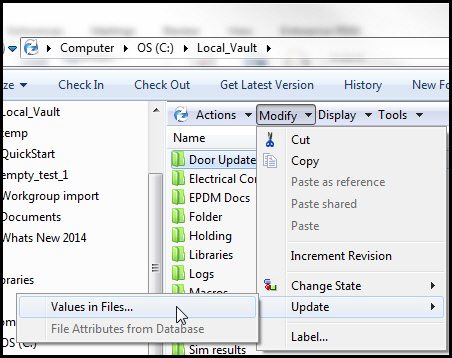
Figure 6
This launches a series of dialog boxes that will step you through the process to push your desired variable values.
1. Use the first screen to filter files based on the filename
· File names can include wildcards (*) and/or file extensions
· Using multiple words acts as an “OR” search. E.g. entering “part assy” will look for any files with “part” or “assy” (or both) in the filename
· No logical operators (AND, OR, !, <>, etc) are recognized
· Blank box will include everything (selected files can de-selected later if needed)

Figure 7
2. The next screen allows filtering by Workflow State
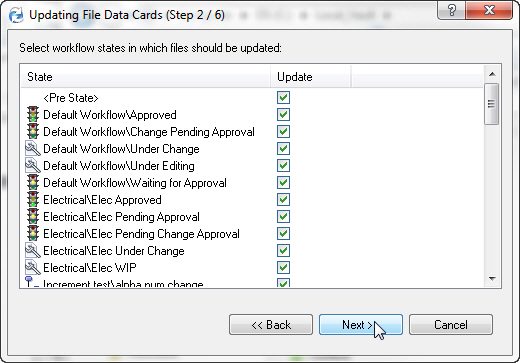
Figure 8
3. The third screen shows all the files that met the criteria from the first two screens. Use the checkboxes to include/exclude specific files
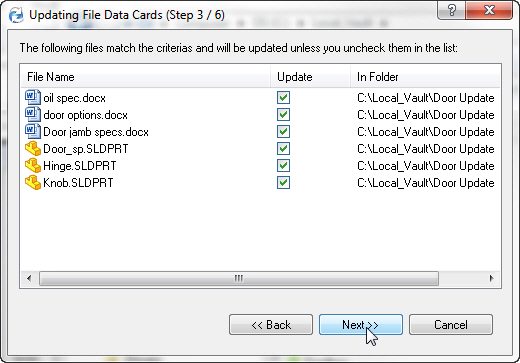
Figure 9
4. Now, choose the variable(s) that you want to push from the parent folder to all the selected files
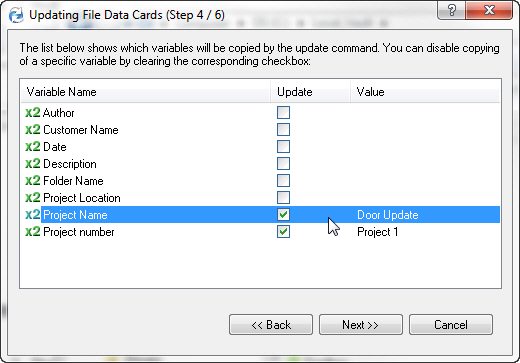
Figure 10
5. The next screen allows you to choose which configurations should be updated
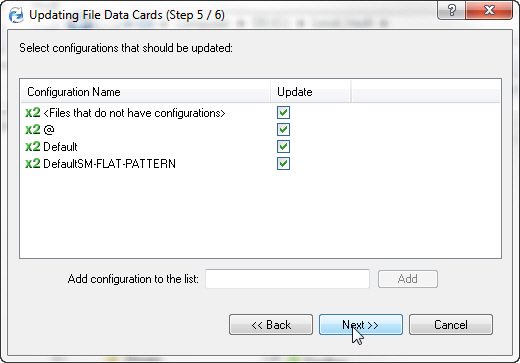
Figure 11
6. You get one more screen to make sure you’re really ready for this. Click “Finish” to start processing the files.
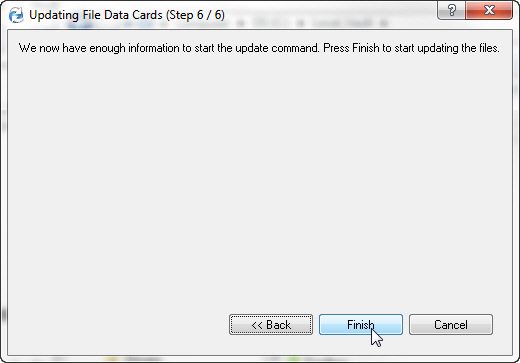
Figure 12
When it’s done, the variables for your selected files will be updated with the information from the folder card. Any blanks will be filled in and any previous values will be overwritten with the new information.
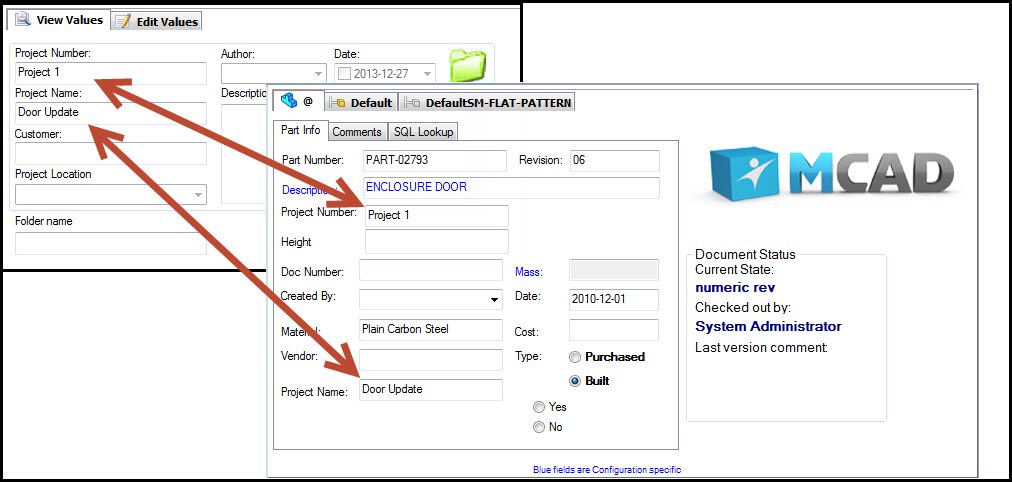
Figure 13
Be sure to check in the updated files to capture your updates.