SOLIDWORKS Weldments from Profiles to Cut Lists – Part 4
In this last part of our SolidWorks Weldment blog series, we will be focusing on Weldment Drawings, Creating a Cut List, and the Properties of the Cut List Items in the part files.
SOLIDWORKS Weldment Drawings
Creating a Weldment drawing is very straight forward. I will just use the sample Weldment part provided by SOLIDWORKS as a quick example in case you want to try this yourself.
1. Pull down the File menu and click New. Click Drawing to open a new drawing. I just picked the standard “A (ANSI) Landscape” sheet size.
2. In the Model View PropertyManager, click the Browse button under Part/Assembly to Insert.
3. Browse to <SOLIDWORKS Install Directory>samplestutorialweldmentsweldment_box2.sldprt and click Open.
4. Under Orientation is the Drawing View1 Property Manger, Isometric is selected. Click in the drawing sheet to place the view.
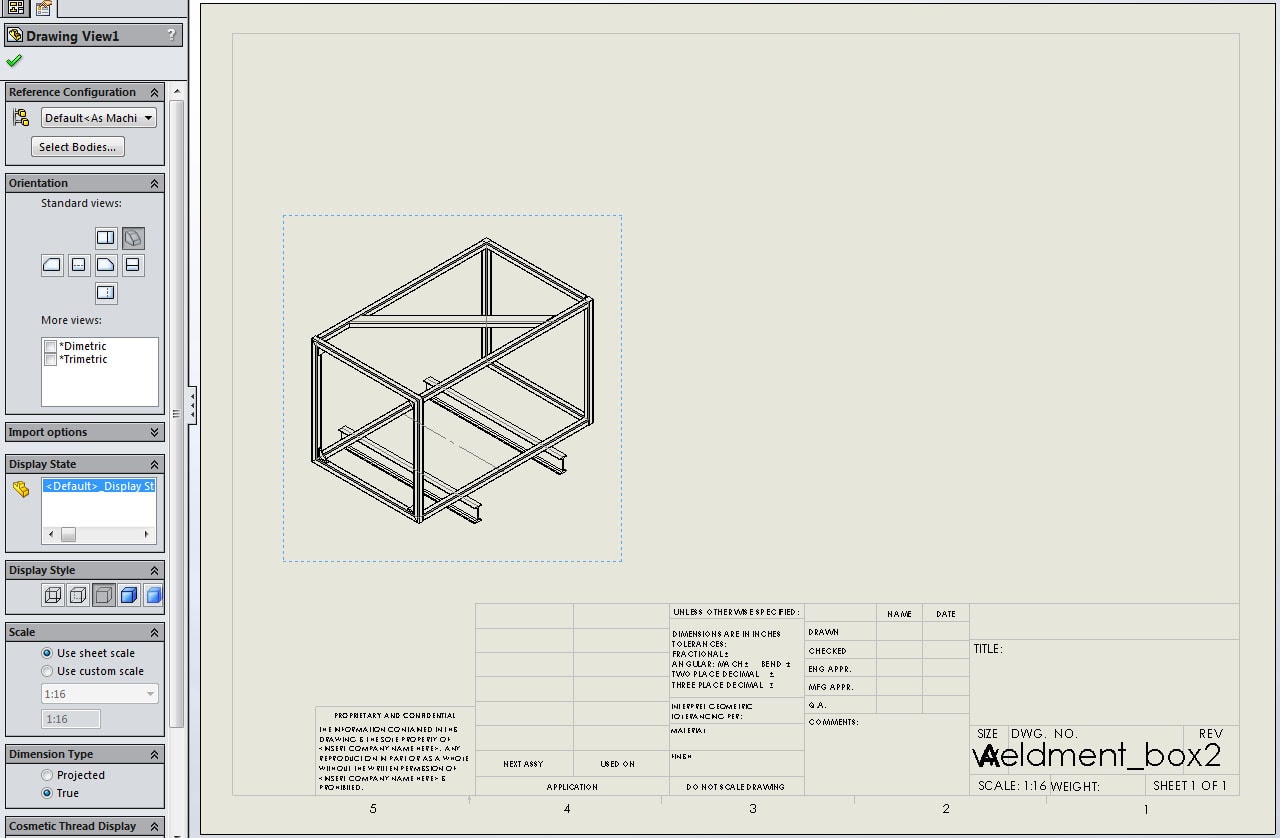
Click the OK check mark to close the PropertyManager.
Drawing Views of Individual Bodies
You can also create drawing views of individual Weldment bodies.
1. Pull down the Insert Menu and pick Drawing View, Relative to model.
2. Next, click anywhere in your Drawing View. The weldment_box2.sldprt document will open.
3. In the Relative View PropertyManager, change the Scope to Selected Bodies.
4. In the graphics area, select one of the bottom I-beams.
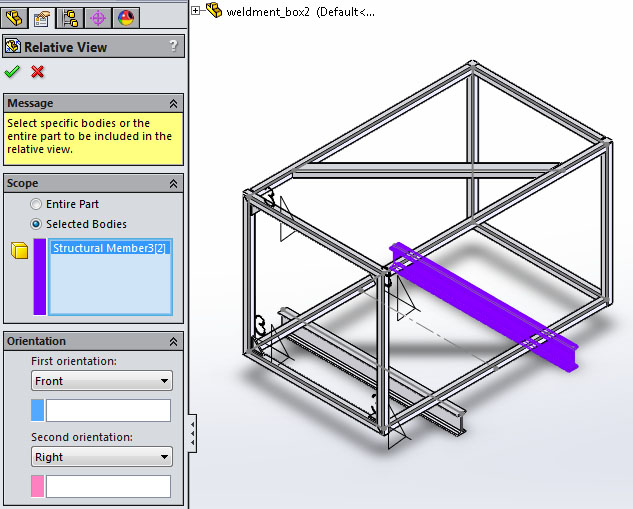
5. Under Orientation, First orientation, pick the front face of the I-beam. Change the Second Orientation to Top and pick the top of the I-beam. Note that the colors of the selected faces in the graphics area match up with the colors in the PropertyManager.
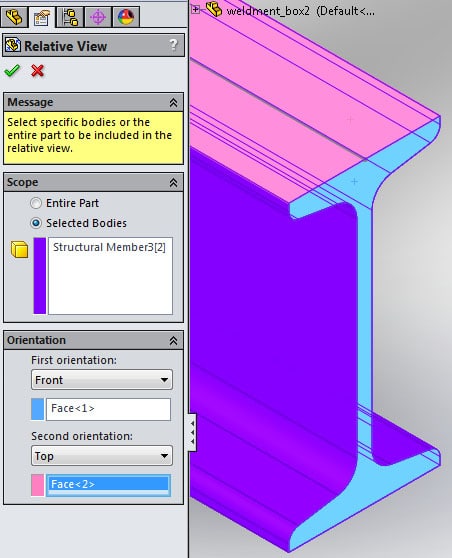
6. Click the OK check mark at the top of the PropertyManager.
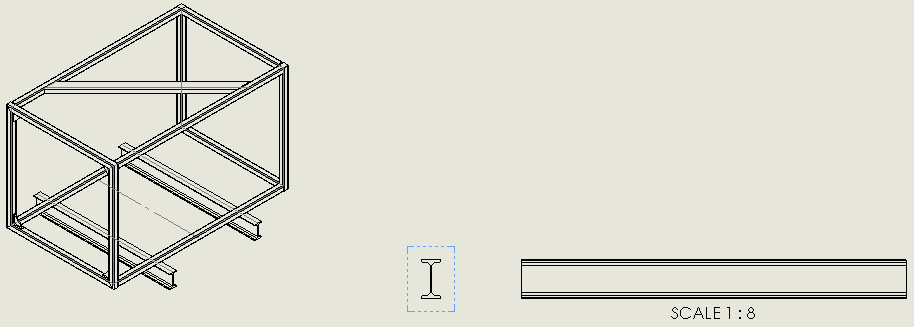
7. I set a custom scale of 1:8. Click in the graphics area to place the new view.
You can add a projected view (Insert, Drawing View, Projected) if you like.
Adding Weld Symbols
SOLIDWORKS also has made it very convenient to add weld symbols to the drawing.
1. Pull down the Insert menu and pick Model Items.
2. In the Model Items PropertyManager, under Source/Destination, select Entire model for Source.
3. Under Dimensions, clear Marked for drawing.
4. Under Annotations, select Weld Symbols.
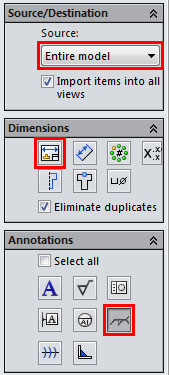
5. Click the OK check mark at the top of the PropertyManager.
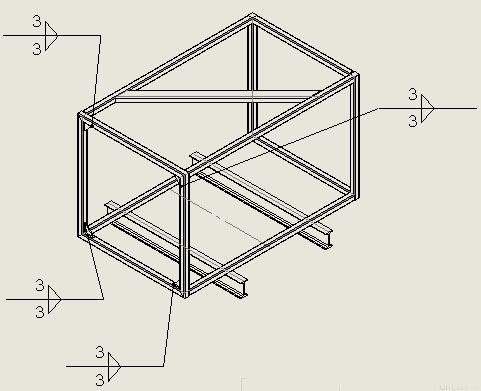
The weld annotations are inserted into the drawing view. You can drag the annotations around to position them how you like.
Creating a Cut List
A cut list is a table containing a list of the components in the Weldment. It is like a BOM for your welded structural shapes. The cut list groups identical items together, leaving out items like fillet beads that do not belong on the list.
The first step is to create the cut list items. Switch back to the part file.
In the FeatureManager design tree, expand Cut list(31).
Right-click Cut list(31) and select Update. Although the cut list is generated automatically, you manually specify when to update it in a Weldment part document. This enables you to make many changes, and then update the cut list once.
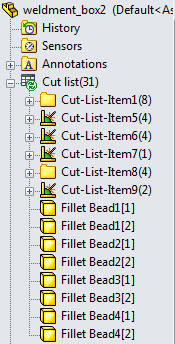
This groups together the identical items and sorts them using folders. The Fillet Beads are listed out individually at the bottom of the list.
Properties of the Cut List Items
To help identify what is in the cut list, SOLIDWORKS gives us the ability to add some custom properties like part numbers or descriptions. These custom properties can be assigned to the Weldment so that they will show up in the cut list on the drawing.
To understand this better, right click on Cut-List-Item1(8) in the FeatureManager design tree and pick Properties.
The Cut-List Properties dialog box comes up. On the Cut List Summary tab, you can see a list of the cut list folders. Whatever is listed out here is what will show up on the cut list in the drawing.
Cut-List-Item1 is selected. Under Property Name, select PARTNUMBER. Then under Value / Text Expression, type “SUB2284” and press Enter.
Under Property Name, add another customer property DESCRIPTION. Under the Value / Text Expression, type “Back Frame” and press Enter.
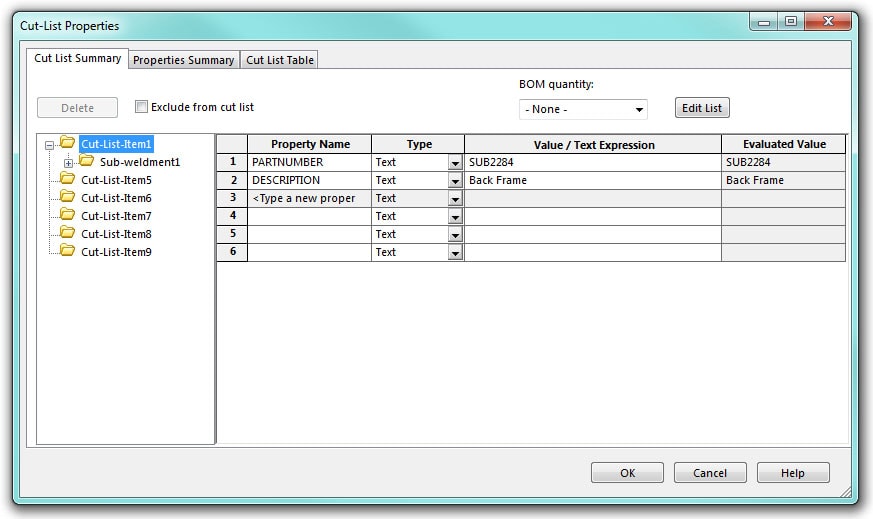
On the left side, click on Cut-List-Item5. As you can see, this item already has several properties already entered. SOLIDWORKS calculates the values for LENGTH , ANGLE1, and ANGLE2. The DESCRIPTION is already defined in the profile used to create the structural member. If there is a material assigned to the body, this will show up in the linked MATERIAL.
I went ahead and added a PARTNUMBER to Cut-List-Item5, Cut-List-Item6, Cut-List-Item7, Cut-List-Item9.

For Cut-List-Item8, I added several custom properties:

Click the OK button is close the Cut-List Properties dialog box and switch back to the drawing.
Add the Cut List to the Drawing
Pull down the Insert menu and pick Tables, Weldment Cut List.
Select the Isometric drawing view in the graphics area.
Click the OK check mark at the top of the PropertyManager.
Now you can place the cut list on your drawing sheet.

Customize the Cut List Table
As with other tables in SOLIDWORKS, you have the ability to customize the format and display of the cut list table. If you bring the cursor over the table, you will see the four arrow button at the top left of the table that brings up the Format toolbar that allows you to change things like the font and font size.
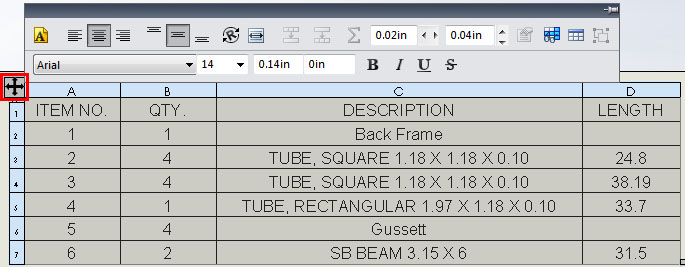
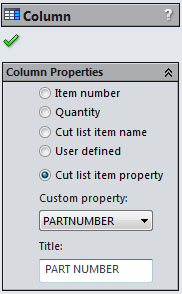
You can adjust the column width and row heights. You can right click on a column header and Insert – Column. This is useful to display some of your other custom properties. Once you insert a new column, select it and you will see the options in the Column PropertyManager. Here is an example:
Add Balloons
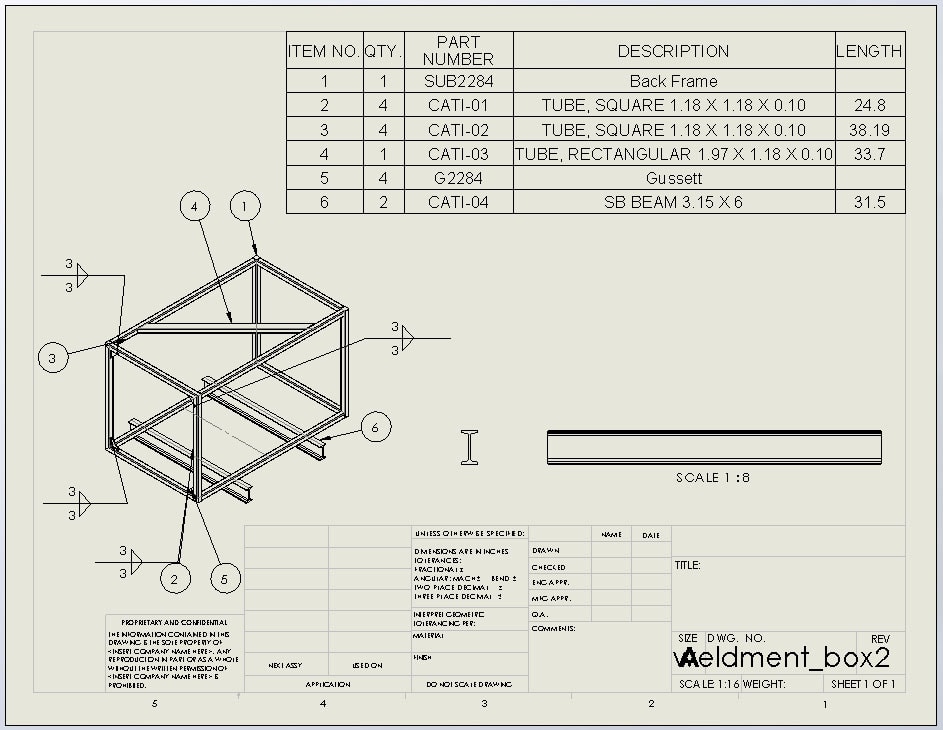
Now that you have the cut list, you can use balloons to easily identify what is what on your drawing view. All you have to do is to select the isometric drawing view, pull down the Insert menu and pick Annotations, Auto Balloon to add the balloons to your drawing.
Hopefully you can take this quick overview and start using this yourself. If you already do, then, hopefully you picked up a new thing or two. For a full description of all the features, please click here.
We hope this series has given you an insight to how to access the Weldment tools. Please check back to the CATI Blog as the Dedicated Support Team will continue posting new series of articles every month that go further into the details of many of the SOLIDWORKS tools. All of these articles will be stored in the category of Daily Dose…..of SOLIDWORKS Support and links to each article with their release date are listed below:
- SOLIDWORKS Weldments from Profiles to Cut Lists – Part1 (Bryan Pawlak 2/26/14)
- SOLIDWORKS Weldments from Profiles to Cut Lists – Part2 (John Van Engen 2/27/14)
- SOLIDWORKS Weldments from Profiles to Cut Lists – Part3 (Blake Cokinis 3/3/14)
- SOLIDWORKS Weldments from Profiles to Cut Lists – Part4 (Neil Bucalo 3/4/14)
Neil Bucalo, CSWP
Certified SOLIDWORKS Support Technician 2013
Computer Aided Technology, Inc.

 Blog
Blog