SOLIDWORKS Flow Simulation: Coffee Cup Mixing and Cooling
SOLIDWORKS Flow Simulation
SolidWorks Flow Simulation is a very powerful tool. Sometimes it can be fun to use a very powerful tool to simulate an everyday occurrence, just to see the results and to sharpen one’s simulation skills. In this case, I have added an untold amount of milk and cream to coffee over the years and watched the beautiful swirls it makes as it mixes. This article shows such a simulation using an assembly containing a cup on a table and a thin divider between the coffee and air to allow the use of liquid and air in the same simulation (fluid subdomain).
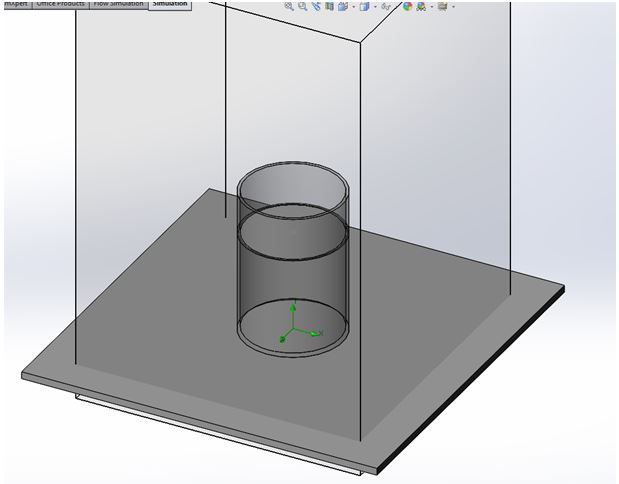
I set up a time-based study using air as the standard fluid and defining a fluid subdomain that contained water at a few degrees below boiling. This was put into a porcelain mug and allowed to cool for 180 seconds to get the natural convection cells inside the mug to set up, just like in reality.
After allowing the study to solve, one is left some very pretty flow results! Shown here are the heat gradient in the water, table and the air, the external air flow, and the internal fluid flow.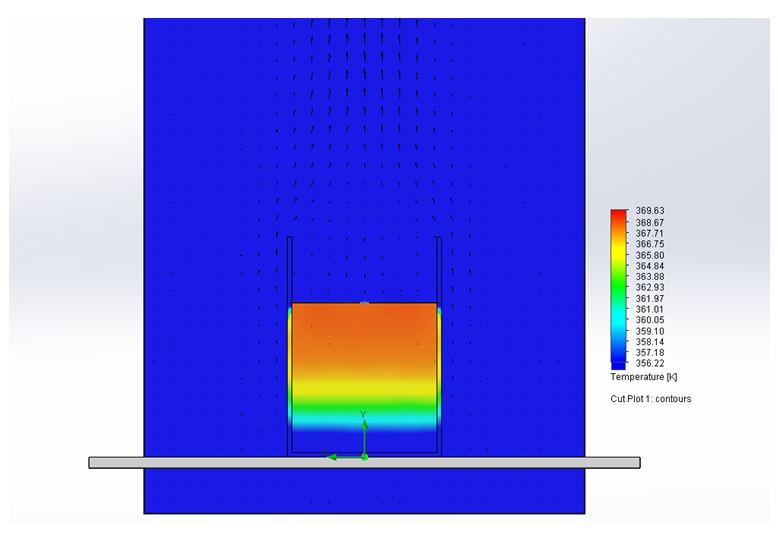

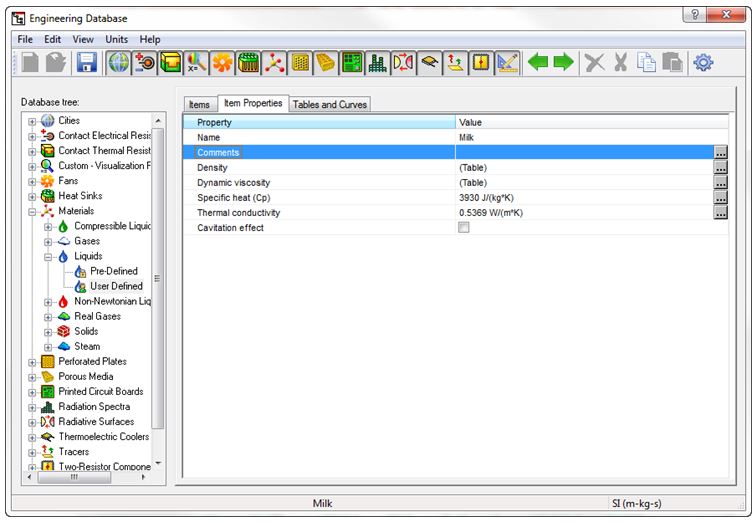
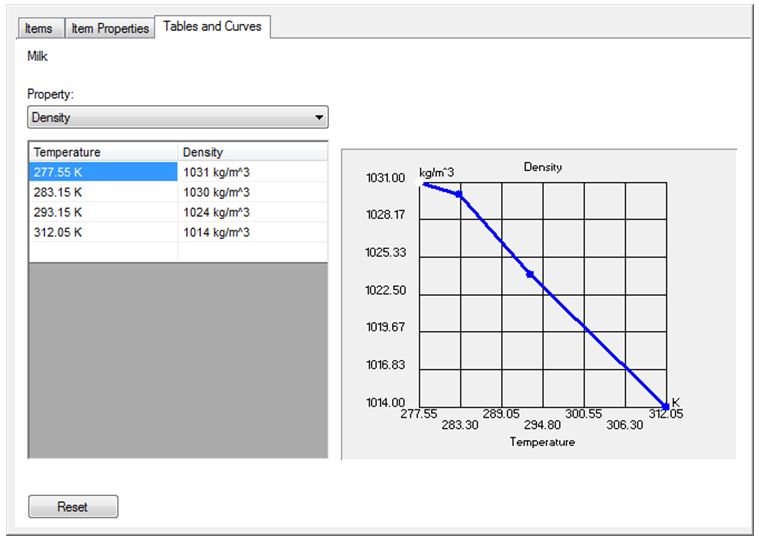
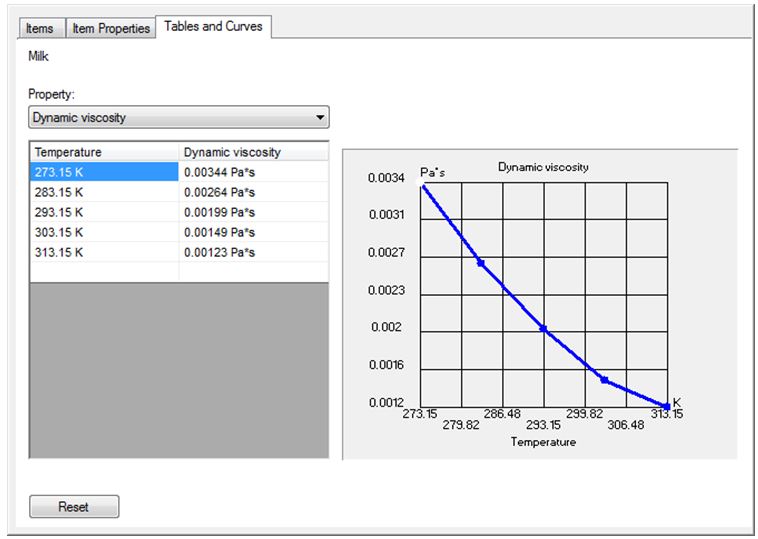
As one can see from the results, beautiful convective swirl patterns are evident in both trajectory displays, showing the buoyancy effects causing the natural convection. Once the study was complete, it was then time to create a milk injection for the study. This starts with defining our milk! Using data about the changes in milk viscosity and density with temperature, along with the average specific heat and thermal conductivity of milk across this temperature range, I was able to make several custom curves to help define milk more accurately.
 Once I had milk defined, I calculated the average emulsification radius for the fats in the colloidal suspension we call milk. I arrived at a value of approximately 1 micrometer or 1e-6 meters. Once all of this data was entered, I also ensured that the milk’s injection temperature and relative kinetic energy from pouring were accounted for in the Flow Simulation particle injection study setup.
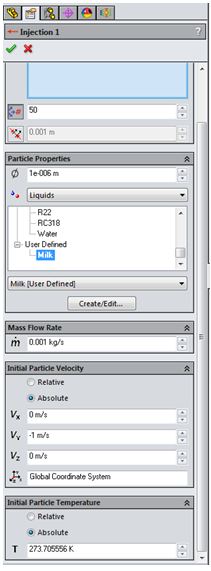
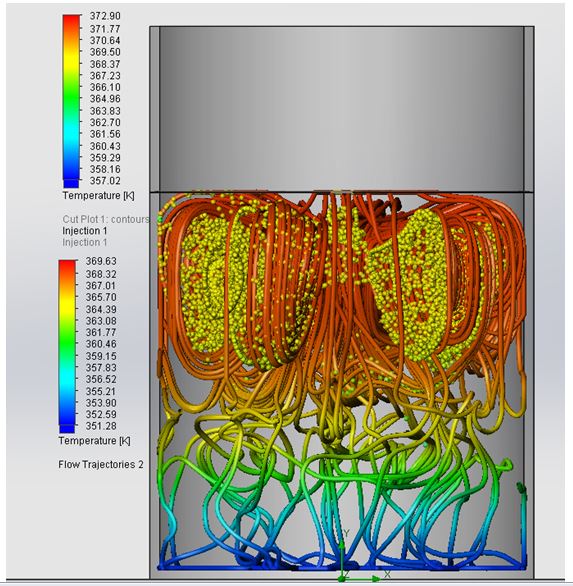
Duplication of the particle study with a change to the initial particle (milk) temperature using room temperature (~23C) allowed for a comparison of cold milk to warm milk. The results show that the colder the milk, the further it dives into the thermal gradients in the cup before its density lowers enough to become buoyant in the convective swirls of the water. Warm milk is shown first and then cold milk.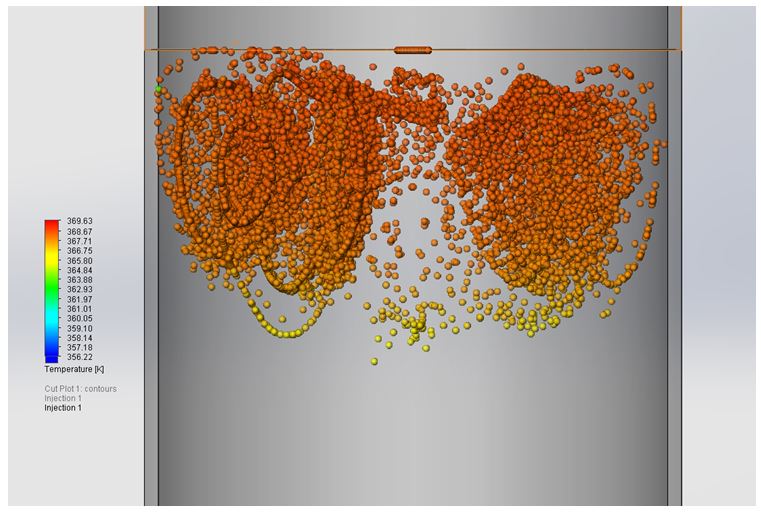
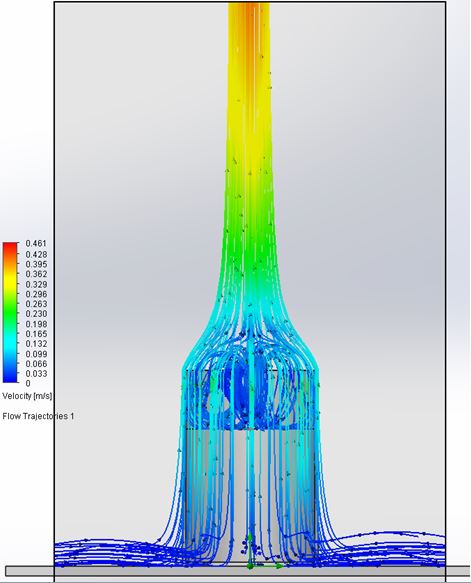
 If one overlays that with the internal flow patterns, the fact that the milk follows the flow path becomes very evident.
This study goes to show that the Flow Simulation package for SOLIDWORKS is a very powerful tool, even when applied to an effect one sees while making their morning wake up juice.
Post By: Drew Potter