SOLIDWORKS 2017 What’s New: Routing, Distinct Routes Through Clips – #SW2017
Routing, Distinct Routes Through Clips
SOLIDWORKS Routing is all about automation. As fast as you can click the mouse, you’re placing components in your assembly and directing the route through your assembly. If there’s a downside to this level of automation, it’s that sometimes you don’t have as many choices as you’d like.
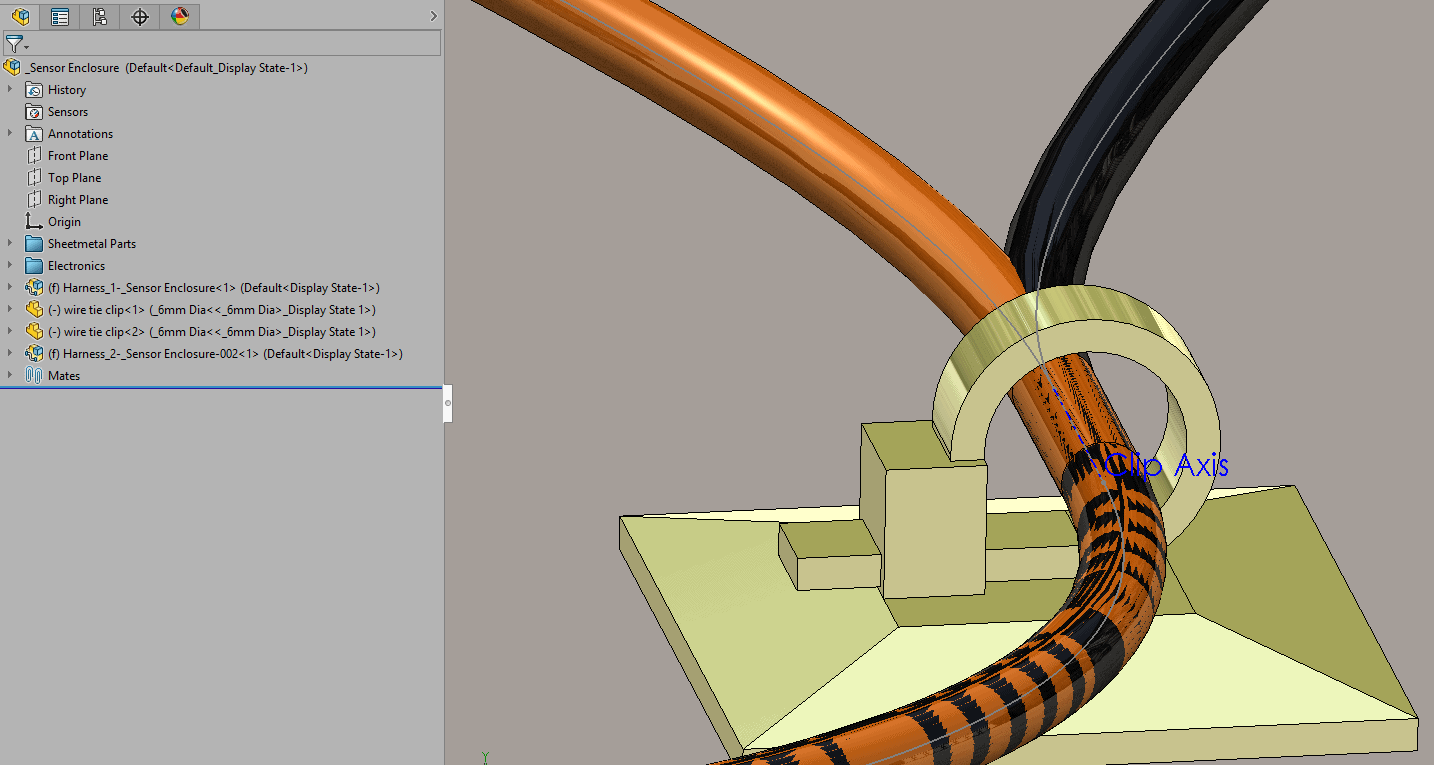
One of those scenarios is when multiple routes are passing through the same clip. This screenshot shows what this looks like in SOLIDWORKS 2016 and previous versions. You’ll see the two routes pass though the clip center axis and therefore pass though one another. While this does control the route position, meaning if you move the clip the route updates, it leaves much to be desired.
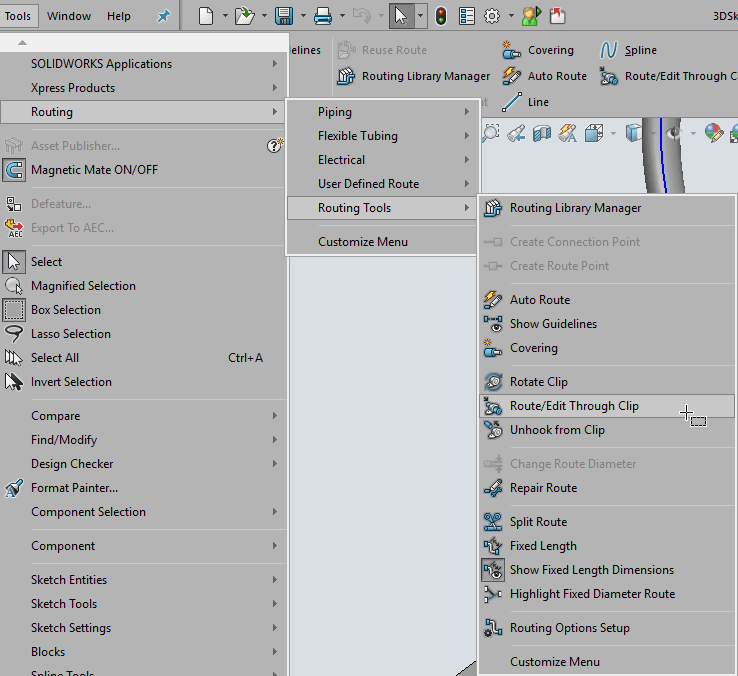
SOLIDWORKS 2017 gives the user the control they need on how the routes pass though the clip. Now when you’re editing a route there’s a new command called Route/Edit Though Clip located under: Tools, Routing, Routing Tools.
Within this new command there are a number of options to edit the route: Auto Align, Flip Direction, Sketch Drag and Unhook from Clip. Select the axis running though the clip and SOLIDWORKS 2017 will automatically show you the route or routes passing through it.
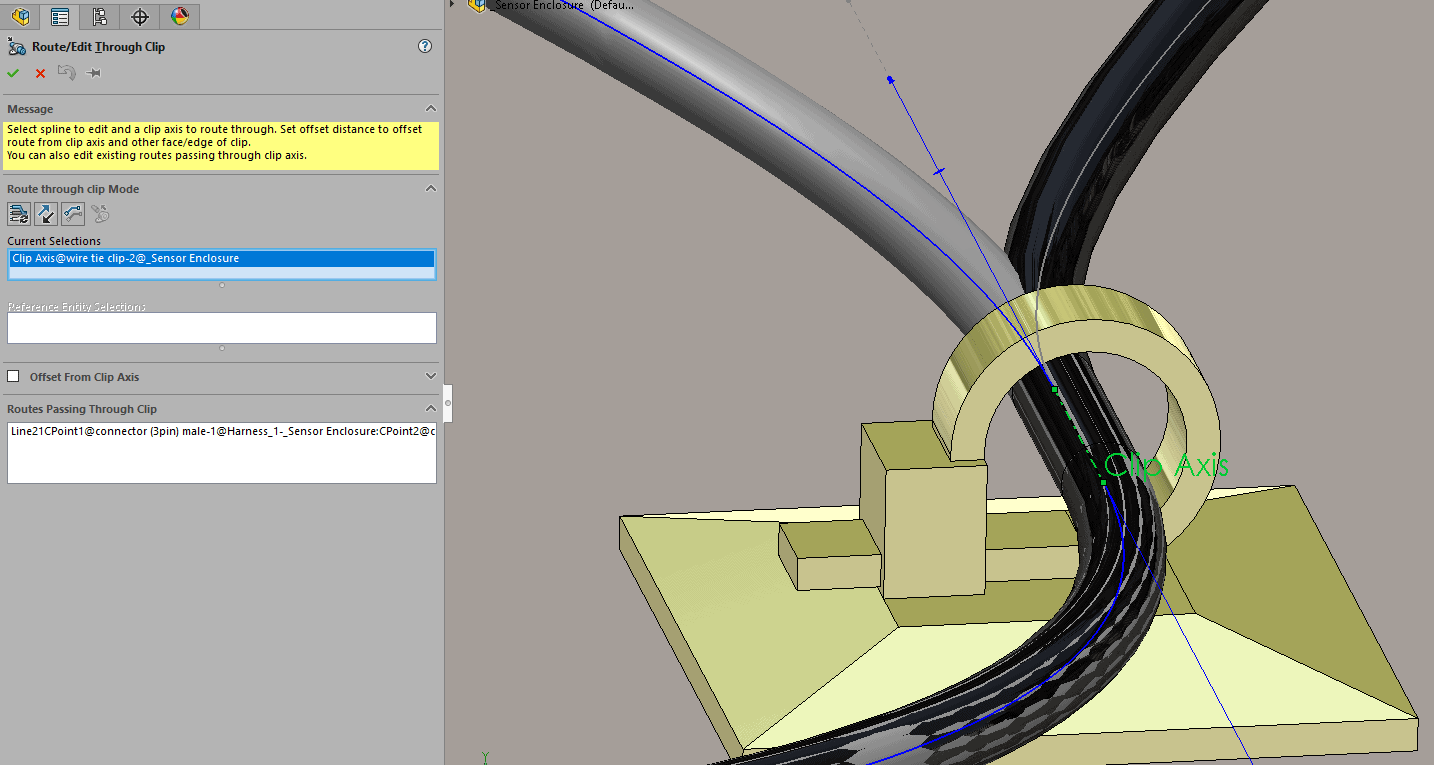
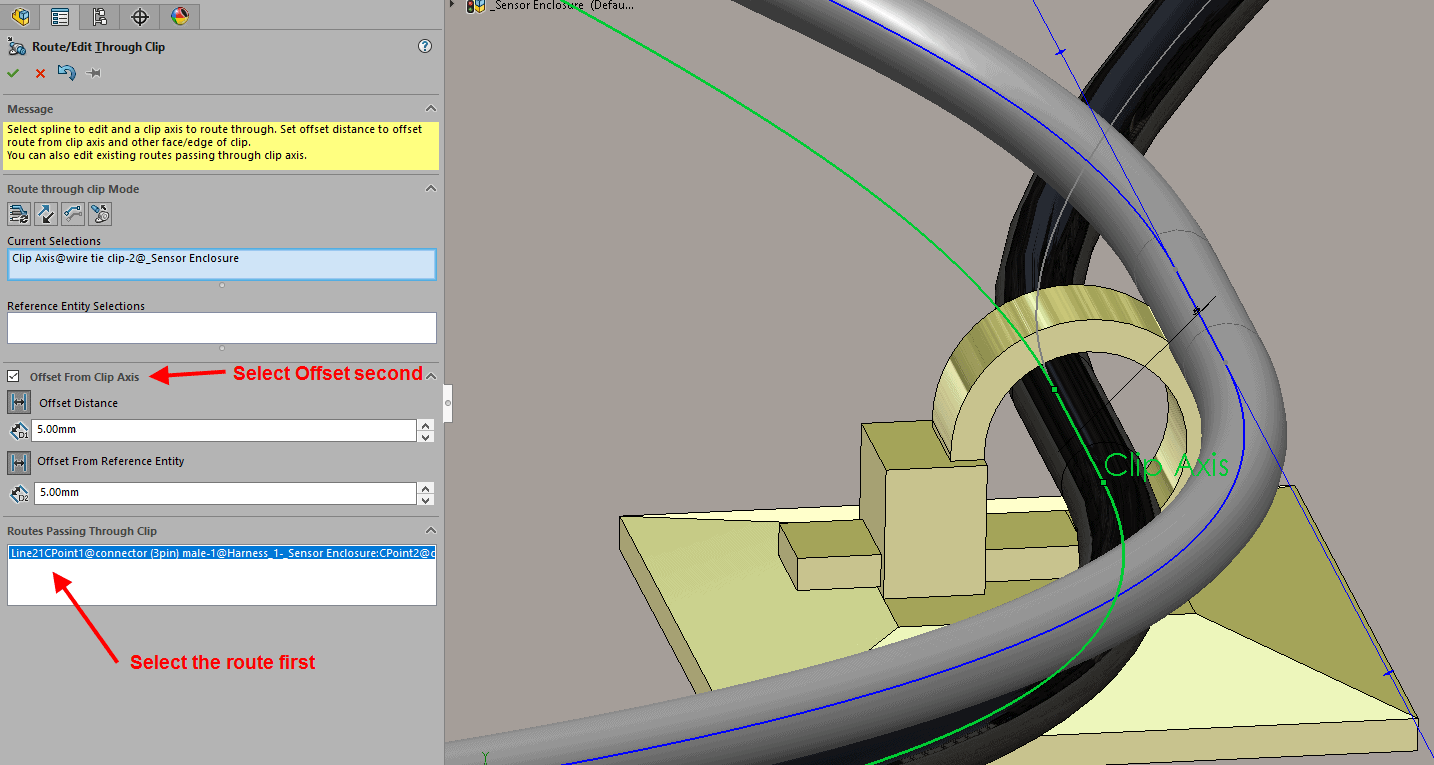
The next step is to select the Route Passing Through Clip, then select Offset from Clip Axis box and begin making some changes. This order is important, select route first and then one of the editing options second. You’ll see the initial Offset Distance is a bit large and the route is now outside the clip, but we have full control over its position. If the route offset doesn’t preview, try selecting in the graphics window to refresh.
With the Offset Distance set to 1.5mm, I have a value that works but I’m not satisfied with the position. You can see the route is offset to the right of the Clip Axis and I want it positioned to the left. SOLIDWORKS 2017 gives us the control with SKETCH DRAG MODE.
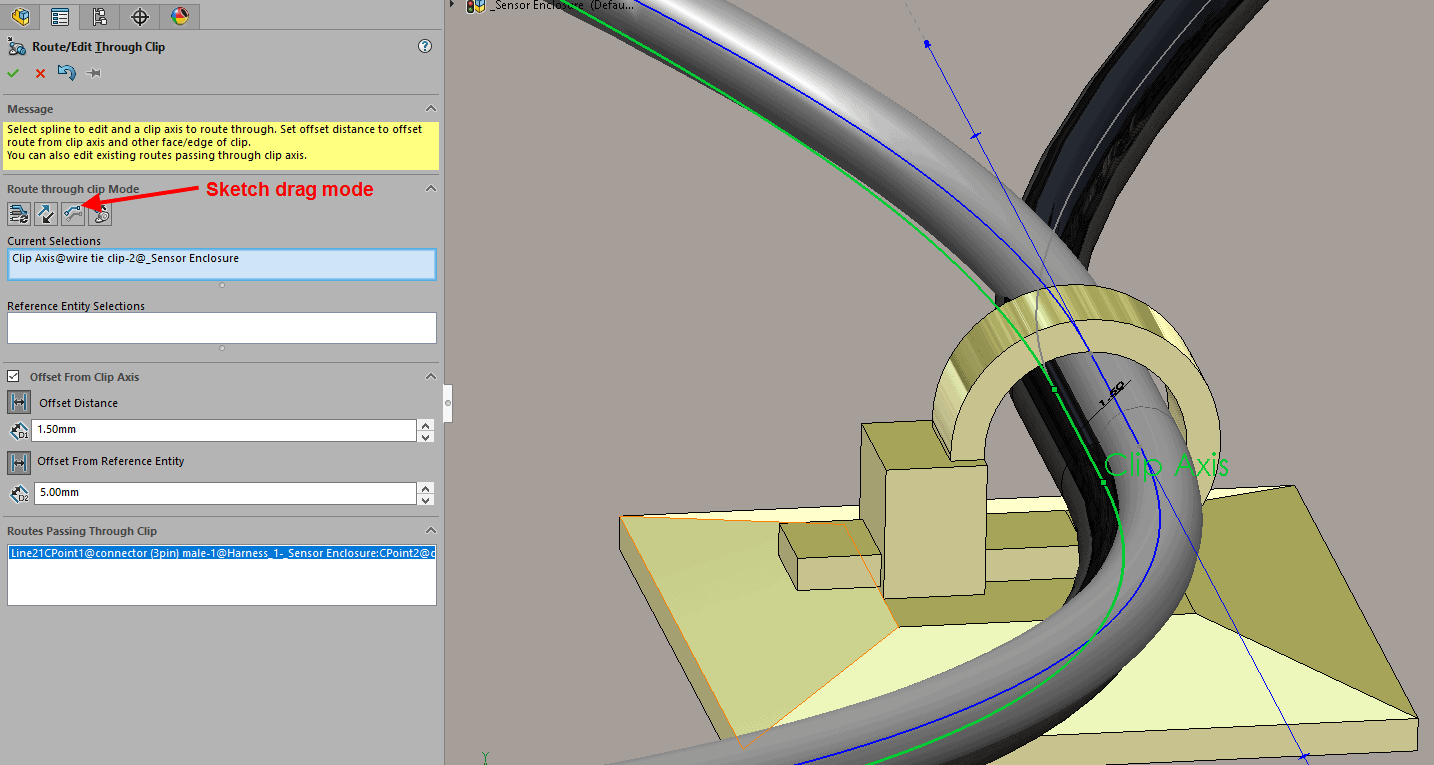
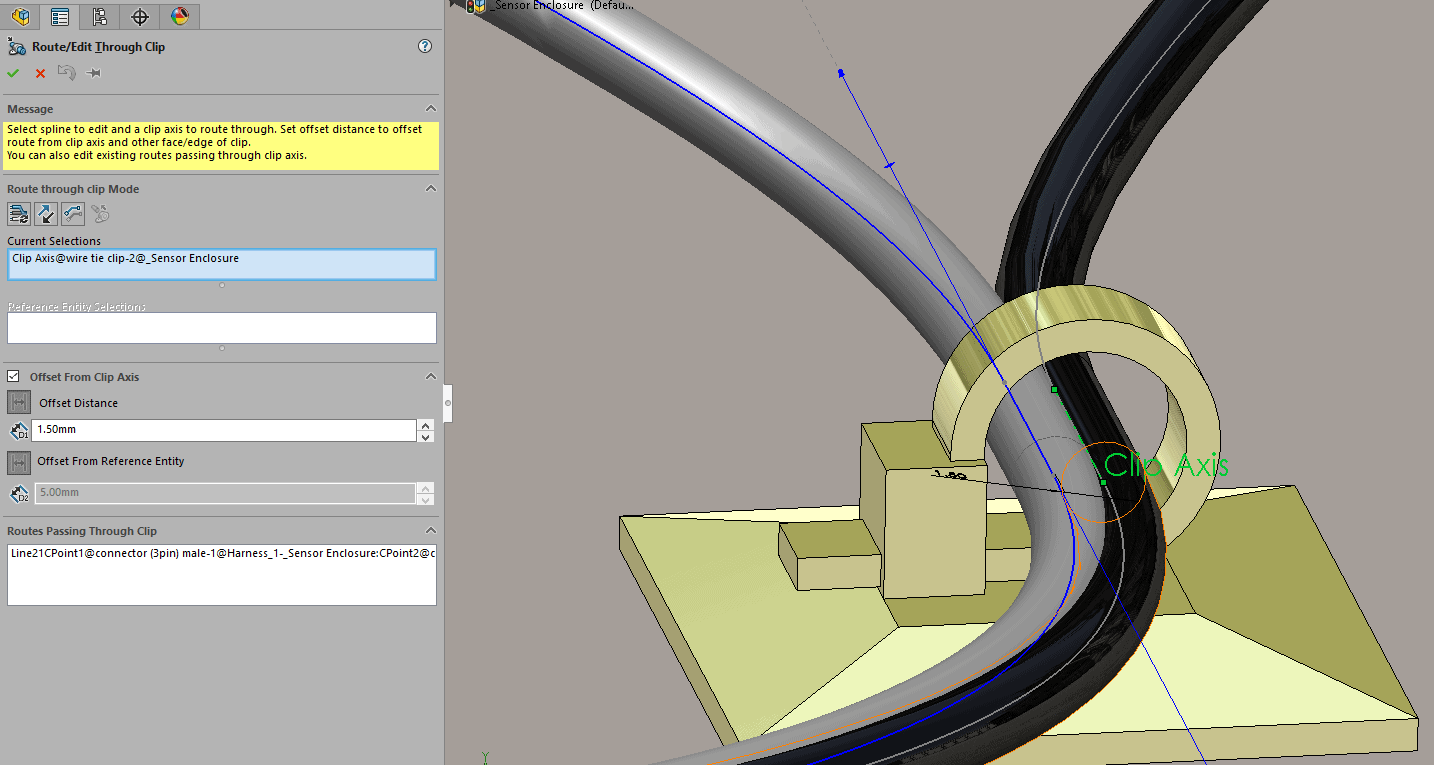
When enabled, Sketch Drag Mode allows the positioning of the route and maintains the specified Offset Distance. SOLIDWORKS 2017 automatically adds the dimension and a parallel relation to the 3D Sketch so it will always stay aligned with the Clip Axis. As you can see, I’ve moved the route to the left side of the Clip Axis and SOLIDWORKS 2017 has maintained the 1.5mm distance.
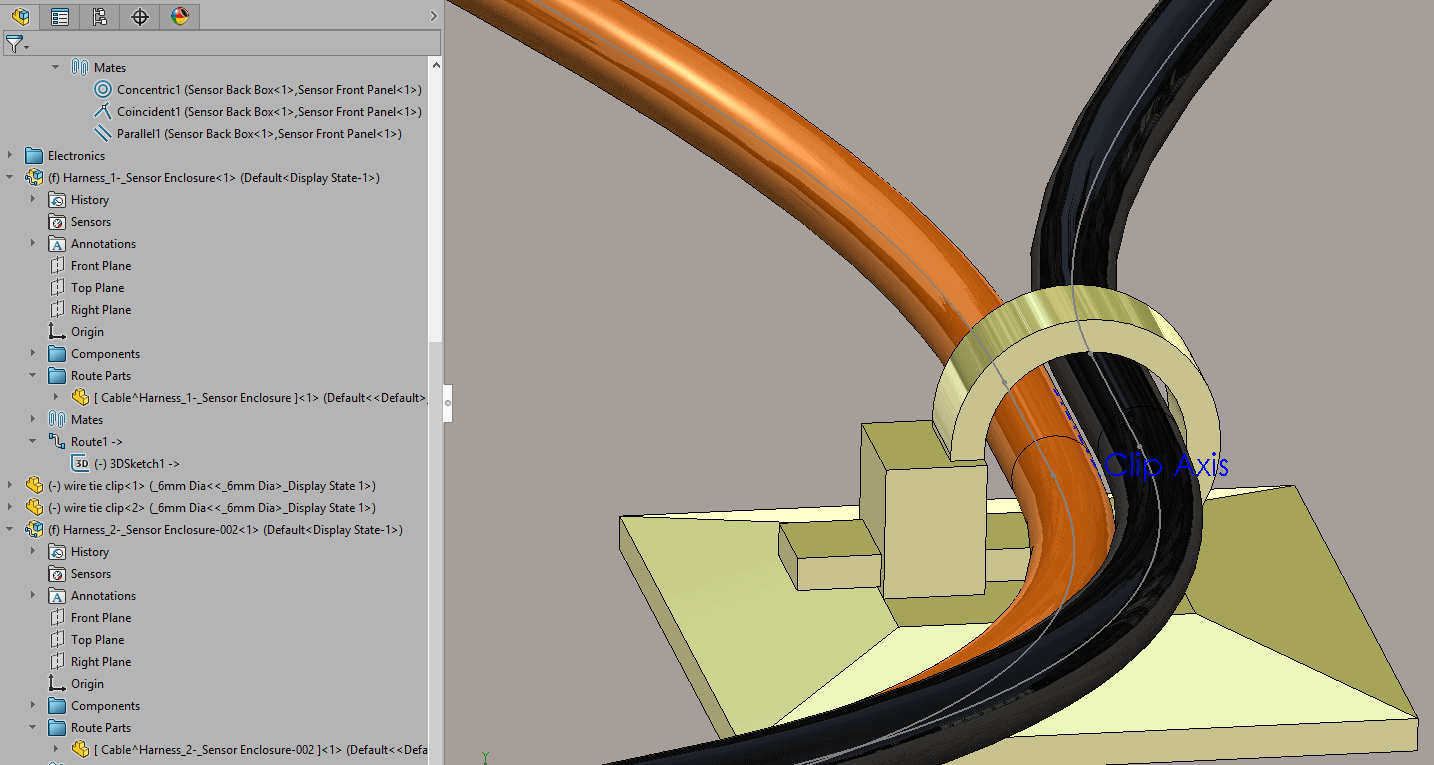
Repeating these steps on black wire give me a nice clean model where each route is separately passing though the clip. Of course, the offset distance and the route positions can be changed at any time when editing the route.
I hope this part of the What’s New series gives you a better understanding of the new features and functions of SOLIDWORKS 2017. Please check back to the CATI Blog as the CATI and MCAD Support Teams will continue to break down many of the new items in SOLIDWORKS 2017. All of these articles will be stored in the category of”SOLIDWORKS What’s New.” You can also learn more about SOLIDWORKS 2017 by clicking on the image below to register for one of CATI’s or CATI’s Design Summits.
Kris Dubuque
Field Services Technical Manager
Computer Aided Technology