SOLIDWORKS: MBD Template Editor – Adding Custom Properties
MBD Template Editor – Adding Custom Properties
So you’ve added Custom Properties to your Part or Assembly in SOLIDWORKS and now you want to bring those Custom Properties into your MBD Templates for creating 3D PDFs.
Tech Tip: If you need help setting up Custom Properties in your Part or Assembly in SOLIDWORKS see our tech blog on Adding Custom Properties here.
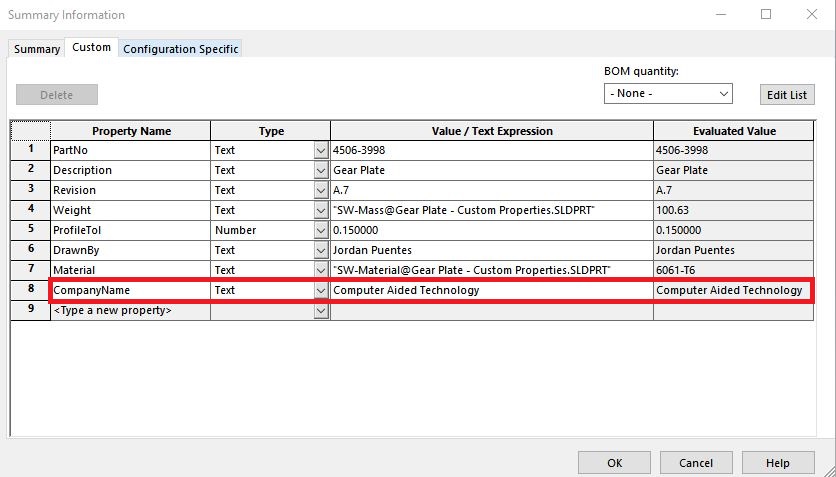
Shown below is a snapshot of the Custom Properties set up in this part. The Custom Property I am going to bring into my 3D PDF Template is CompanyName.
First, we’re going to need to launch the Template Editor. The Command to access the 3D PDF Template Editor is found on the SOLIDWORKS MBD tab on the Command Manager.
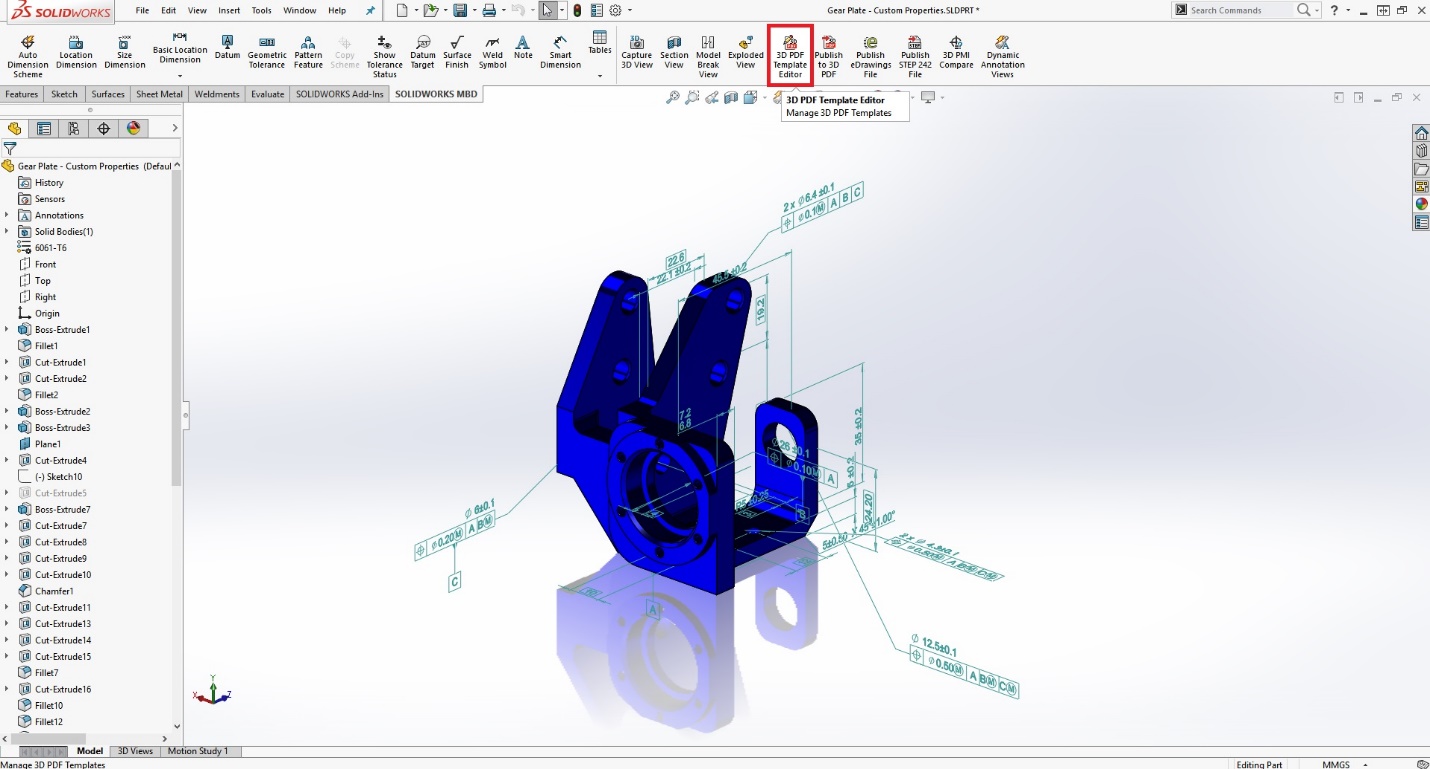
Once you launch the 3D PDF Template Editor, it will open its own window.
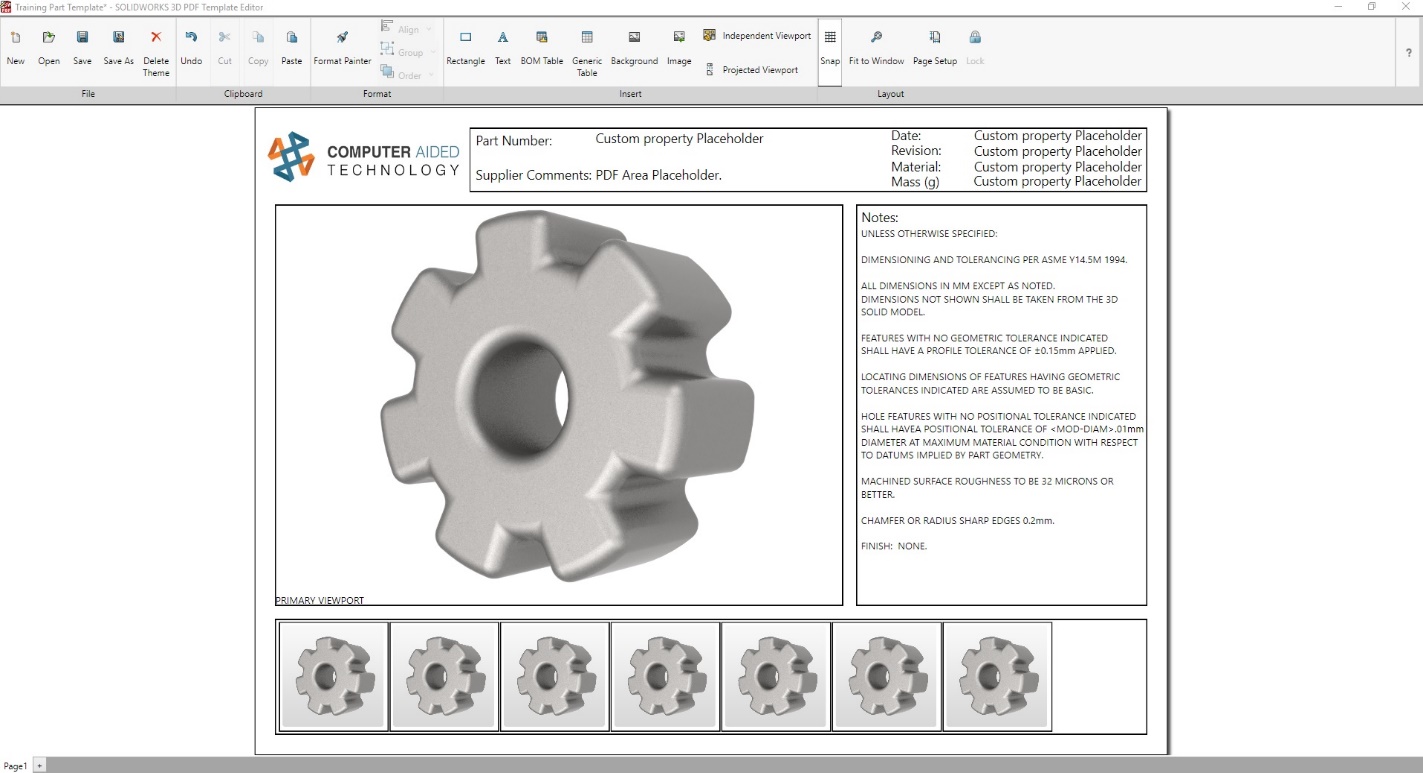
Tech Tip: You will not be able to make any changes to your SOLIDWORKS Part or Assembly and all commands will be greyed out while the 3D PDF Template Editor is launched. Save your changes and Close the Template Editor to resume working in SOLIDWORKS.
We will then need to create a basic text field to identify the Custom Property on our Template. Start by selecting the Text command and clicking on the top left corner of where you will place your Text Field. Make sure you select the Template Text Field for Text Type and Double-Click on the Text Box to edit the text.
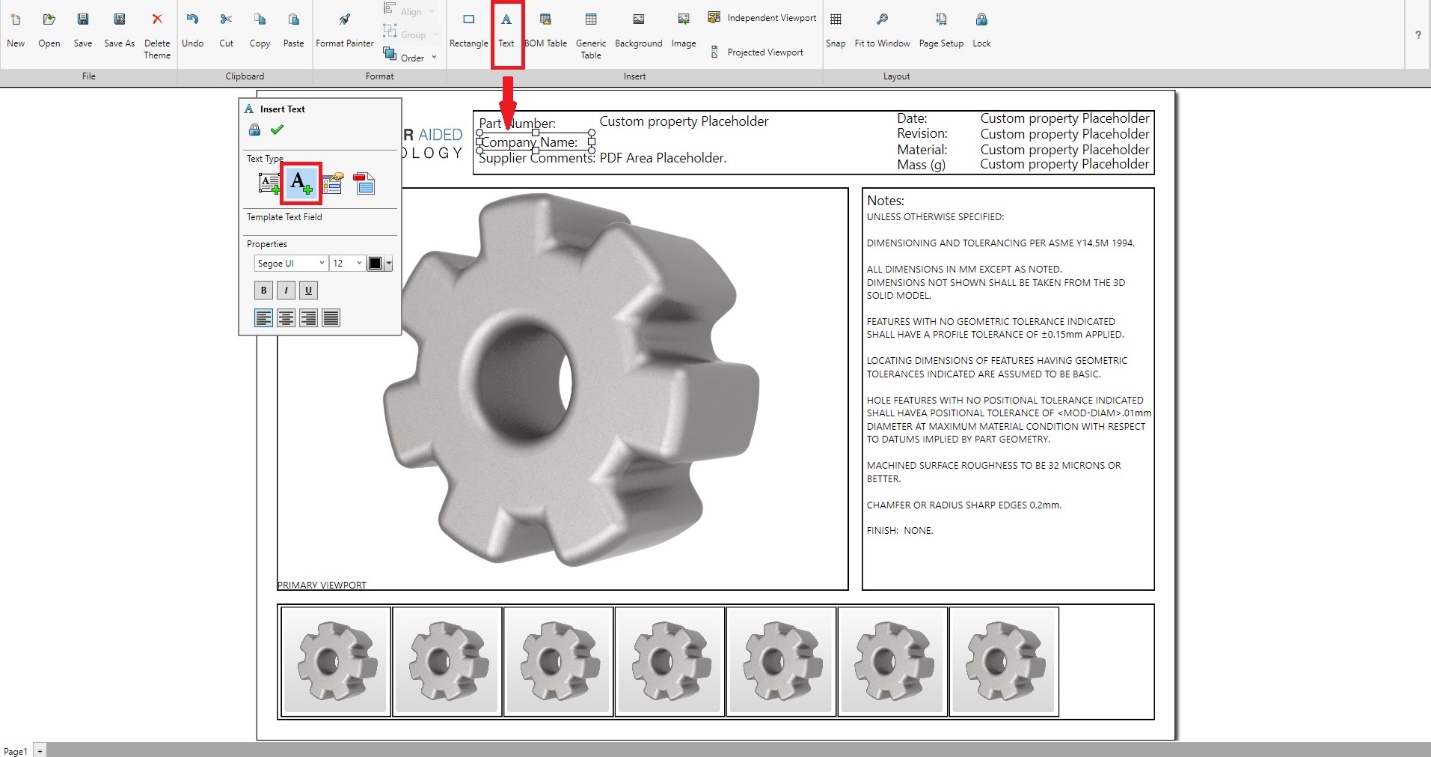
To create our Custom Property Text Field, we will again use the Text command, but this time, select the Custom Property Field as our Text Type. Enter the Field Name as a generic description and the Instructions if you need additional instruction when adding the Custom Property. The most important field is the Custom Property field. This needs to match the Custom Property you would like to link it to in the SOLIDWORKS part/assembly environment. In this case, the CompanyName property we set up earlier.
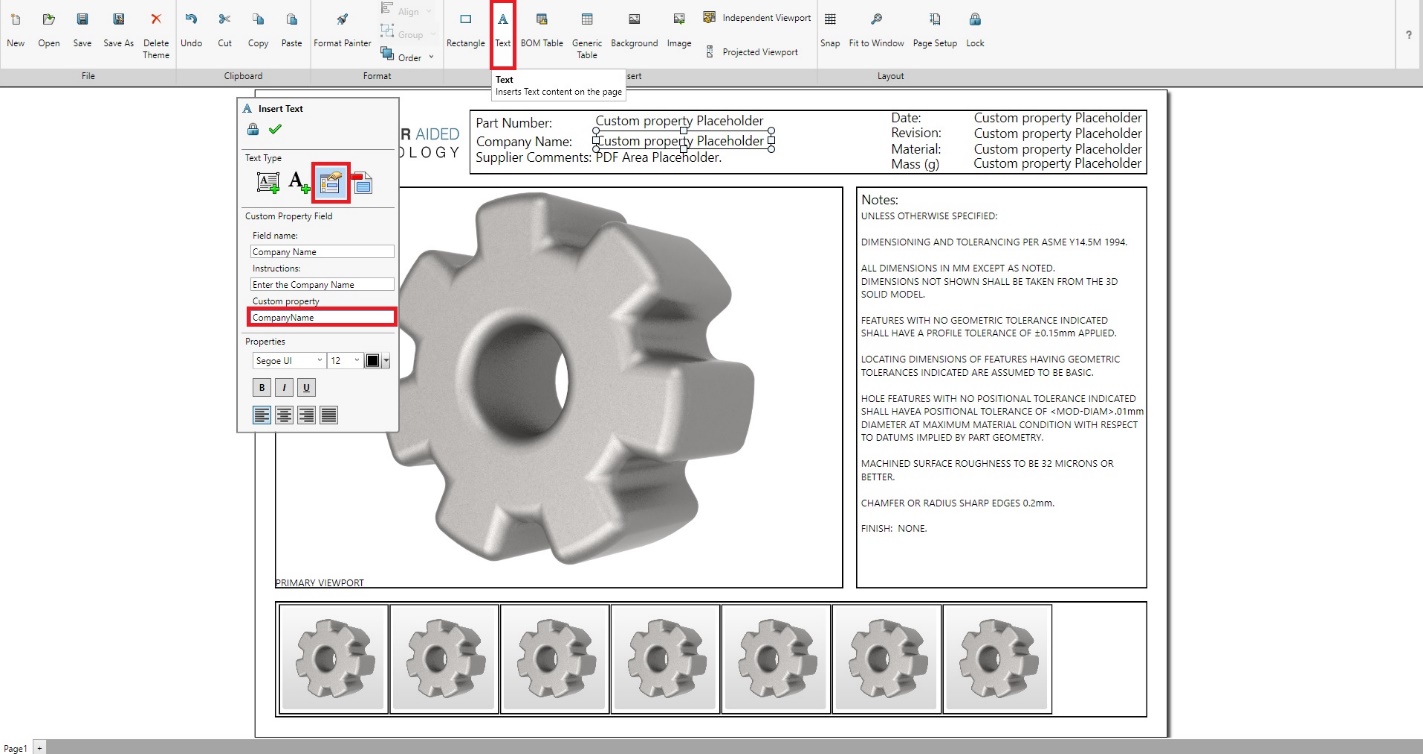
TechTip: You can use the Align command to make sure your text boxes are all lined up correctly.
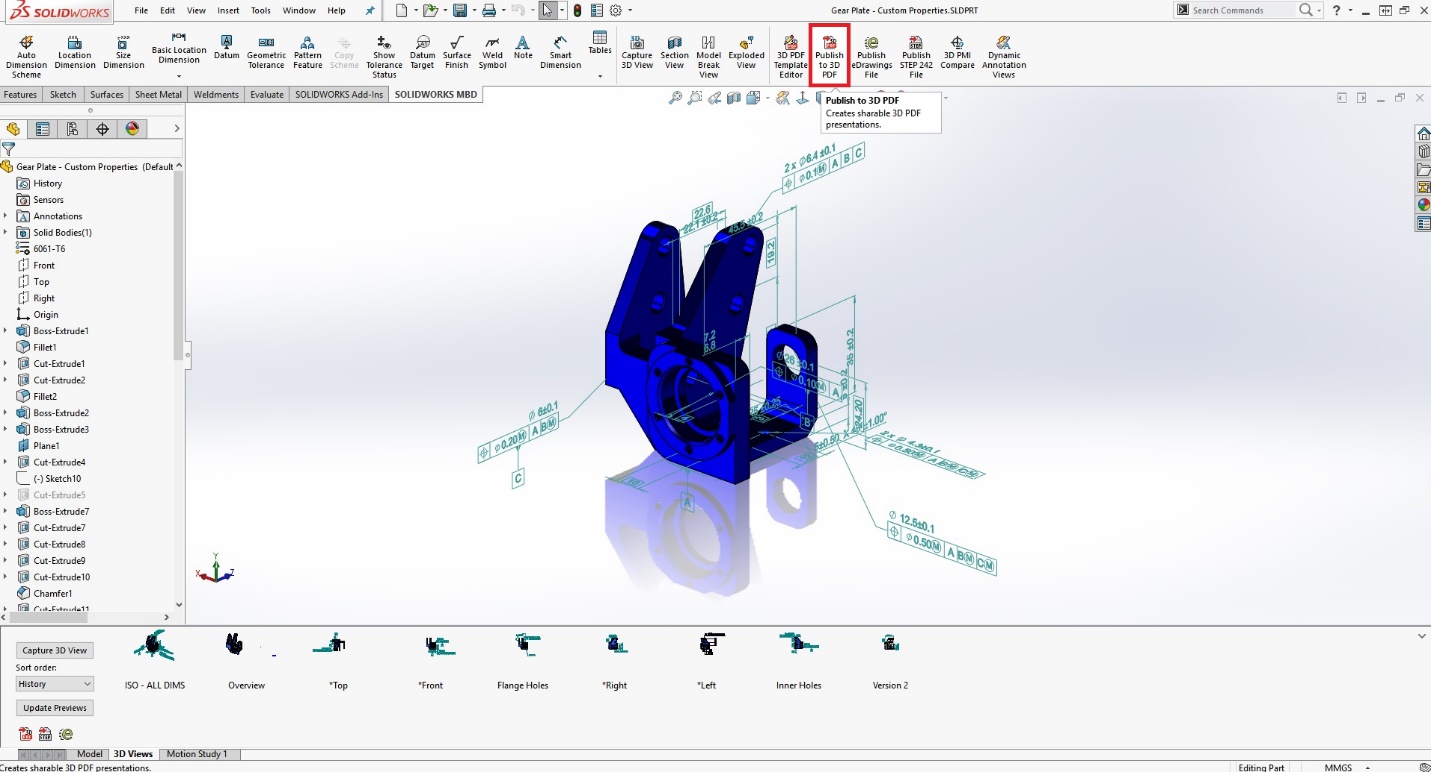
Once we place our Custom Property Field, we can Save and Close the Template Editor. Back in the SOLIDWORKS part/assembly space, we can now Publish our MBD information to our new 3D PDF Template using the Publish to 3D PDF command on the MBD tab of the Command Manager.
On the Publish to 3D PDF Property Manager, use the Theme Selection Drop-down box to select your new Custom Template.
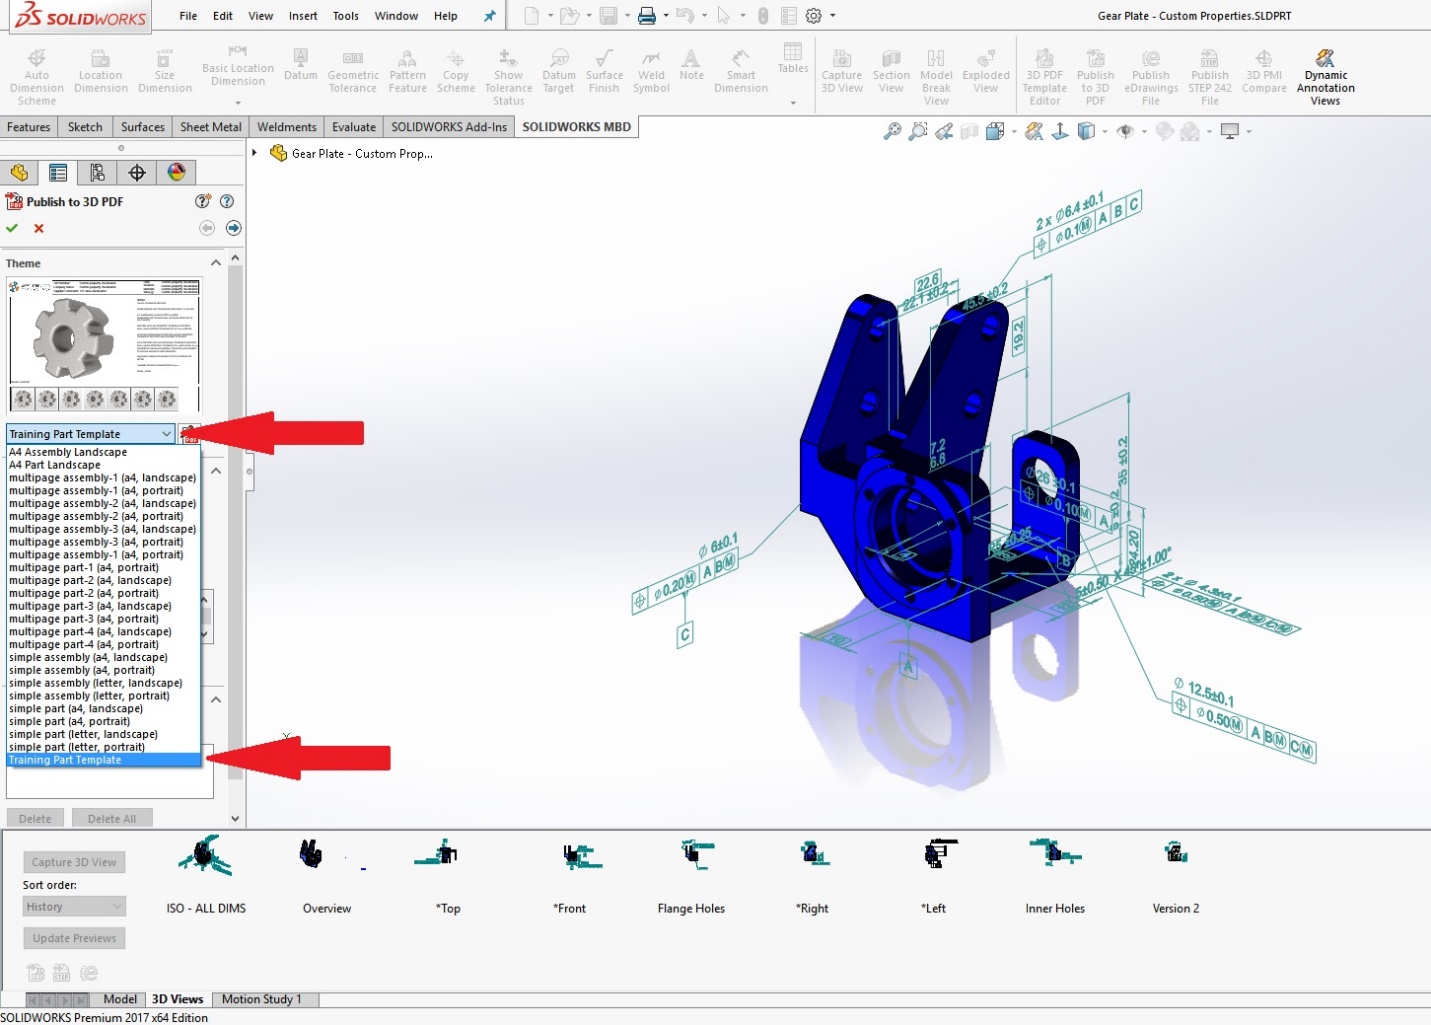
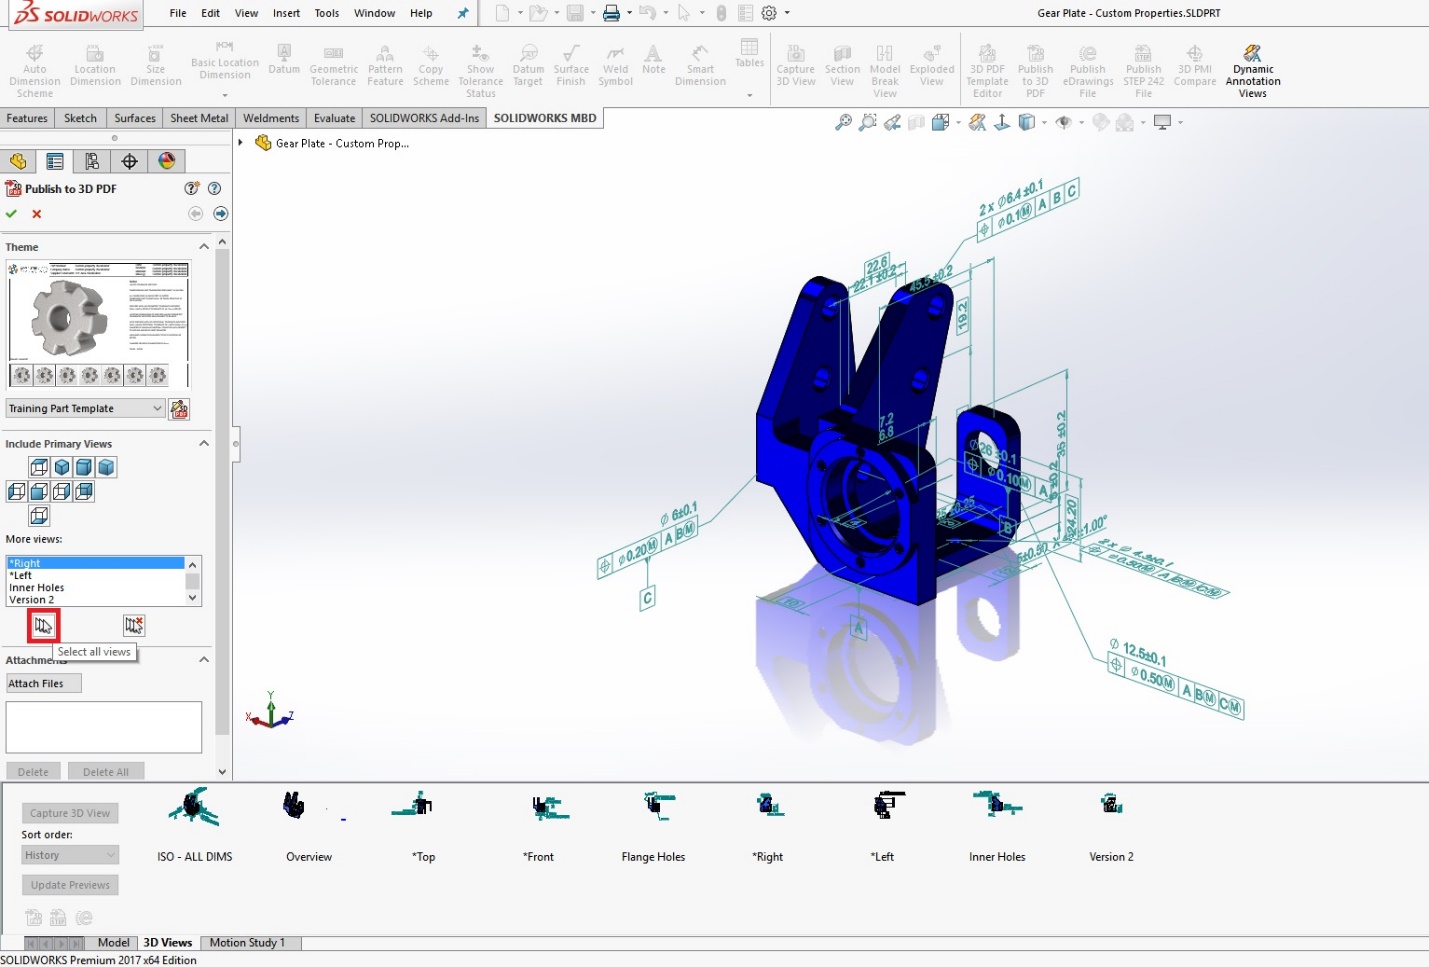
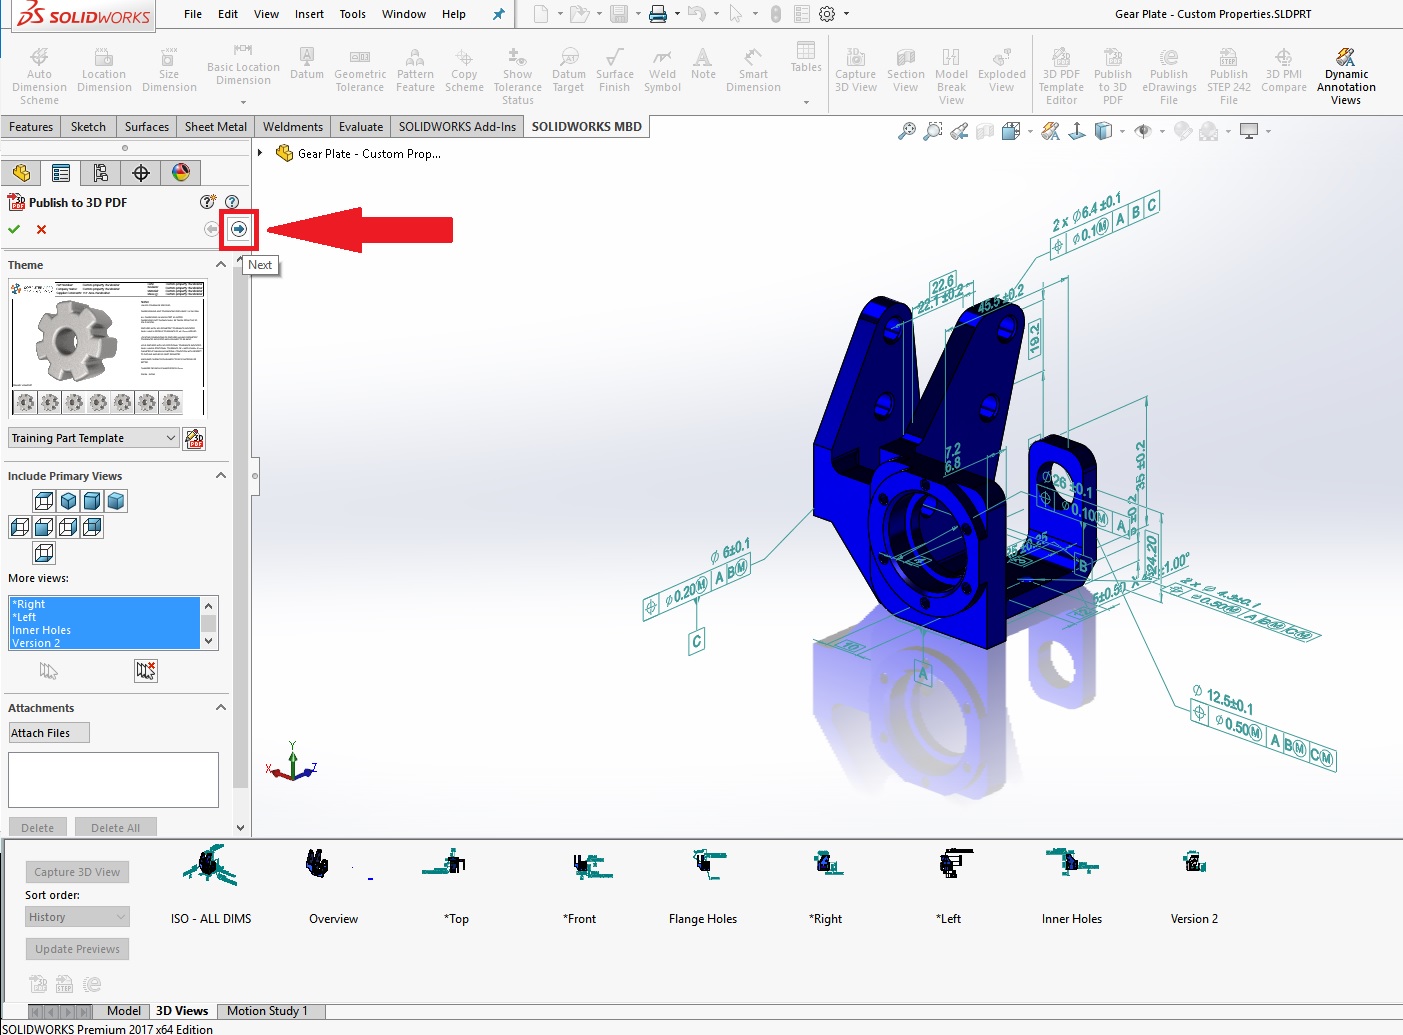
To speed things up, you can use the Select All Views Command before hitting the Next arrow at the top of the Property Manager.
After hitting the Next arrow, you can then select the Edit box to bring you into the Custom Property Text Prompt. If we set up the Custom Property Text Holders correctly in the Template Editor, these values should be pre-populated with the correct information, including our Custom Property, CompanyName. Notice, this is where we can see the Description and Instructions fields we filled out earlier.
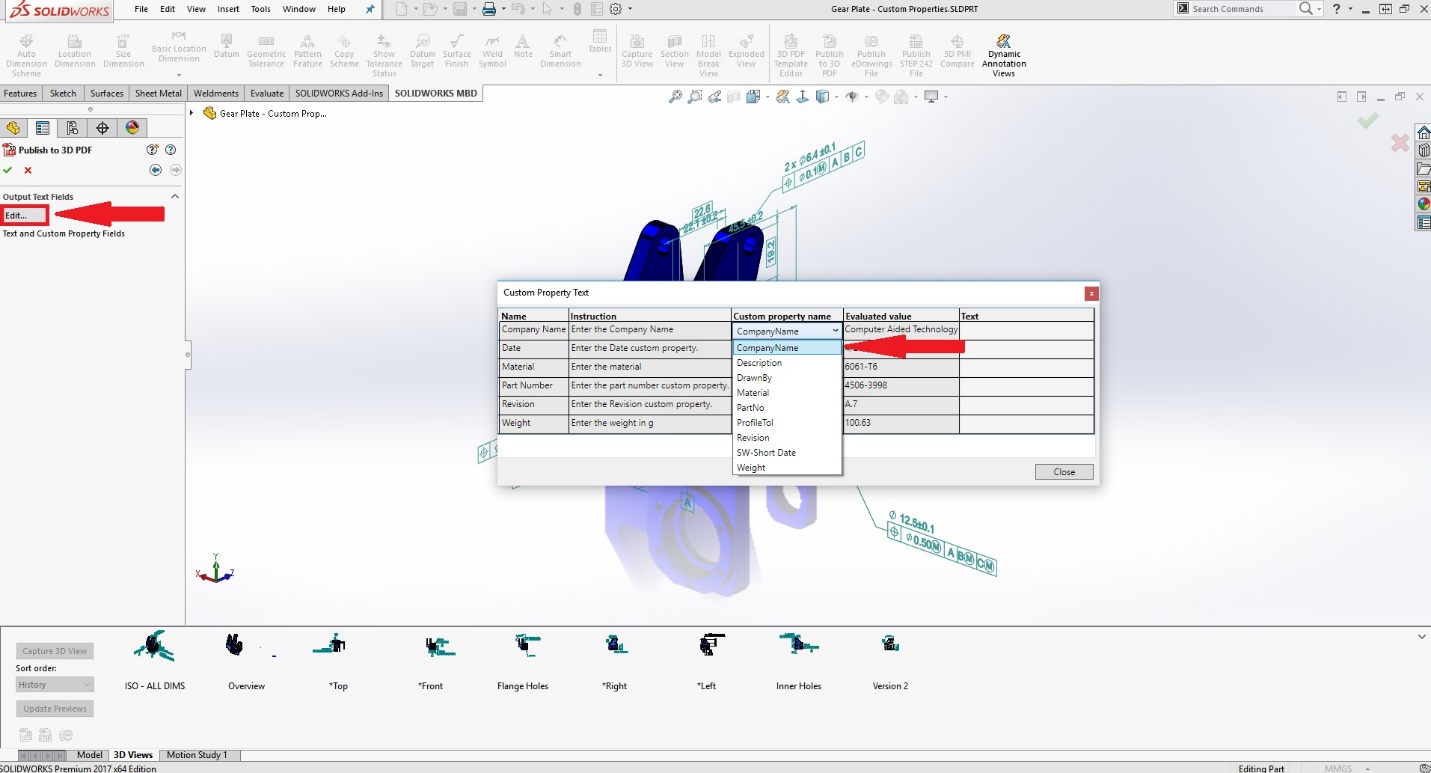
TechTip: Even if these fields are not pre-populated, you can always use the drop-down menu to assign any of the Custom Properties in your part/assembly to each Custom Property field.
Once you’ve finished reviewing your Custom Properties, hit the Green Checkmark in the Property Manager, and choose a location to save your generated 3D PDF.

Our Custom Property CompanyName can be seen in the final product pulled directly from SOLIDWORKS along with all of our other Custom Properties.
Jordan Puentes, CSWE
Application Engineer
Computer Aided Technology