Creating Offset Section Views in SOLIDWORKS Drawings
Offset section views in SOLIDWORKS Drawings allow the user to create efficient, informative sections of a model. What may sometimes require two or even three linear section views can sometimes be accomplished in a single offset section view. This article will discuss the different ways we can create these powerful drawing views in SOLIDWORKS.
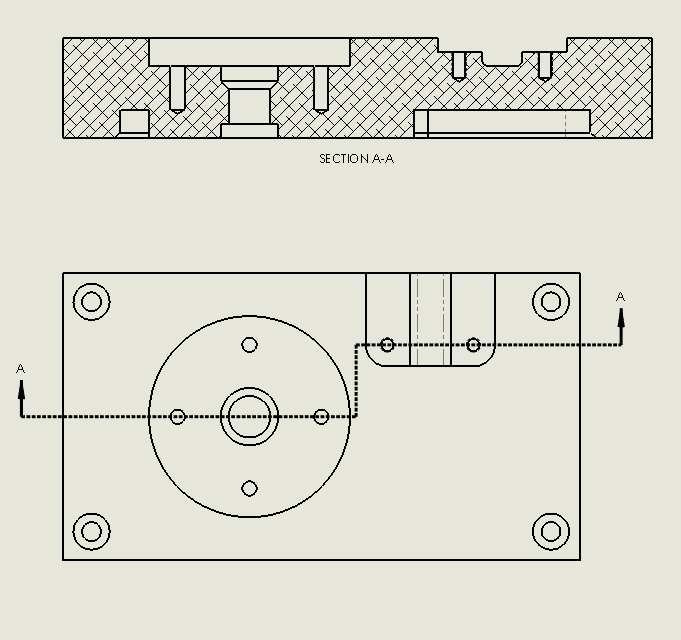
We will start with a top view and an isometric view of the part, a mounting fixture.
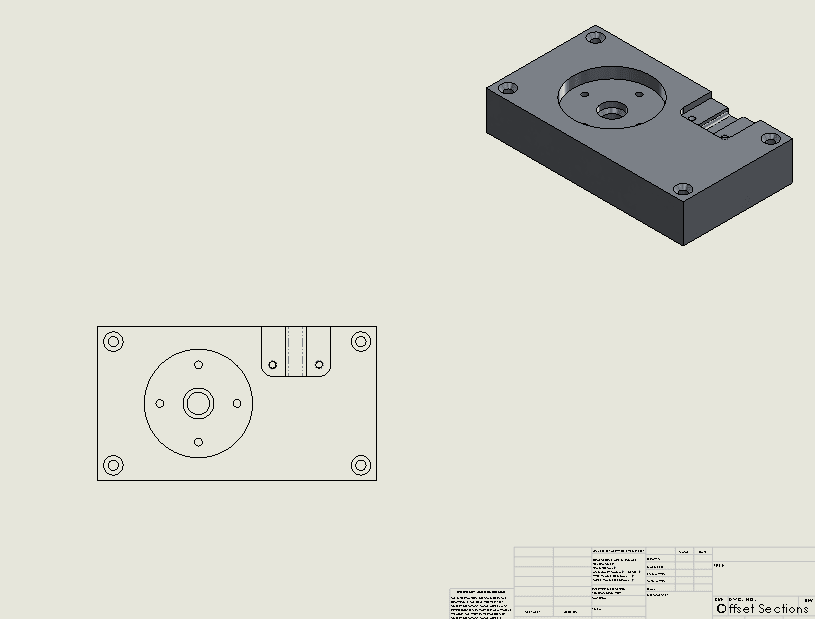
We want to use section views to show the details of the machined features of the part. Because the center of the hole and the slotted pocket are not coplanar, we would have to use multiple standard sections to detail both of these features. We will use an offset section to circumvent the need for multiple section views.
There are several ways to create offset section views in a SOLIDWORKS drawing. You can use the offset functionality built into the Section View command, or you can create a sketch that includes an offset to use as a cutting line. You can also edit an existing straight cutting line. Let’s look at using the automated functionality first.
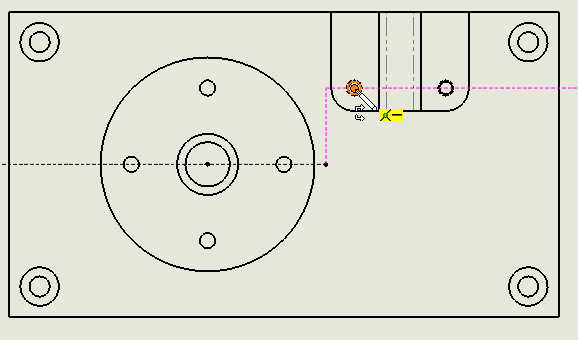
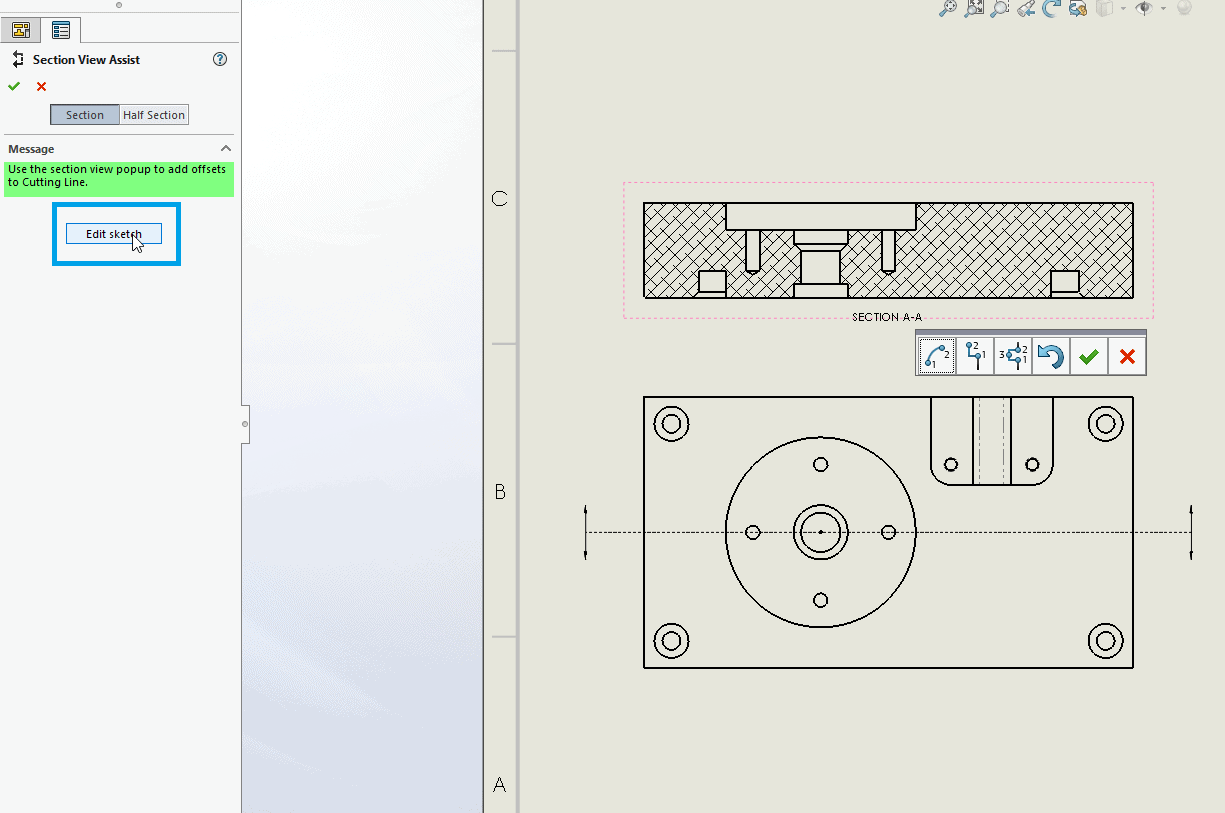
To create an offset section using the built-in tool, simply start the section view command and place the initial cutting line.
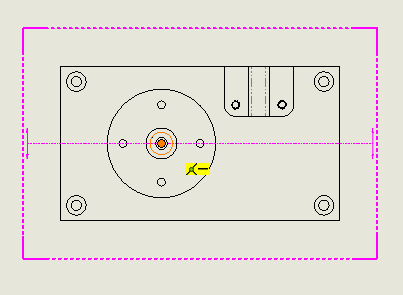
As soon as we click to drop the cutting line, a shortcut bar pops up, asking if we want to modify the cutting line.
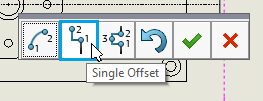
Choosing ‘Single Offset’ allows us to add a jog to the section line. Click once on the line to place the starting point for the jog…
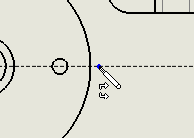
…and click once more to start the offset. Be sure to hover the mouse over the side of the jog point you want to offset, and click once more to place the offset line.
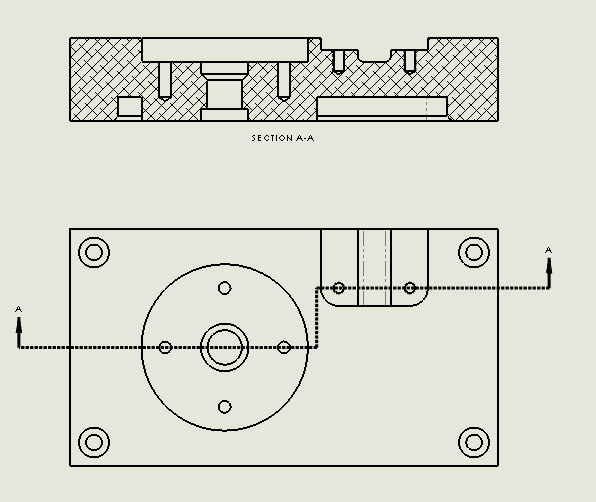
Click the check mark when the cutting line shortcut menu appears again, and now you can place your offset section view!
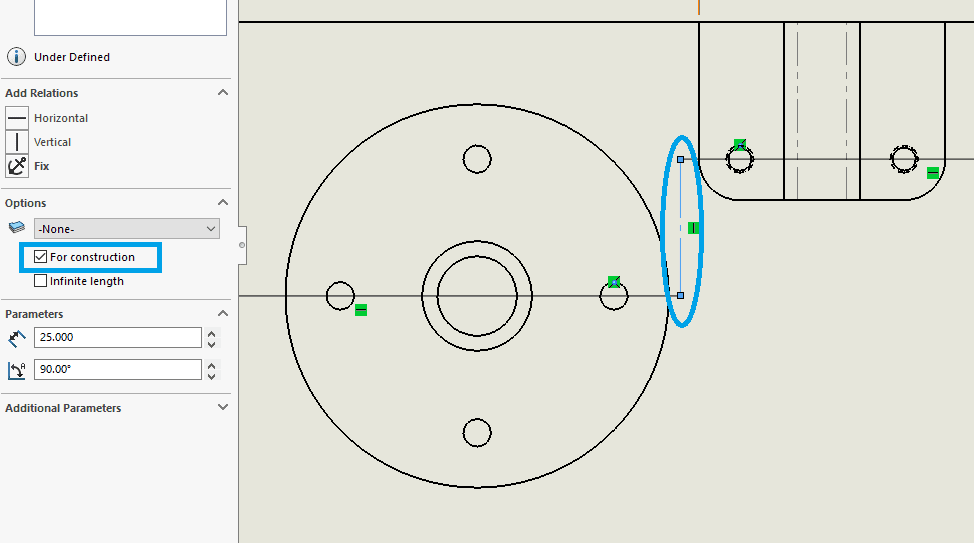
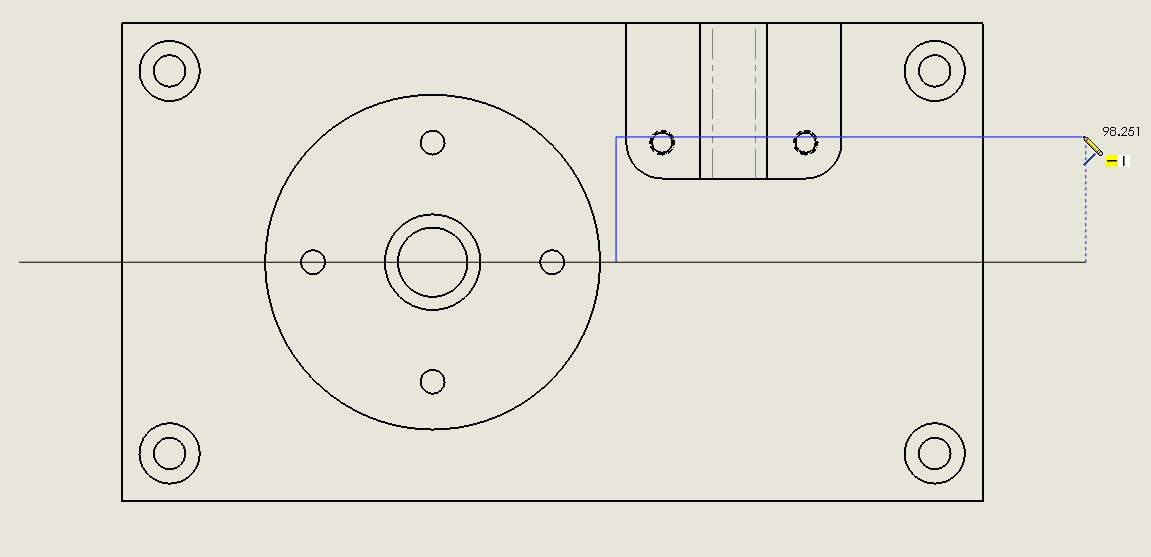
You can also sketch a series of lines to use as a section view cutting line to create an offset section view. Let’s look at creating an offset section view from a pre-defined sketch. Using the line command, we can sketch three lines where we want the section line to cut through the part
With the lines sketched, we can add relations (and dimensions, if we want the extra cowbell) to add intelligence to the sketch.
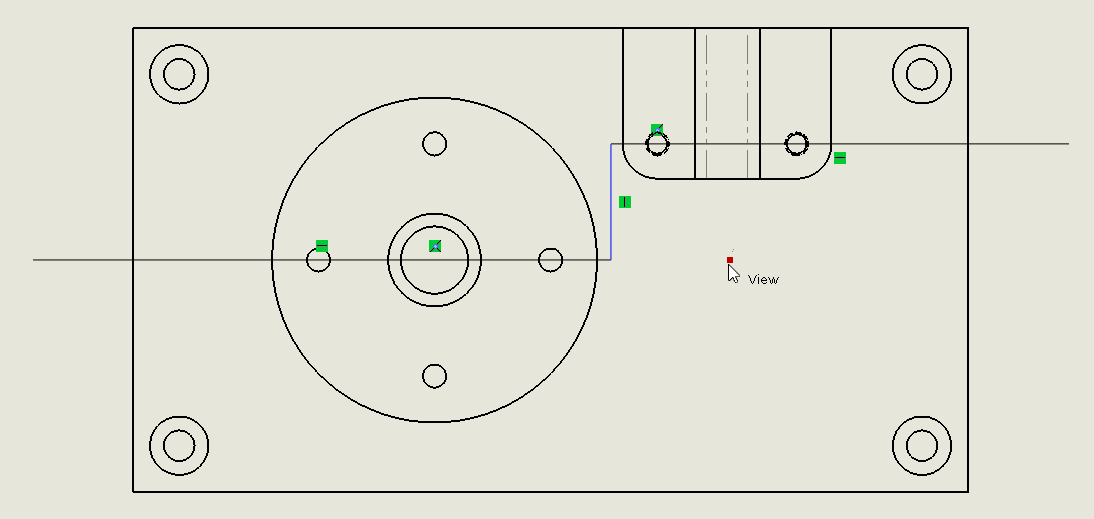
Now, we ctrl+select each line, and the choose the Section View command. SolidWorks opens a dialog asking us what kind of section view we are trying to create.
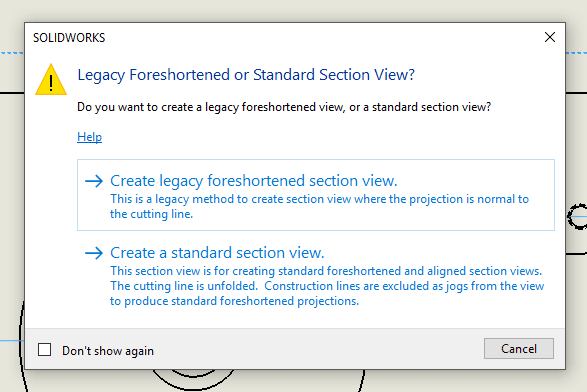
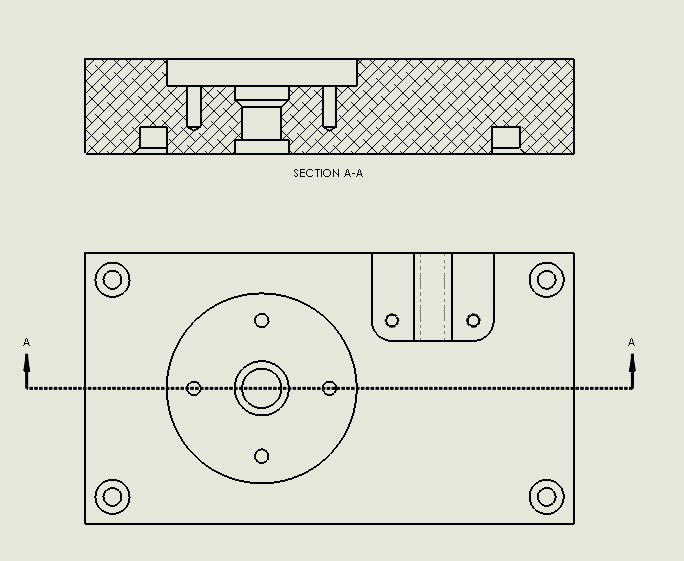
Choosing ‘Create legacy foreshortened view’ will give us almost the same result we got when we created the line using the built-in tool. The section view is projected normal to the cutting line, or parallel to the direction of the cut.

Unfortunately, there is also an unsightly extra line in the section view where the vertical offset line is.
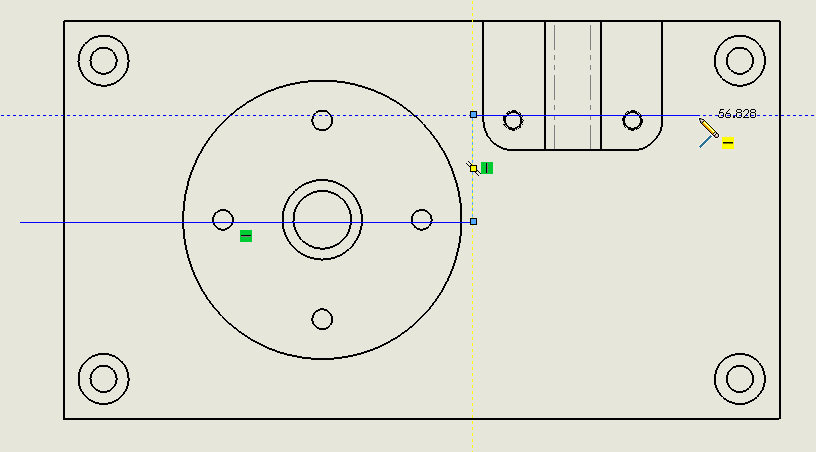
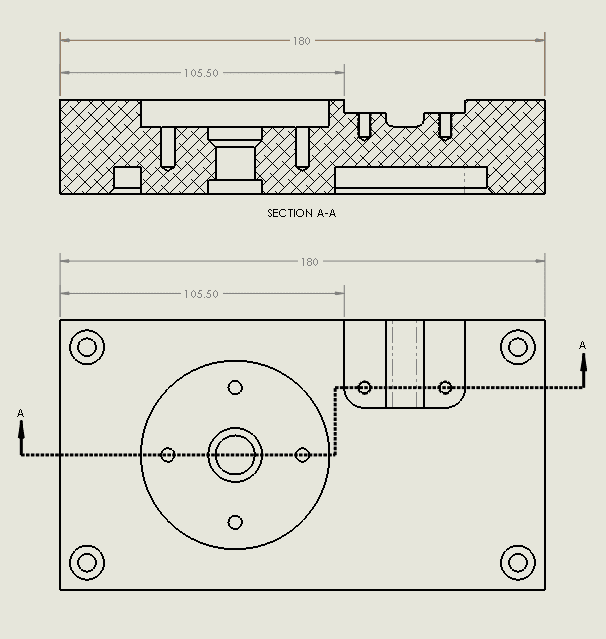
Choosing ‘Create a standard section view’ will “unfold” the section line, even where it is parallel to the direction of the cut. This will create a section view that is not aligned to the parent view.
Notice how the overall length of this section view is now longer than the overall length of the parent view. This can be problematic, especially when adding dimensions to the view.
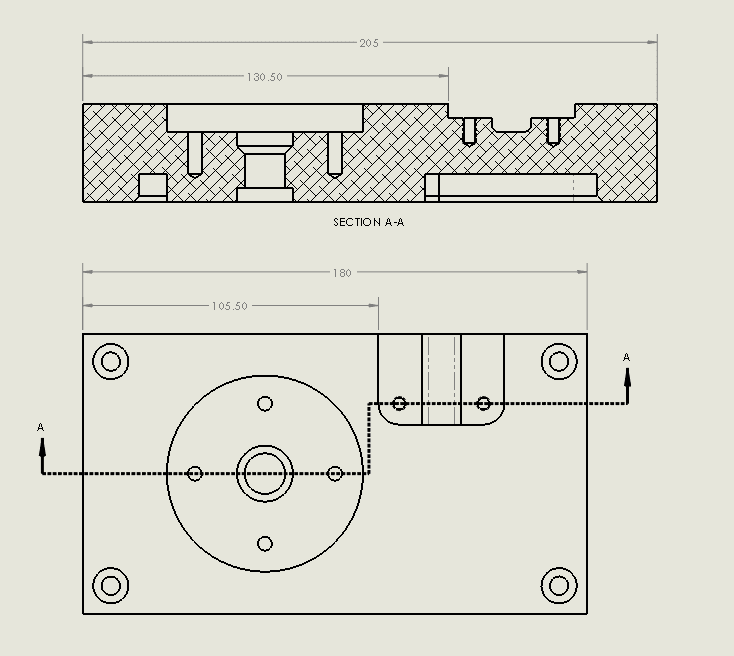
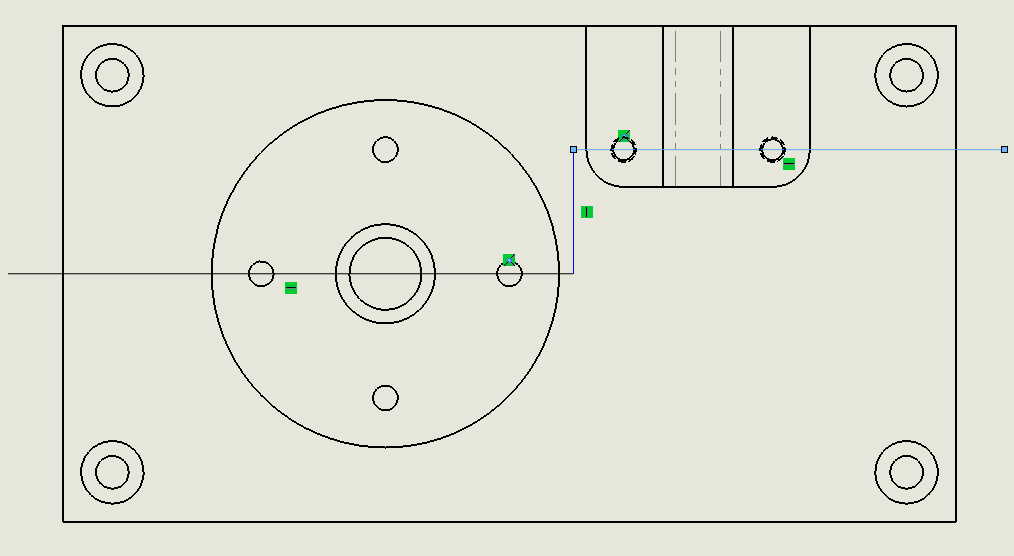
The overall length, as well as the locating dimension for the slotted pocket are now 25mm longer than they were previously. This is because the vertical jog line is 25 mm long.
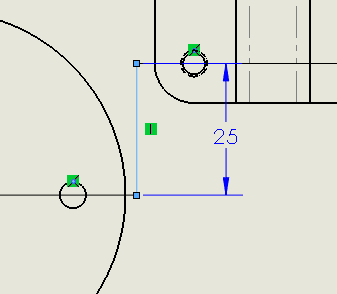
There may be cases where you want the section line to unfold. In this case, we do not want the incorrect dimensions to confuse our machinist, so we will edit the sketch for the section line and convert it into construction geometry.
This allows the section view to project without unfolding, resulting in an exact replica of the section view created using the built-in offset tool.
The last method we will look at is editing a standard section view line to include an offset for the cut. Below is a standard section view through the center of the part.
Right click on the section line and select ‘Edit Cutting Line’
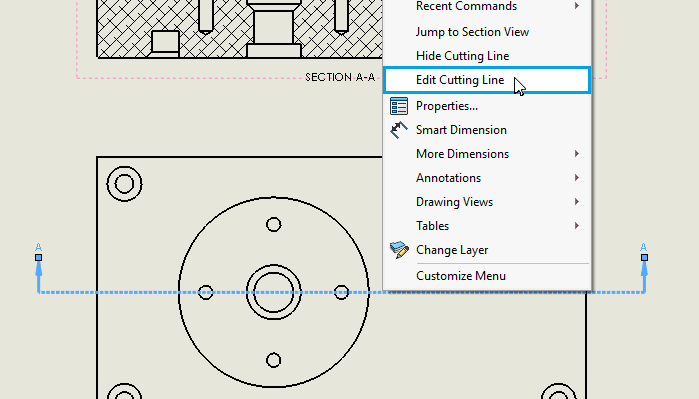
At this point, we could add the offset using the in-context shortcut menu like we did in the previous section, or we can change the section line by clicking the ‘Edit Sketch’ button in the PropertyManager.
The Line command now becomes active, and we can sketch the offsets and add relations (and dimensions, if we want) in the same way we would for any other sketch.
After adding some relations, trimming away the original cutting line, and exiting the sketch…
We once again end up with the “unfolded” projection.
At this point, we would just have to edit the sketch once more and convert the vertical line to construction geometry again to avoid the scaling.
Happy Sectioning!
Aarya
Application Engineer
Computer Aided Technology