How to Design a Custom 3D Printed Nameplate with SOLIDWORKS
 Fisher Unitech has 32 Stratasys 3D Printers, distributed across the showrooms of our 17 offices. To showcase them, we try to keep them running as much as possible, building sample parts and benchmarks to support our sales team, backfill production when our customers’ machines are down, and printing parts as a service. But having access to 3D printers does have its perks, and we do find the time for “government jobs” now and again.
If you attended one of our Design to Manufacturing events and filled out a survey, you’ve already received one. I designed those “FUdgit” spinners earlier this year and we’ve been churning them out every spare chance we’ve had since then. But that’s the subject of a different blog article. Today I’ll focus on nameplates.
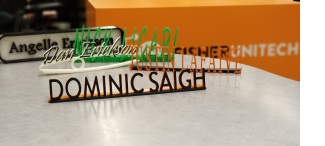
By way of a welcome to the Fisher Unitech family, and to showcase the technologies we offer, every new employee receives a custom nameplate like the one above. It was designed in SOLIDWORKS and printed on Stratasys FDM printers. The nameplate design has gone through many iterations since we began giving these as unofficial desk-warming gifts a few years ago, finally settling on a two-tone design. Today I’d like to show you how I modeled it. In my next blog, I’ll show how we print them.
Before beginning any design, it’s important to consider the design intent and manufacturing constraints. In this case, we want a nameplate that’s attractive and easy to read, and stands up without tipping over; it also needs to be all one piece. To keep costs under control, the model needs to be easy to customize, requiring minimal CAD time, and to print quickly using minimal materials.
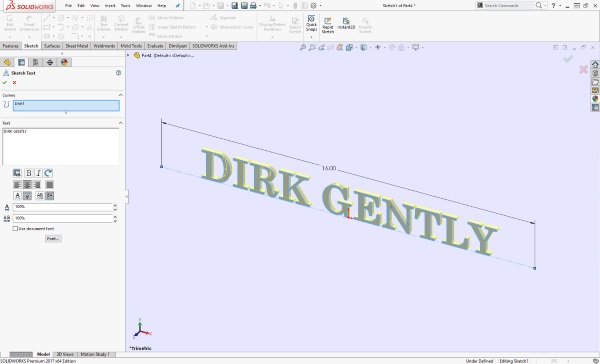
I’ll begin with the name. Text is infinitely easier to position if you add some sketch geometry first, and attach the text to it. I’ve centered the text on a line at the origin of the part, and extruded the sketch to a 0.2in” boss.
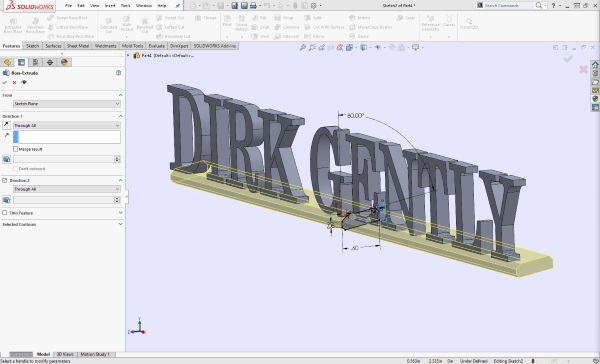
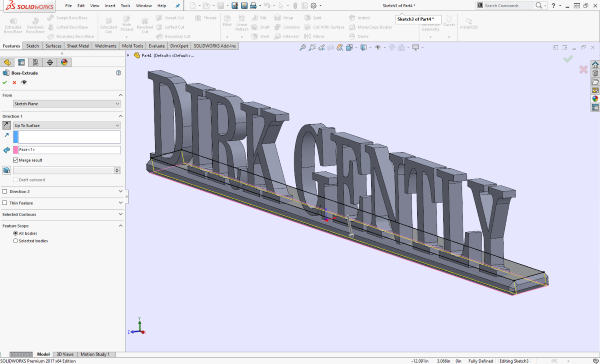
Next I’ll need a base for the nameplate, both to underscore the name and to attach all the letters together. Its length needs to be variable to accommodate different names, so I’ve sketched the cross-section instead. I’ve angled the base 80° relative to the text, to move the center of gravity and prevent the nameplate from tipping forward. Extruding this boss ‘through all’ in both directions ensures that it will always be the correct length for the name. You’ll see in a moment why I’ve elected not to ‘Merge Result’.
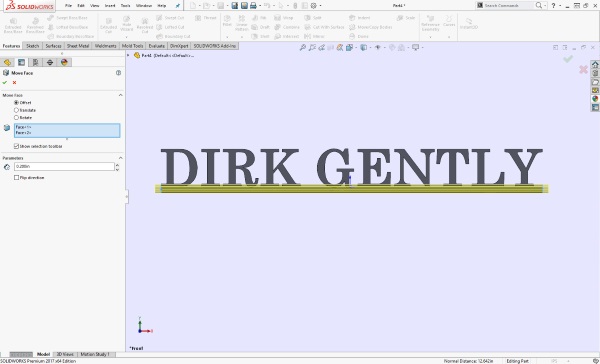
I think the base looks best when it’s a little wider than the name. To do this, I select the two outer faces, and use the Move Face command to offset them by 0.2in. Because of the way SOLIDWORKS identifies these faces internally, this step works best when the base is it’s own body (hence not merging it with the text in the last step); this way, no matter how the name may change, these are always the faces that get moved.
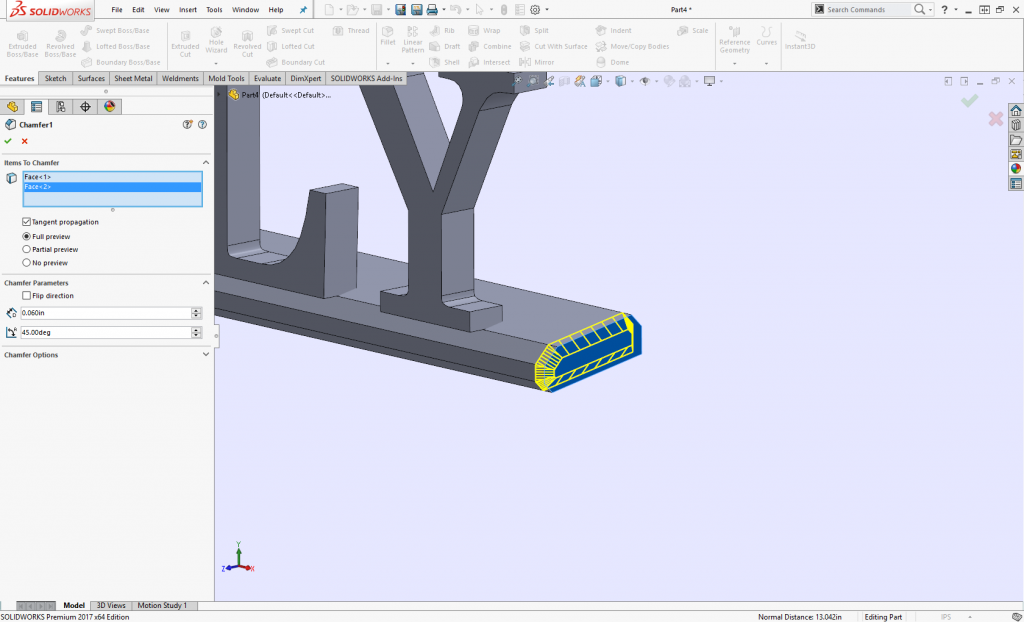
I’ve added some Chamfers on the ends for aesthetics, but they aren’t necessary.
Now it’s time to stick everything together. The simplest method I’ve found is to Sketch on the top face of the base, and Convert that face to a sketch profile. Then I Extrude a boss down up to the bottom surface of the base, merging the result with all bodies.
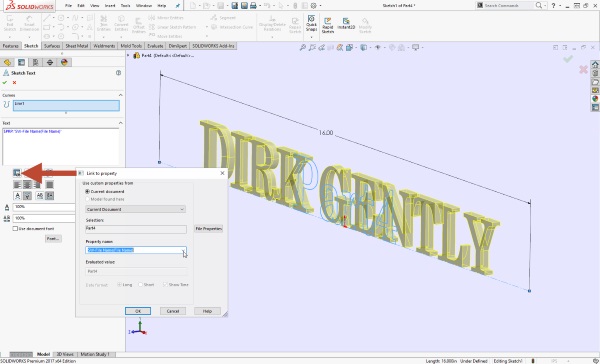
The very last step is to add a bit of automation, to make the job of creating new nameplates a bit easier. Here I’m editing the text from the first sketch. I’ve deleted the name, and replaced it with a link to this document’s filename.
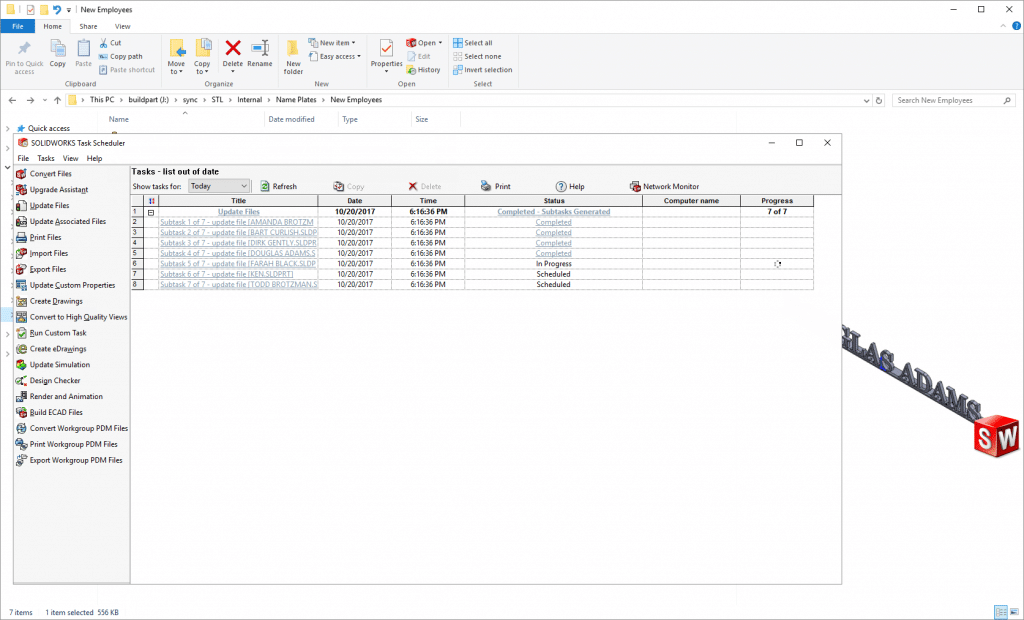
Now whenever the filename is changed, the model will update after a simple Rebuild. Or Update many nameplate files at once using the SOLIDWORKS Task Scheduler.
There are many other ways to create a similar nameplate, I am sure, but I hope you found this method useful. In my next blog, I’ll explain how I use GrabCAD Print to process this file and print the nameplate – be sure to tune in!
More 3D Printing Tips & Tricks
How to Insert Metal into a 3D Printed Part
How to Manage Part Curl in your FDM Parts
How Important is Orientation to your 3D Model?
More SOLIDWORKS Tips & Tricks
Bringing Flat Files into SOLIDWORKS to Create Models (Part 2): Pictures
Using a Data Card for State Changes in SOLIDWORKS PDM
The Power and Value of the SOLIDWORKS Hole Wizard
Don’t Forget to Subscribe

About the Author
 Dan Erickson is a student of life. With a BS in Mechanical Engineering Technology from Michigan Tech University and a penchant for tinkering, he is driven to understand how the world works and improve wherever possible. After several career iterations, Dan came to Fisher Unitech in 2011 as a SOLIDWORKS Support Engineer. He has since followed his passion for transformative technology to the 3D Printing department, supporting the Sales and Marketing teams as 3DP Application Engineer.