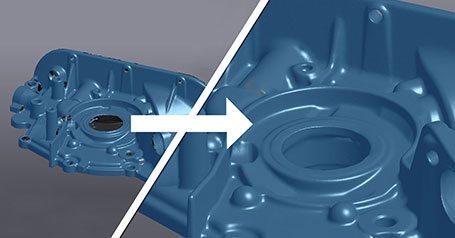
Fixing a 3D Scan for Printing
SOLIDWORKS, 3D Printing, and 3D Scanning really are complementary technologies. We’ve been printing files that were exported from SOLIDWORKS for years. Like most mature CAD packages, SOLIDWORKS does an awesome job on exporting STL files. See this post for a recommendation on export settings from SOLIDWORKS. Depending on part geometry, the workflow from Scan to Print may require a few extra steps.
![]()
![]()
![]()
During a scan, we might end up with a few holes that will need to be filled. At the very least, we need a “water tight” body in order to print. Creaform gives us a few tools to help with this in VxElements.
Before going through a few of these commands for fixing, I wanted to touch on a few reasons why we might see these holes in our scan. It could be the accuracy of the scanner we’re using (some are better than others), it may be that we can’t physically position the scanner to capture a certain area. We need to be able to “see” everything we want to scan. I have also seen the reflectivity of certain surfaces cause holes in our scan. In Any case, we should be able close off these holes in order to print.
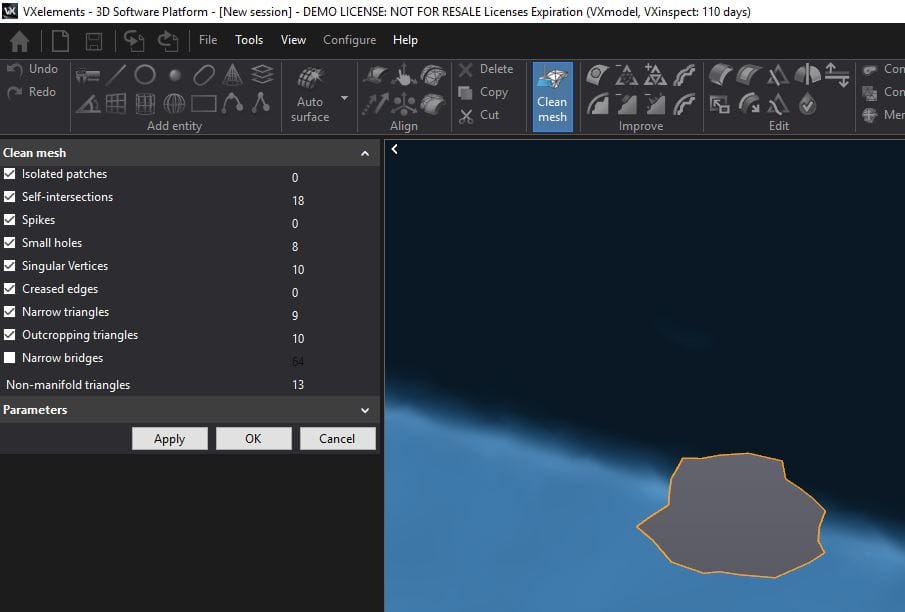
You could start with interrogating the scan to see how how many holes we have to deal with. Start off by clicking “Clean Mesh’ This will give you an idea of how many holes we have to deal with. The process is automatic, just select the automated fixes to see how well it does. In the case of the hole below, automated fixing does the trick, but lets look into a more manual approach.
Another option is the Fill Holes command. We have several options available, including a partial, or a bridge fill. In the case of this hole, a Whole fill is what we want. The methods curvature, flat, and adaptive, would be depending on the hole and geometry. Clean boundary could be used to simplify the hole before patching.
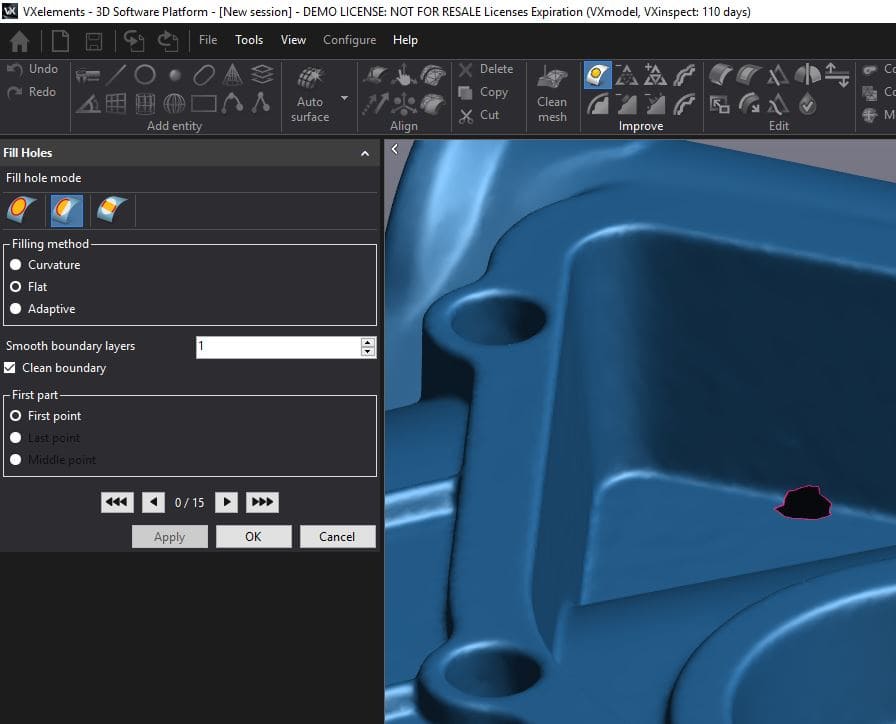
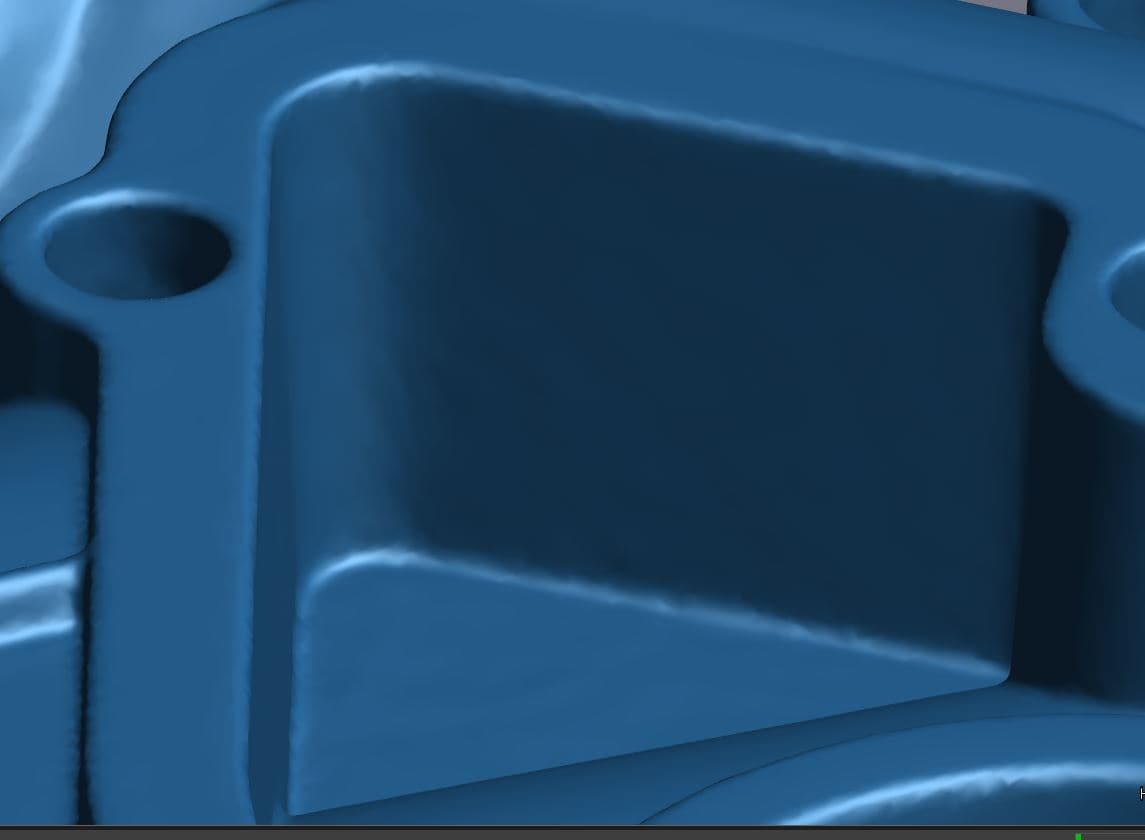
To finish this hole, I chose an adaptive method since we had flat areas and curved areas to deal with. In the finished screenshot, its hard to determine where the hole was.
Once you are satisfied, you can use the “Clean Mesh” command to see if we got them all.
Congratulations! Once your part is “Water Tight” you are good to go for 3D Printing.
Jeremy Marvin,
Application Engineer, Additive Manufacturing,
Computer Aided Technology