Exporting from SOLIDWORKS to Visualize using the Visualize Add-In
Exporting from SOLIDWORKS to Visualize using the Visualize Add-In
So, you’ve installed SOLIDWORKS Visualize on the same machine as SOLIDWORKS and you have a 3D model ready to go. Your next step is to export your model into Visualize to start rendering. There are a few different ways to export your model both directly and indirectly from SOLIDWORKS using the Visualize Add-In. I’ll break down your options here and clarify which option to use and when.
Start by activating the Visualize Add-In. Navigate to Tools > Add-Ins or by using the Options drop-down and select Add-Ins.
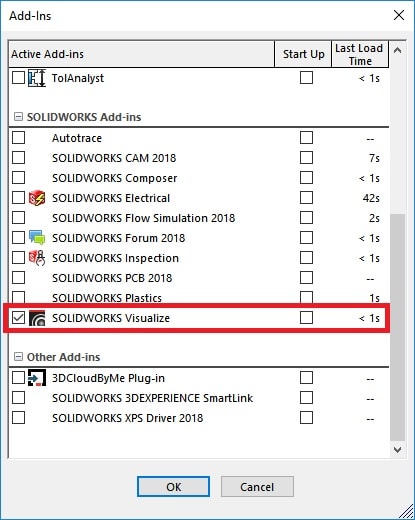
By selecting the checkbox next to SOLIDWORKS Visualize and selecting OK, you will now have a new SOLIDWORKS Visualize Tab on your Command Manager.
Tech Tip: The Visualize Add-In is available for all versions of SOLIDWORKS.
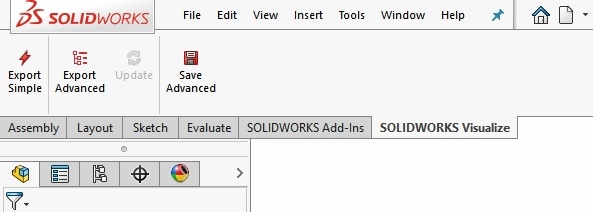
The four export options listed are Export Simple, Export Advanced, Update, and Save Advanced.
First, we’ll start with Export Simple. This method exports your current model into Visualize using the Appearance part grouping method. This is the quickest way to get your model into Visualize for rendering, however this method does not use Monitor File and will not update with any changes to your original SOLIDWORKS File. Use this when you want to quickly move from SOLIDWORKS to Visualize while grouping all identical SOLIDWORKS appearances, and you don’t anticipate any engineering changes.
Next, we have Export Advanced. This method exports your current SOLIDWORKS model into Visualize using the Automatic part grouping method and Monitor File enabled. This method also allows you to export Motion Studies if you have Visualize Professional. Use this method if you have a Motion Study created or would like your Visualize model to update with any SOLIDWORKS changes. By using the Automatic part grouping method, your model will still group similar to the Appearance part grouping method, but will use a combination of grouping methods to best mimic how your part will behave in real-life.
Tech Tip: Read this companion article to see more about exporting your Motion Studies into Visualize Professional.
The third option is Update. When you first activate your Visualize Add-In, you may notice that your Update command is greyed out. This command won’t be available until you use the Export Advanced option. Once you’ve used Export Advanced, the Update command will export the latest version of your SOLIDWORKS file to Visualize where Monitor File will update your Visualize project with the changes. Use this option to push any changes you’ve made into Visualize.
The last export option is Save Advanced. This option will save a copy of your active model including a Motion Study to a specific location, which you can then import into Visualize. Use this option to export your model to other users who do not have access to your SOLIDWORKS files.
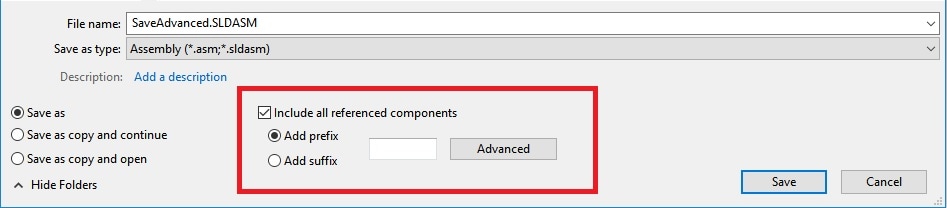
Tech Tip: When saving your assembly model using Save Advanced, you can Include all referenced components to create a copy of all the part files also. This will allow the user to make any changes to the native SOLIDWORKS files if they have SOLIDWORKS installed.
Jordan Puentes, Elite AE
Application Engineer
Computer Aided Technology, Inc.
www.cati.com