SOLIDWORKS 2018: Assembly Performance
SOLIDWORKS 2018: Assembly Performance
One of the most talked about topics with SOLIDWORKS is Assembly Performance. We constantly look for better and faster ways to design assemblies so that they open and perform as quickly as possible. Over the years of working with SOLIDWORKS, I have accumulated several ‘best practices’ and I would like to share some of those with you in this article.
When you install a new release of SOLIDWORKS, your first instinct is to open those older version files when you need to work on them and you are usually in a hurry. But with the new release, the older files are still saved in their current version and when you open them for the first time, SOLIDWORKS is ‘converting’ them in the background which can take precious moments and cause delays. Once the files are opened and saved, then the next time they are accessed, they will open much faster. There is an alternative to this by using the SOLIDWORKS Task Scheduler and running the task called “Convert Files”.
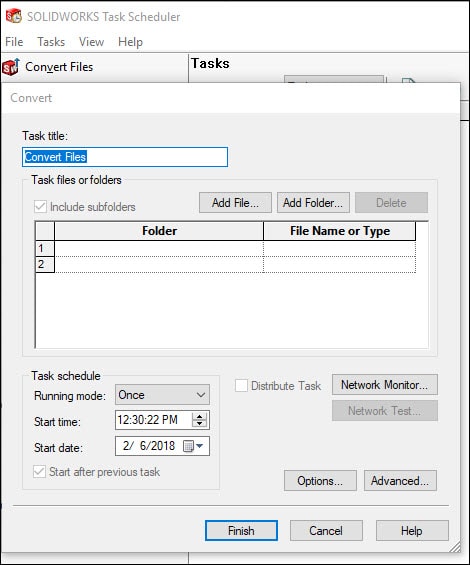
This allows the system to open, save, and close each file thereby converting it to the latest release matching your newly installed version of SOLIDWORKS. This way when you open those last minute design changes on older version files, they open much faster as the conversion has already been done behind the scenes. Schedule this to run on a weekend and make your PC work for you!
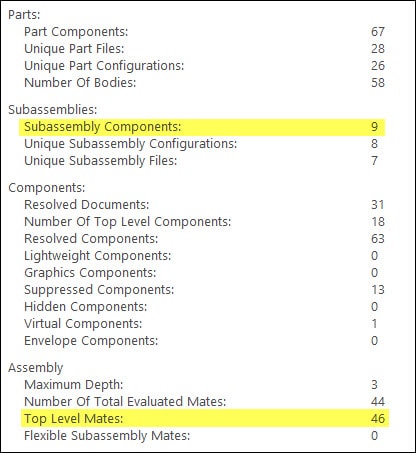
Another best practice is to use as few top level mates as possible. This refers to parts located at the root assembly level. Each part is usually requiring 2-3 mates to define, and you can easily increase this number of mates with more top level components. Seek to use Sub-assemblies as much as you can to limit these top level items. You can’t get rid of all of them, but the more sub-assemblies you use, the better the performance. Try to keep your top level mates in any assembly to 100-200 mates maximum. A quick way to check this is to use the command Performance Evaluation found on the Evaluate toolbar in the Command Manager:
Speaking of assemblies, another way to maximum performance is to use Speedpak features in your sub-assemblies. This is a quick feature found in the configuration manager of SOLIDWORKS’ assemblies and allows you to even further simplify those levels of detail in each sub assembly.
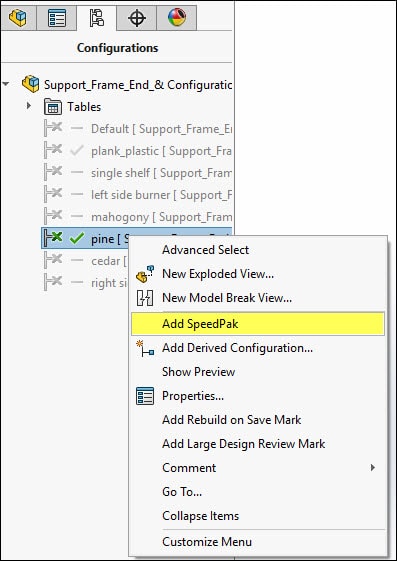
By enabling a Speedpak configuration, you can take a 15 part assembly with 45 mates down to a single item with 1 or 2 mates! Huge time gain during rebuilds and open times.
The last one I want to share with you is one that can sneak up on you quite easily. This is known as Image Quality and specifically Graphics Triangles. This can be adjusted on a part level by accessing Tools, Options, Document Properties, Image Quality:

You can also open this setting on the top level assembly, and choose the option to ‘Apply to all referenced part documents’ to have this lower(faster) setting applied to all files referenced in the assembly.
You can check your assembly Display Performance by using the above mentioned Performance Evaluation command and you will see a category for Graphics Triangles:
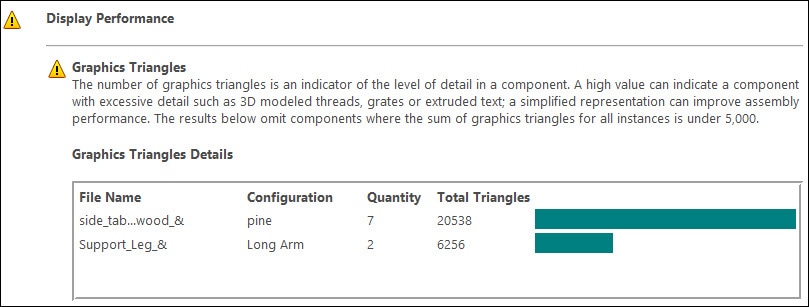
Your top results can be looked at closer to see if you can reduce image quality, or suppress some features to simplify geometry only at the assembly level.
I hope these ideas and suggestions make your large assembly perform as best as it can within SOLIDWORKS. Other components that can affect performance are working across a slow network connection to a shared network drive, low system RAM, slow hard drive, or just too many processes running on your machine.
Thank you for taking the time to read this post and I hope this information will prove helpful.
Brian Reel
CATI Field Technical Services Manager