SOLIDWORKS - Creating Internal Volume - Delete Face Command
In this blog, I will describe how to create an internal volume of a part using the delete face command as an alternative to the intersect command. An alternate method is sometimes needed in cases where the intersect method fails and there may not be time to troubleshoot, so a manual method is needed.
Initially it may be difficult to understand why deleting faces can help create an internal volume, but it does one key thing for us: it separates our Solid body into two different groups of surface bodies. One of those groups of surface bodies will be the internal faces of the part. Those internal faces will become the new solid body of the internal volume.
To help illustrate this, the following image represents the cross section of a bowl:
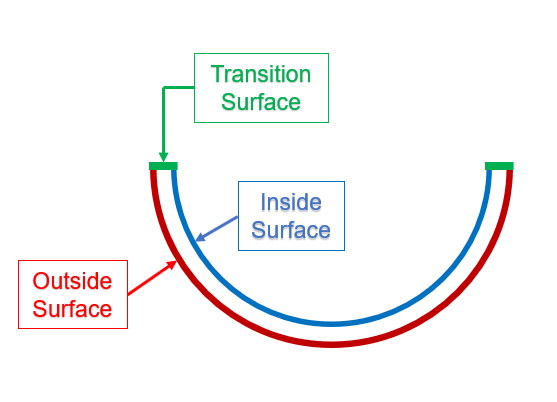
The red line is the ‘outside face’ of the bowl, where the blue line is the ‘inside face’ of the bowl. The green lines represent a transitional face where the outside face and inside face meet.
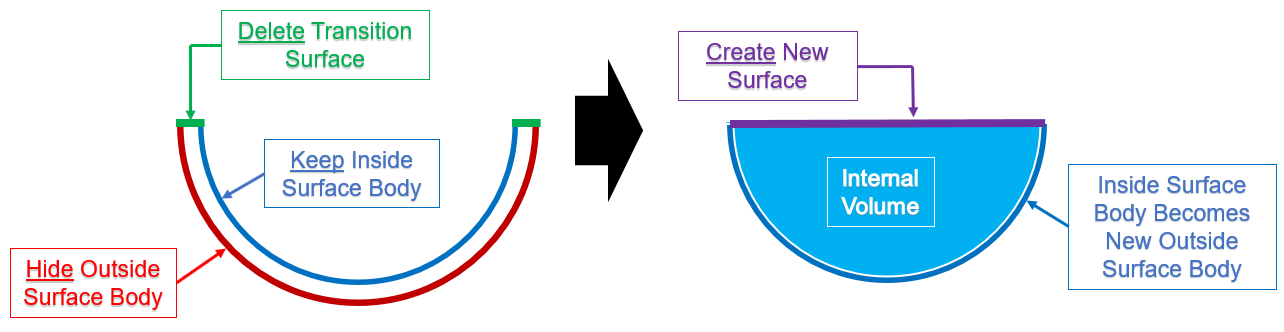
By deleting the transitional face, the single entity is split into multiple entities: the inside and outside surface bodies. The outside surface body can be hidden or deleted and then new surfaces can be created to cap and knit the remaining internal surface body to become a solid of the internal volume.
While a bowl is a simplified example, this process can be applied to any model. Whether there is only one inlet, or multiple inlets/outlets. Revisiting the same part used in the previous blog SOLIDWORKS – Creating Internal Volume – Intersect, this method can be applied.
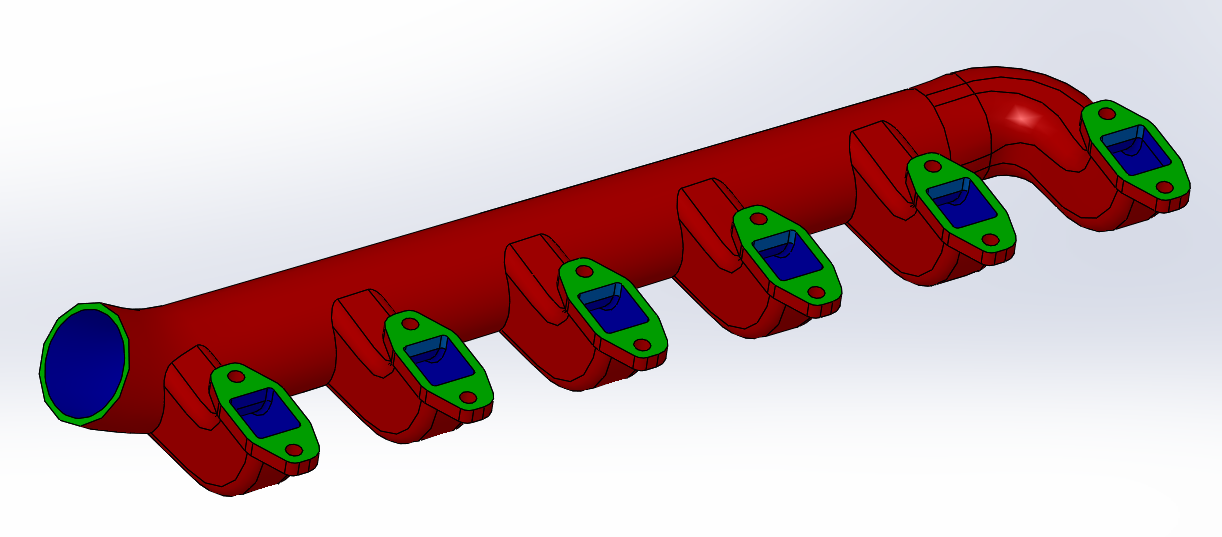
The part is colored to match the bowl illustration where Red is applied to the outside faces, blue on the inside surface and green on the transitional faces that connect to the two. In some cases the transitional surfaces may actually be part of the outside surfaces, but that is okay because in the end the only concern is the inside surface. Next step is to delete the transitional surfaces with the delete face command.

The ‘delete face’ command can be found under the surfaces tab in your command manager. If you find that you are missing the surfaces tab, right click any of the tabs that are currently visible such as ‘Features’ or ‘Sketch’ and you will have a menu with all of the toggle-able tabs to turn on or off. Select ‘Surfaces’ and you should now have that tab available.
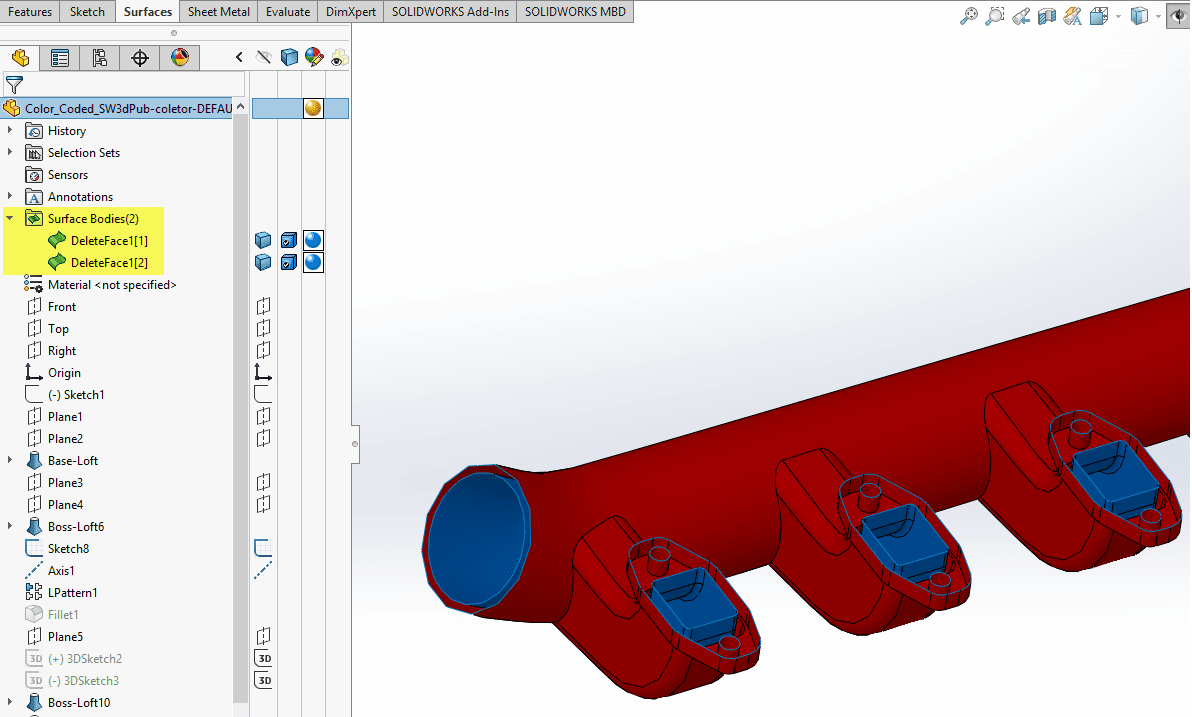
After the transition faces are deleted, the Surface Bodies folder shows that there are only two surface bodies left, one is the inside surface and the other is the outside. In more complex scenarios there may have more than two surface bodies and some sorting may be required to determine which is the internal surface(s) of interest.
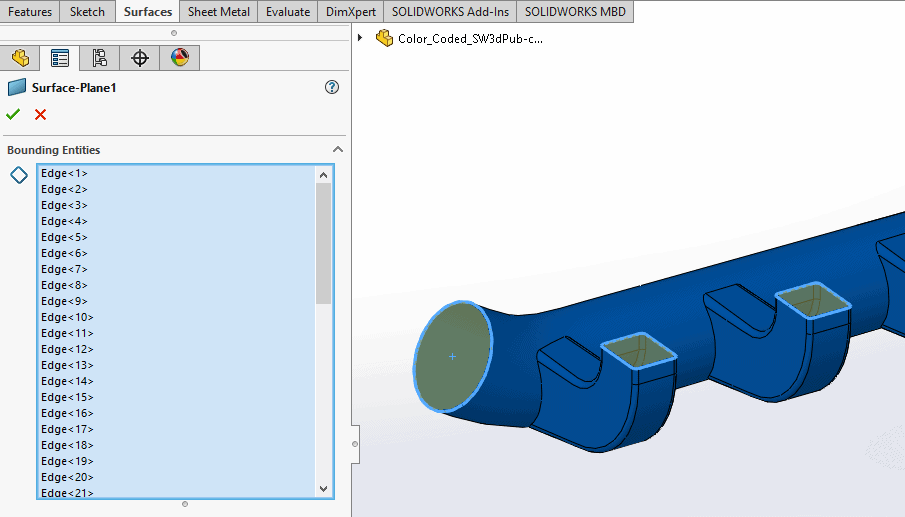
After hiding the outer surface bodies, all that is left is the internal surface body. Surfacing tools such as Planar Surface and Boundary Surface can be used to cap the inlets/outlets of the surface body.

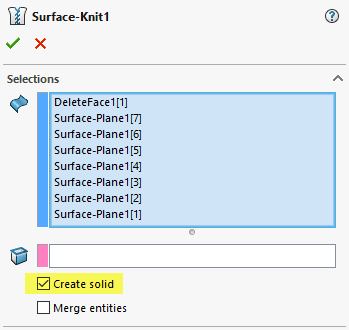
The last step is to use the ‘Knit Surface’ command to knit all the capped inlet/outlet surfaces with the surface body itself. Once SOLIDWORKS detects that the selected surfaces for the knit command form a closed surface body, you will be able to select the ‘Create Solid’ checkbox resulting in a solid body of the internal volume.
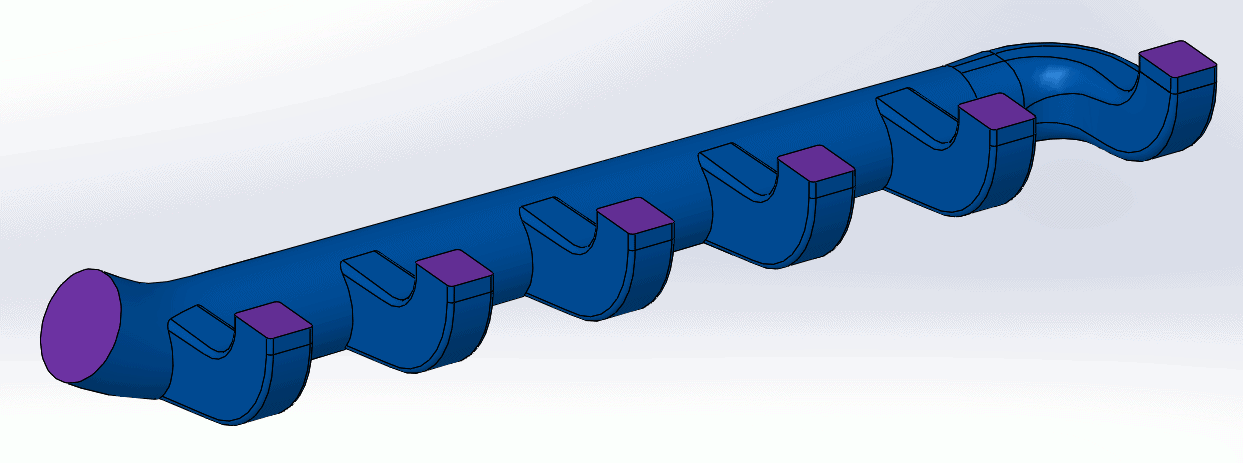
Once you have your resulting solid body of the internal volume, the mass evaluation tool can be used to determine the volume and weight.
Braden Leasure
Technical Support Engineer
Computer Aided Technology, Inc