SOLIDWORKS: Spring into Action - Creating Custom Springs
Sometimes the mood strikes to dabble in custom spring design. In this article we’ll talk about SOLIDWORKS helical controls and how to use them to get the spring design we’re going for.
First, let’s create a simple spring with no frills. Start by sketching a circle and then inserting a helix.

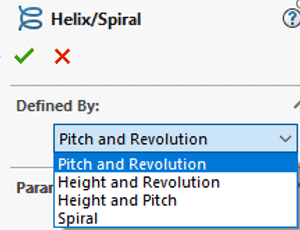
It is up to the user to decide which settings the basic helix will be defined by (e.g. pitch and revolution, height and revolution, etc.).
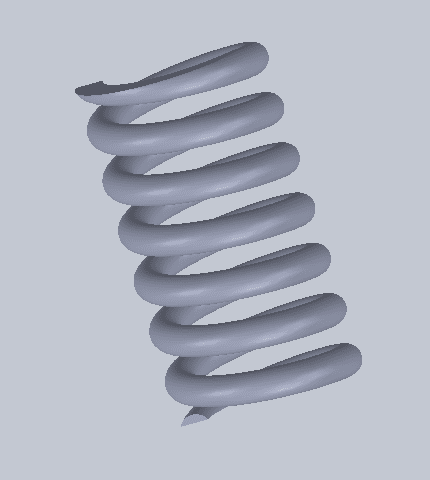
Create the solid model spring using the Sweep command (not covered in this article). The flat end features can be created by a simple cut-extrude.
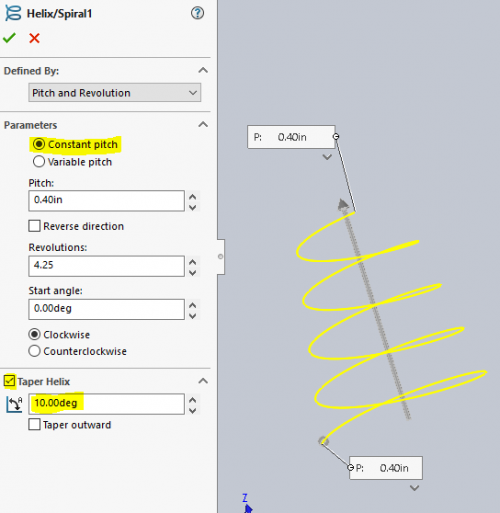
The initial circle sketch defines the diameter of the helix however this can be changed after the spring is constructed. For example, the spring can also be tapered inward or outward at a specific angle to produce a conical shape.

What about creating a spring ‘crunched’ at both ends?
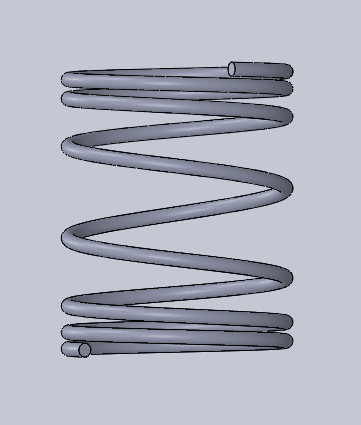
This is were the ‘Variable Pitch’ controls come in.
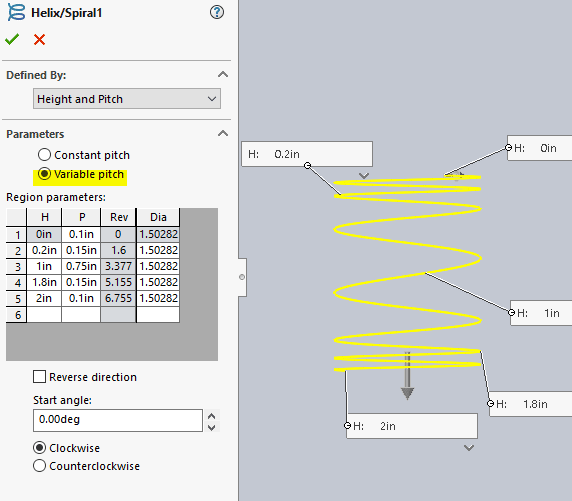
Notice this helix is defined by Height and Pitch. These can be controlled by modifying the Region parameters table under the Height and Pitch columns. The Diameter column can also be customized corresponding to each Height value in this setting.
Note the symmetry in the table values (H and P columns) from top to bottom. The Reverse direction box controls whether the “height” value starts from the bottom or top of the helix curve.
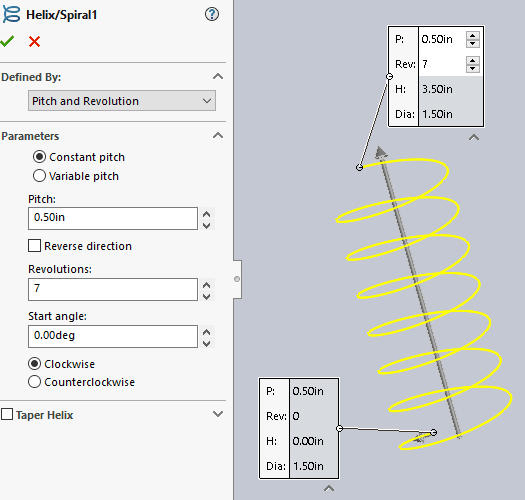
Finally, how about creating a spring like this where the legs are not 90°?
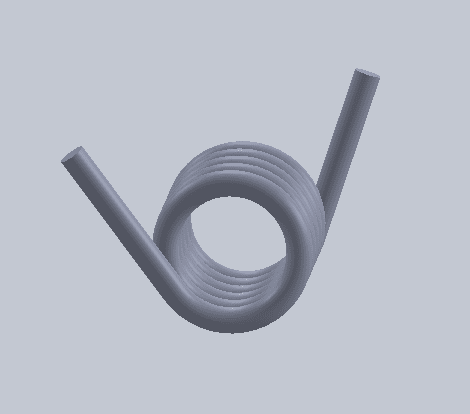
To do this, Variable Pitch must be selected and then the Revolution modified. Notice the revolution can only be changed at one end of the helix.
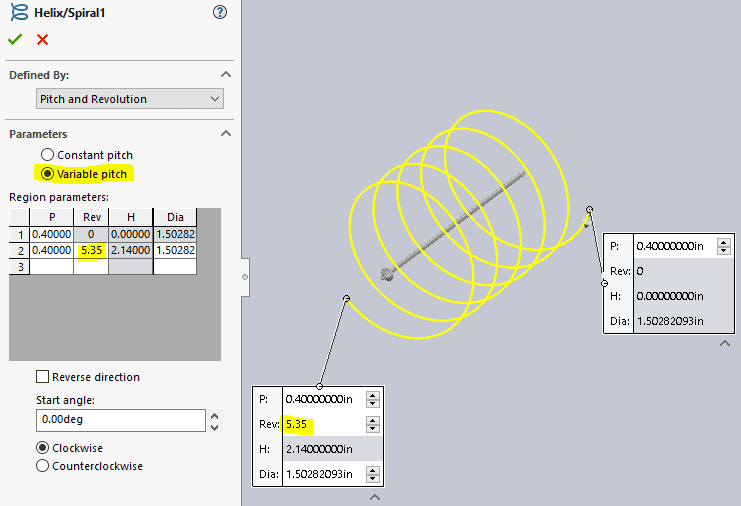
In case you’re wondering about the Start Angle, this controls where the helix curve begins and is based on the Unit Circle convention – 0° (at 3 o’clock) rotating counter-clockwise.
I hope you found this blog article helpful in accomplishing your design goals and perhaps sparking interest in experimenting with helical parameters. Till next time, enjoy springing into action!
James Carlin, CSWE
Support Engineer
Computer Aided Technology, Inc