How to Create a SOLIDWORKS Piping Route
Let me show you how easy it is to create a simple Piping Route
First off. What is a Piping Route? SOLIDWORKS Routing is an add-in that allows you to completely automate the process of routing pipework, tubing or even cabling, saving you many hours of modelling against traditional methods. SOLIDWORKS Routing is a package that is available with all Premium Licenses.
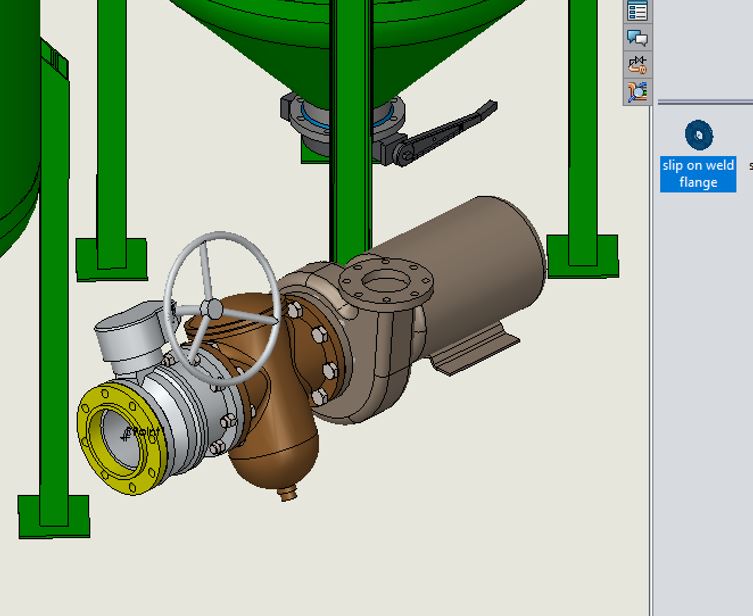
First thing we need to do is drag and drop a slip on flange from the design library to an existing component in an assembly. Select the configuration that’s needed. Notice the “stub line” that was create.
The Route Properties appears automatically. Route Properties dialog box is used to create custom property templates that predefine parameters and defaults for a route. When you begin a new route assembly, you can use the default or select a custom templates in the Route Properties PropertyManager. I’ll choose the default.
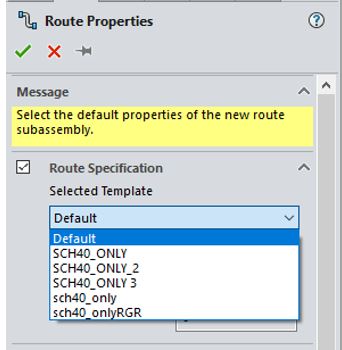
Your next option is to either use Customize Settings in the Route Properties property manager..
- If Customize Setting is cleared, the selected route specification template settings are greyed out and cannot be change.
- If Customize Setting is clicked, the route specification template settings can be change.
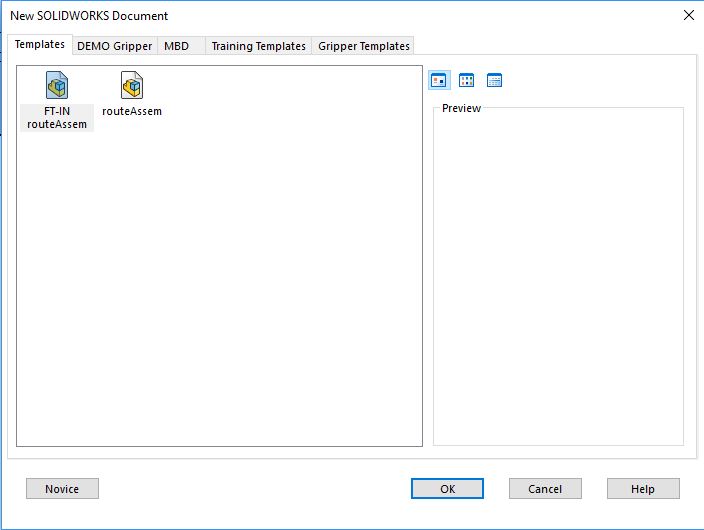
I’ll leave the option unchecked and click the green check mark. You will be asked to select a route template. I’ll use the default routeassem.
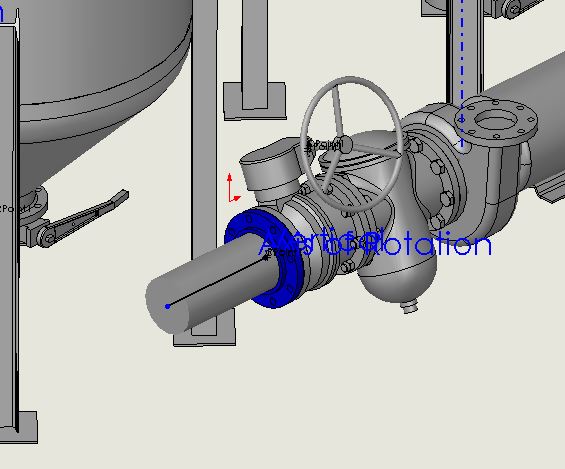
You’ll need to add another slip on weld flange from the design library. Select the configuration. and you are now ready to create the route. Let’s use the Auto Route command.
The Auto Route tool uses the Orthogonal route option to create multiple solutions for a piping route. The solutions appear as temporary graphics that include both line and arc segments running between connectors. Flanges in this example.
Click Auto Route from the Piping CommandManager tab.

And select Orthogonal Route.
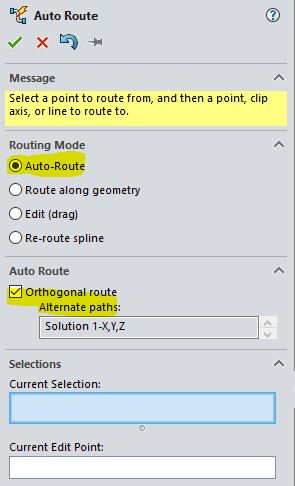
Select the end points of both stub lines.
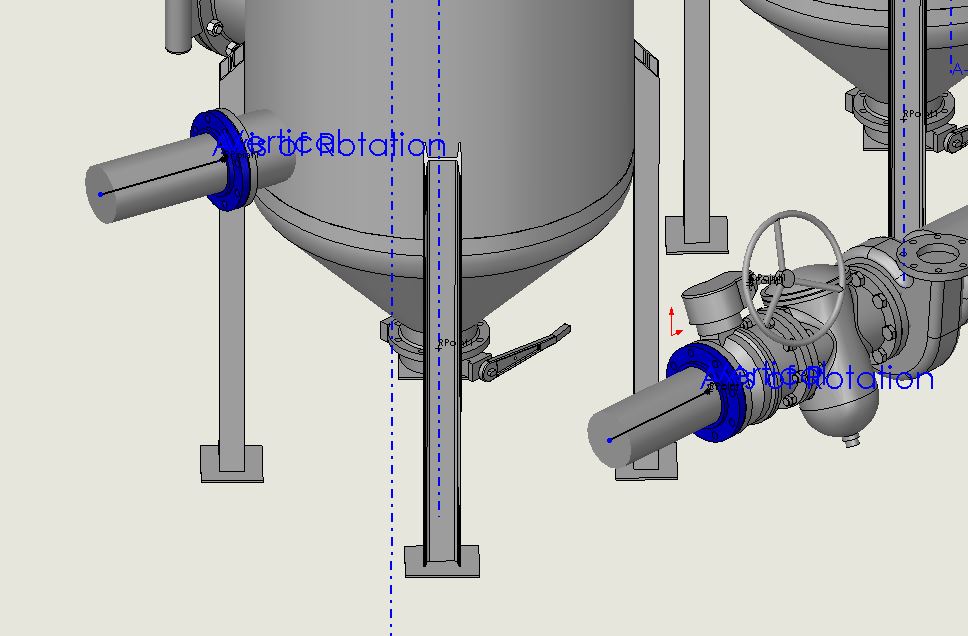
Four possible solutions are offered by clicking the up or down arrow. Mouse buttons can be used to move through the solutions as well. You can right mouse click to toggle thru the solutions and left mouse click to accept the current solution.
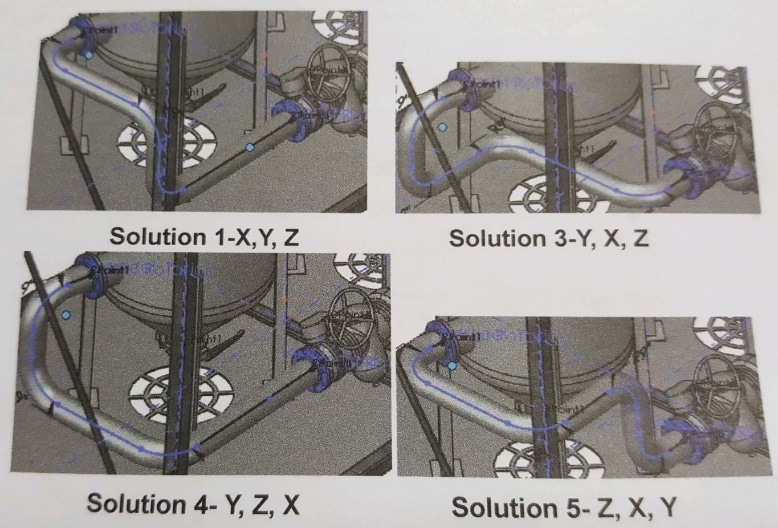
Select the solution that works best and hit the green check mark to complete the auto route. You are still in the sketch and can add dimensions to fully define the sketch.
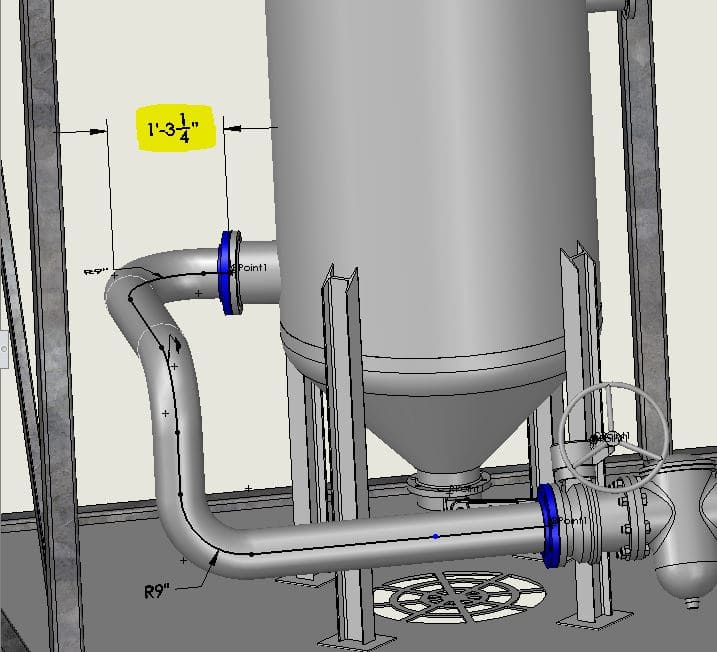
Exit the route sketch and the route subassembly. There you have it, SOLIDWORKS makes creating Piping Route that easy.
Roger Ruffin
Sr. Application Engineer
Computer Aided Technology, LLC