SOLIDWORKS: Creating and Saving Custom Sheet Metal Forming Tools
Ever wondered how to create and save your own custom sheet metal forming tools in SOLIDWORKS? I am about to walk you through just that!!
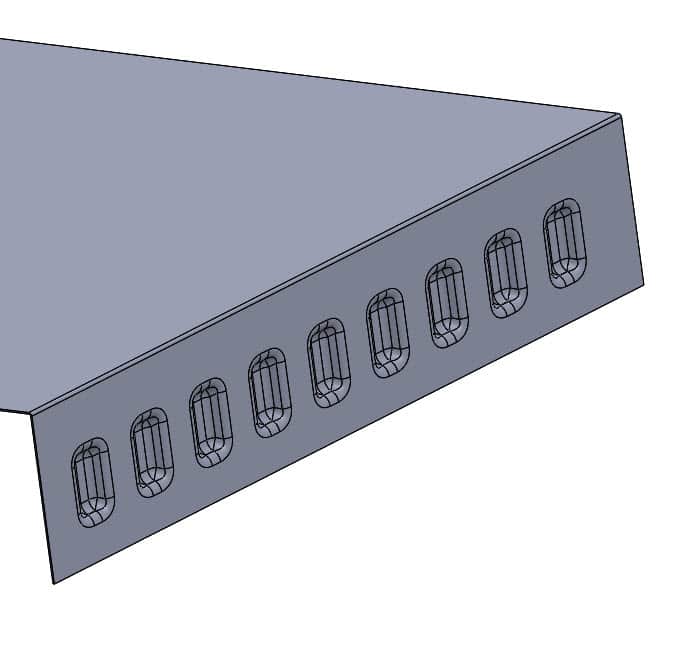
First, let’s define what a forming tool is in SOLIDWORKS. Forming tools are used to create sheet metal features that would be produced using a punch or stamp. Refer to the indentations as seen in the image below.
Before creating a custom forming tool, determining how it is going to be saved and stored is important because there are two different file types that could be used.
- .sldprt (Solid Part)
- .sldftp (Solid Form Tool Part)
Determining which file type to use depends on how it will be stored and used during the design process. Generally, storing the forming tool files in a Custom Design Library in SOLIDWORKS is best practice. To add a Custom Library to the SOLIDWORKS Design Library, follow the directions below:
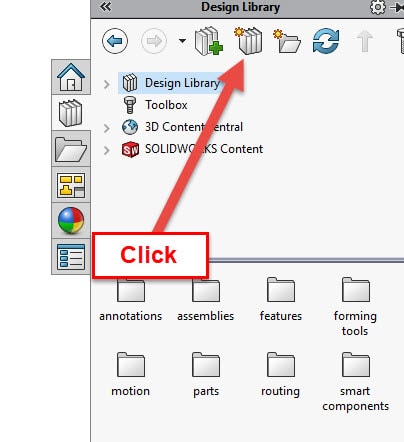
- Point SOLIDWORKS to a folder you have deemed the Custom Library you will store your custom data in. This folder can be located on your local drive or network drive. Refer to image below:
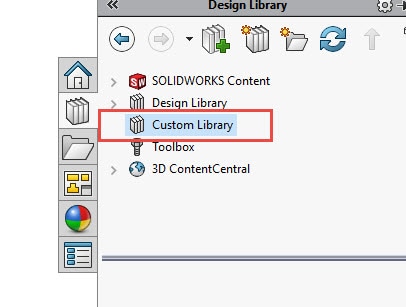
- Once you click the icon, you will need to navigate to the folder you want to use as the Custom Library and click “OK”. You should now see a Custom Library folder in the Design Library. Refer to the image below:
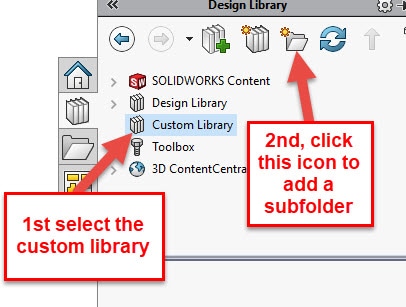
- Now that you have designated a folder location in the Design Library, you will need to create a sub-folder named forming tools. This can be done the traditional windows way through the file explorer or the “Create New Folder” icon could be used in the Design Library. Refer to the Image below.
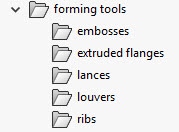
- Once you have a sub-folder named forming tools, you will need to add additional sub-folders under the forming tools folder that correspond to the different types of forming tools that will be created. Refer to the way the SOLIDWORKS default Design Library is set up.
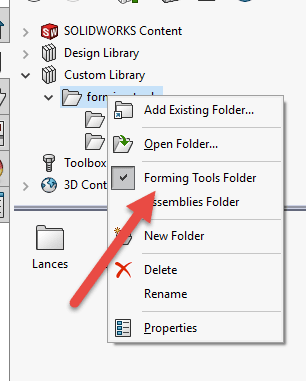
- Once the folder structure is complete, the “forming tools” folder needs to be marked as a forming tools folder. To mark the folder as a forming tools folder, right click the “forming tools” folder and click “Forming Tools Folder”. A check mark should appear next to the words “Forming Tools Folder”. Refer to the image below.
Marking this folder as a “Forming Tools Folder” allows you to use a Solid Part (.sldprt) as a forming tool. If the directory wasn’t marked, a Solid Part would not be able to be used and a Forming Tool Part file (.sldftp) would have to be used because it does not need to be stored in a marked directory.
Now that a Custom Library has been created along with the sub-folders needed. Determining which type of file to use is up to the designer. As mentioned above, if a Solid Part file (.sldprt) is used, the designer must store the file in a marked directory. If a Form Tool part file (.sldftp) is used, the designer can still store it in a marked directory but can also store it anywhere else. Best practice is to store it in the folder designated for forming tools no matter how it was created.
There are two ways to create a forming tool, manually and with the forming tool feature.
The Manual process is as follows:
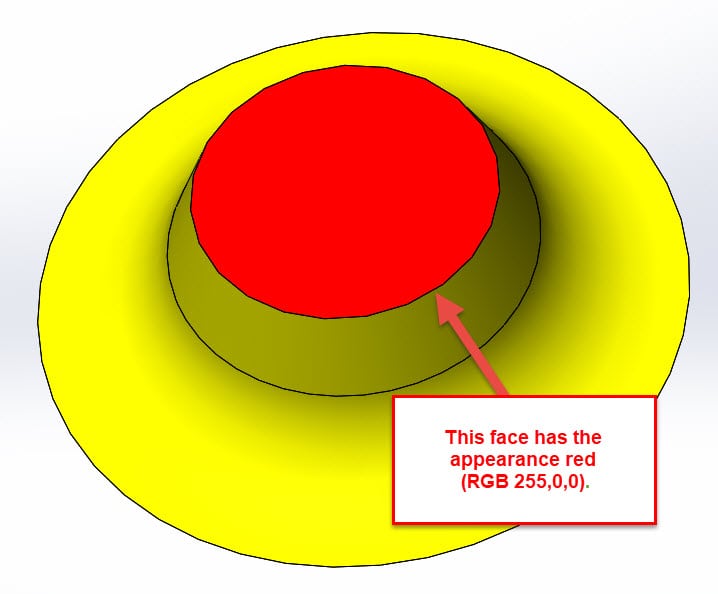
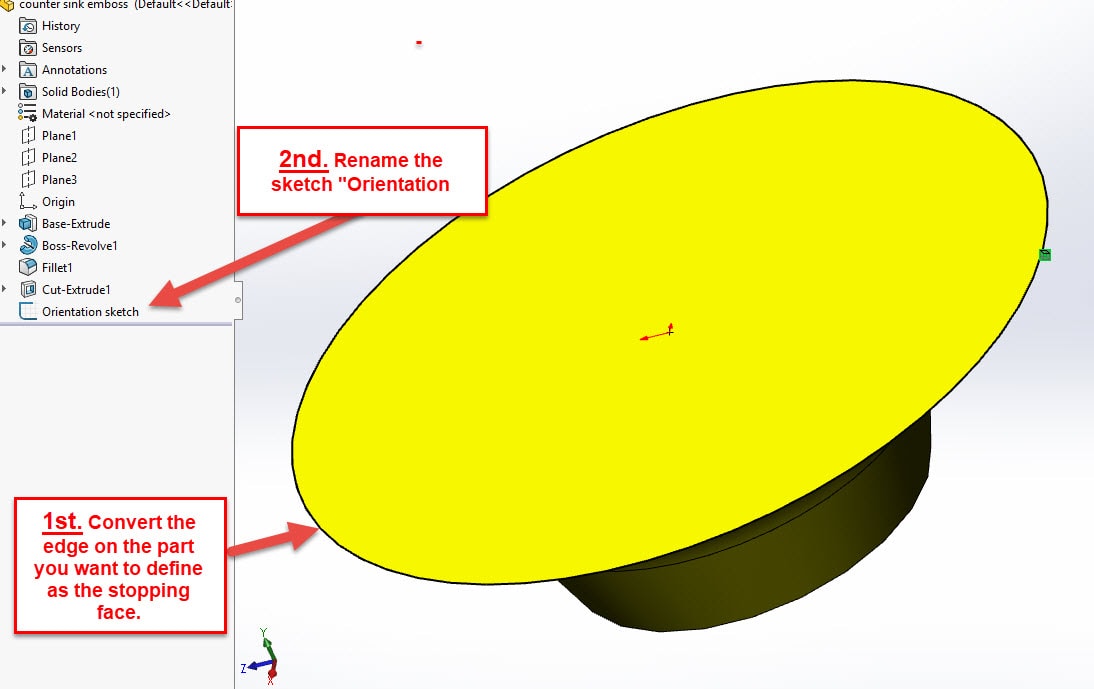
- the user will need to define faces to be removed in red (RGB 255,0,0) and an “Orientation sketch” is needed to define a stopping face.
The forming tool feature process is as follows:
- Click the forming tool feature from the Command Manager.
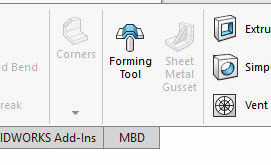
- Fill out the property manager with the appropriate information.
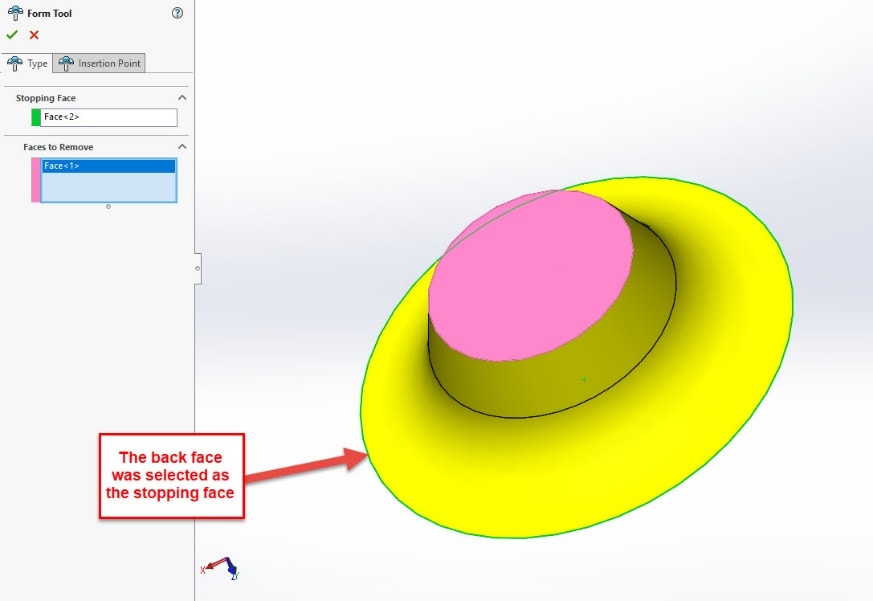
- Click Insertion point in the property manager and choose where on the part placement will be determined from.
As mentioned, either of these methods can be used to create a forming tool as a Solid Part (.sldprt) or as a Form Tool file (.sldftp). If you use the Solid Part method, the file must be stored in a marked directory. Again, best practice is to store all form tools in the directory delegated for forming tools no matter how it was saved.
To save the file as a Form Tool file (.sldftp), just change the save type.

Thanks for taking the time to read and I hope this helped you understand the process of creating and saving custom form tools in SOLIDWORKS Sheet Metal.
Greg Tutor, CSWE
Application Engineer
Computer Aided Technology, LLC