How to Insert and Scale a Sketch Picture
When designing something in SOLIDWORKS, it’s often useful to import a rough idea of a project in the form of a 2D image and then trace over it instead of trying to guess the outline yourself. But how do you know the 2D image is in the correct place and more importantly is the correct scale?
This post will walk through how to Insert a Sketch Picture and how to use the built-in Scale Tool to make sure your picture is the right size before tracing it.
Before we get started, it’s important to note that before you can insert a Sketch Picture, you need to define which plane you’d like to place it on by creating a New Sketch first.
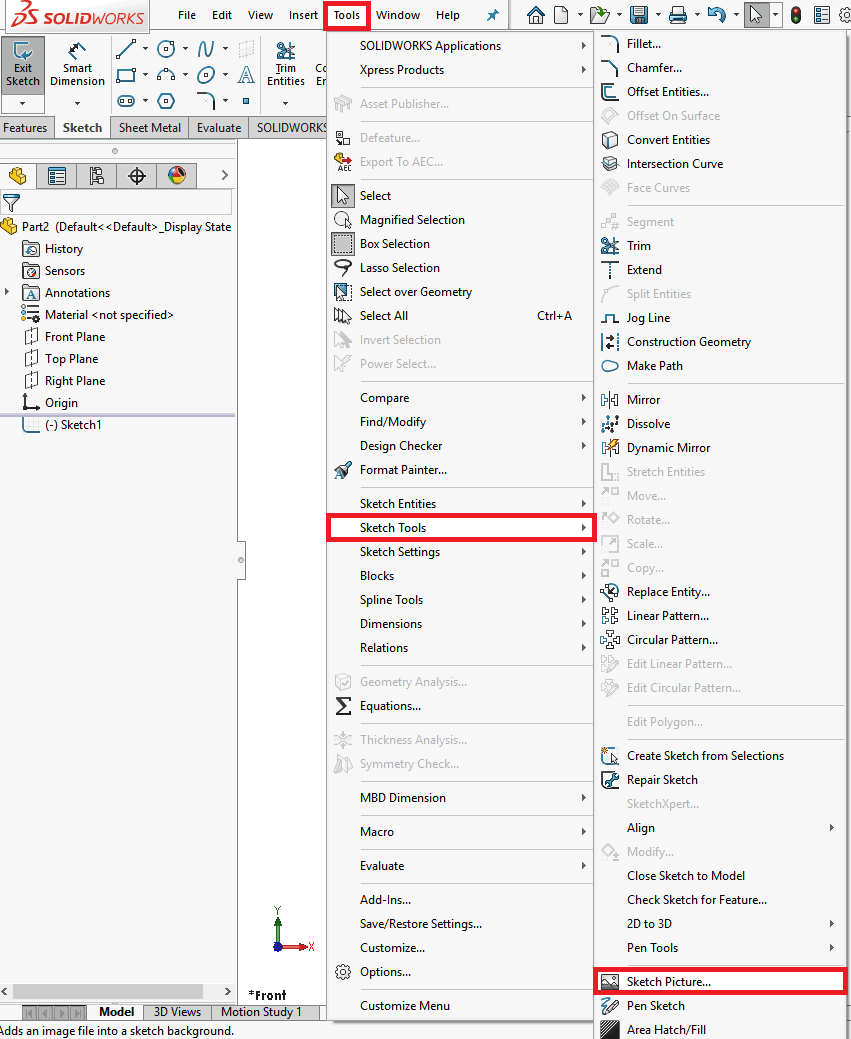
You can find the command Sketch Picture in Tools > Sketch Tools > Sketch Picture.
Tech Tip: If you see the command Sketch Picture is greyed out, check to make sure you are in Edit Sketch mode by either creating a new sketch or editing an existing one first.
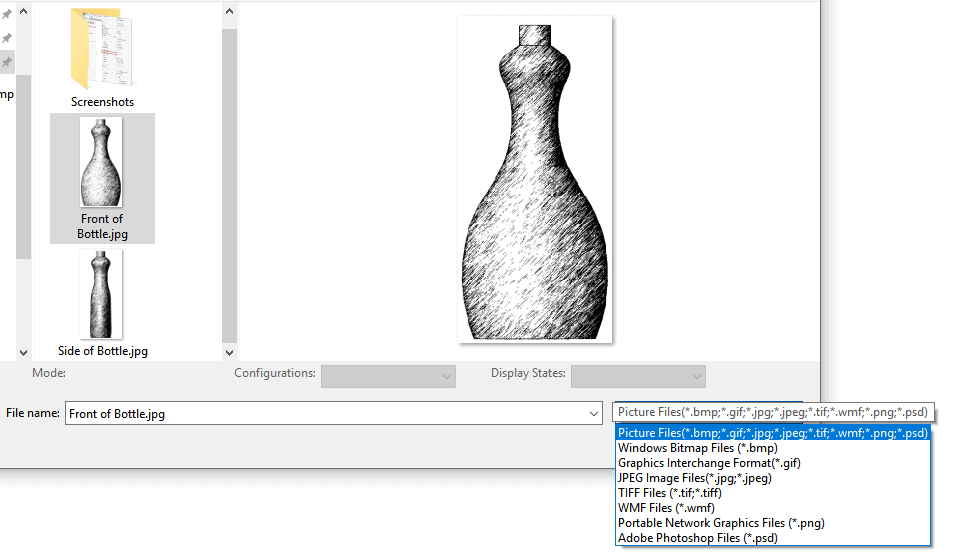
Locate the image you’d like to insert via the open prompt. Supported 2D file types include .bmp, .gif, .jpg, .tif, .png, .wmf, and even Adobe Photoshop files.
Once the picture is inserted onto the sketch plane, you will see the Sketch Picture properties in the Property Manager to the left of your SOLIDWORKS screen.
These properties control the X and Y origin locations of your picture, the angle, as well as overall width and height values. Be aware that these values only control the overall picture size and do not actually look at any geometry in the picture for reference.
You can also enable or disable the scale tool, lock and unlock the aspect ratio and flip your picture either horizontally or vertically.
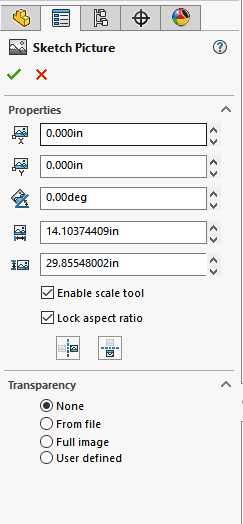
Tech Tip: You can also set any white space in your picture to be transparent by selecting User Defined under Transparency and manually selecting the white pixel color using the color palette dropper selection.
For this example, we are going to start by moving our picture to the sketch origin by clicking and dragging anywhere over the sketch picture and moving it over to the sketch origin.
Tech Tip: You’ll have to eyeball the placement of the sketch picture as there are no snaps to image geometry. Zoom into your picture if needed to get as accurate of placement as needed.
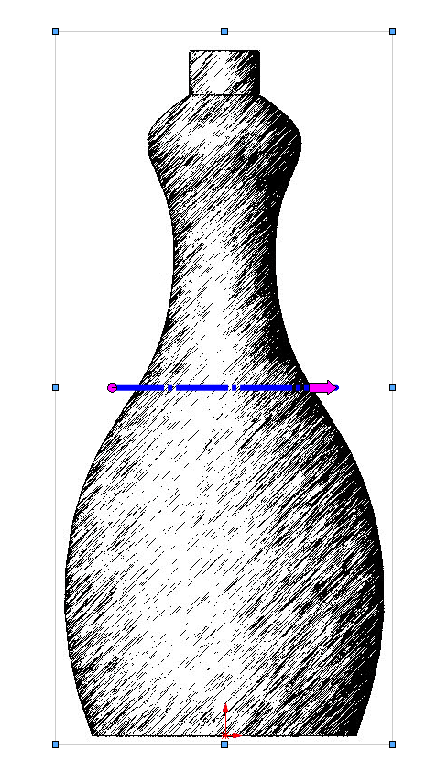
The next step is to make sure our picture is the correct scale by first enabling the scale tool by checking Enable Scale Tool. You should see the Scale Tool appear as a line and arrow that appears over your picture.
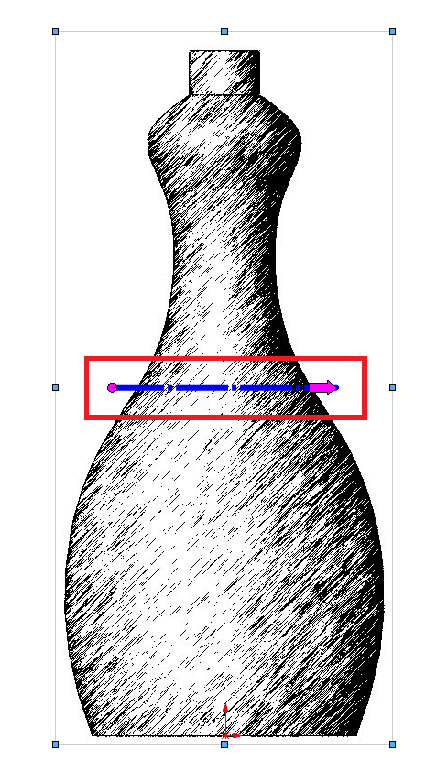
To use the Scale Tool, you need to move the starting point of the line and the arrow to a known distance/location on your picture. For this example, we know the overall height of the bottle is going to be 9 inches.
First, move the starting point of the Scale Tool to the bottom middle of the bottle, which also happens to be our origin which we can snap to.
Tech Tip: Don’t worry if you’re not snapping to the sketch origin for the location of your Scale Tool, you can always zoom into your picture for pixel placement anywhere on the image.
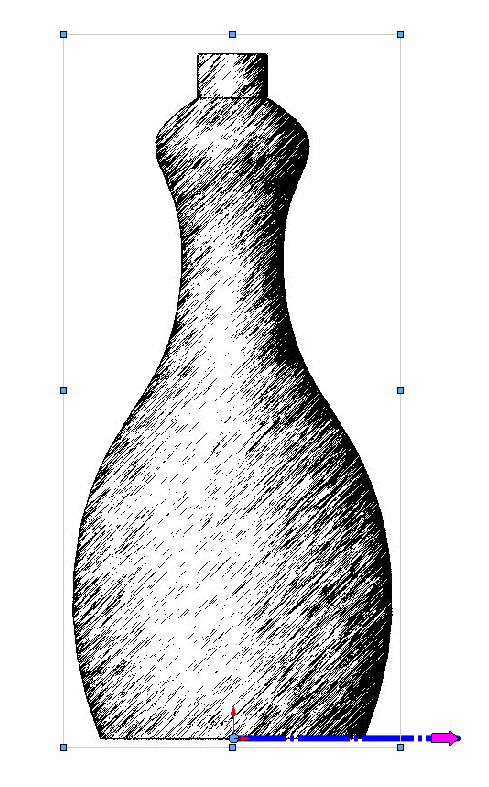
Next, click and drag the tip of the arrow of the Scale Tool to adjust the length and angle of the line.
Tech Tip: When you place the arrow location, the tip of the arrow is the actual end location of the line.
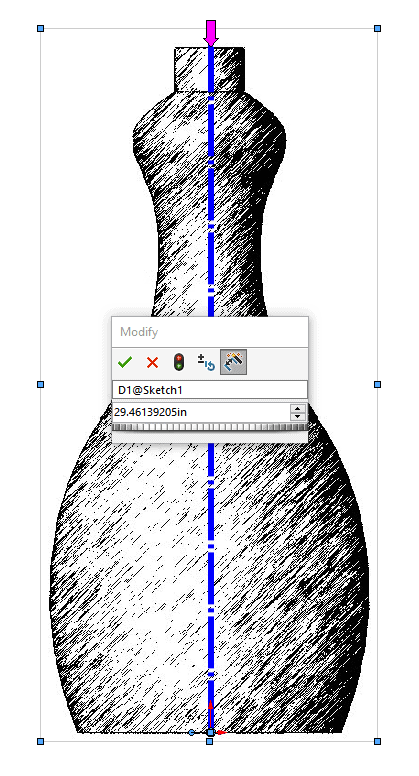
As soon as you drop the arrow location, a dimension dialog box will appear. Just type the known distance into the prompt and hit Enter. The picture will be scaled up or down based on the dimension value you entered.
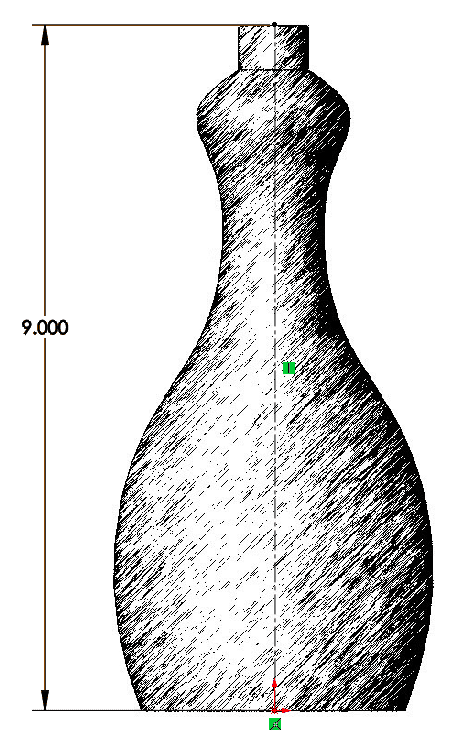
Drawing a construction line over the picture and placing a Smart Dimension verifies the picture was scaled correctly.
Tech Tip: If you intend to use the sketch picture for tracing purposes, make sure the Sketch Picture is the only object in the sketch and then Create a New Sketch for your tracing geometry. This will help in case you ever need to suppress or hide the original sketch picture without suppressing or hiding your traced sketch geometry.
Jordan Puentes
Application Engineer
Computer Aided Technology, LLC.