SOLIDWORKS: Creating Additional Sheet Formats and Templates
After putting the effort to customize your Sheet Format and Drawing Template, including your logo, updated Title Block, etc., it’s not difficult to update that Sheet Format to create a new size, while maintaining your customizations. Here is how you can do that:
1. After customizing a Sheet Format, such as an A-Size Landscape paper, start a brand-new drawing with that selected Sheet Format
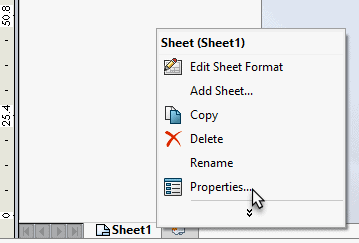
2. Right-click Sheet1 and select on Properties…
3. Within the Sheet Format/Size section, select on Custom sheet size and type in your new preferred Width and Height in the respective boxes and click Apply Changes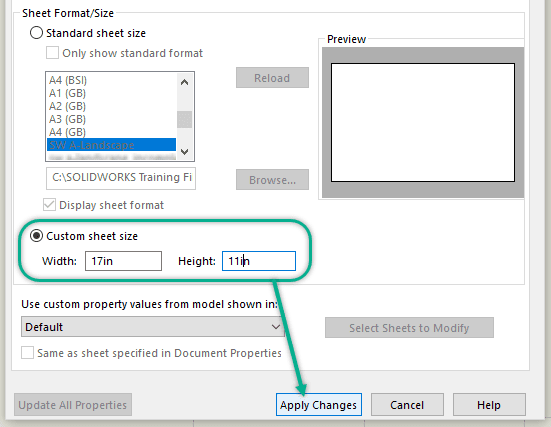
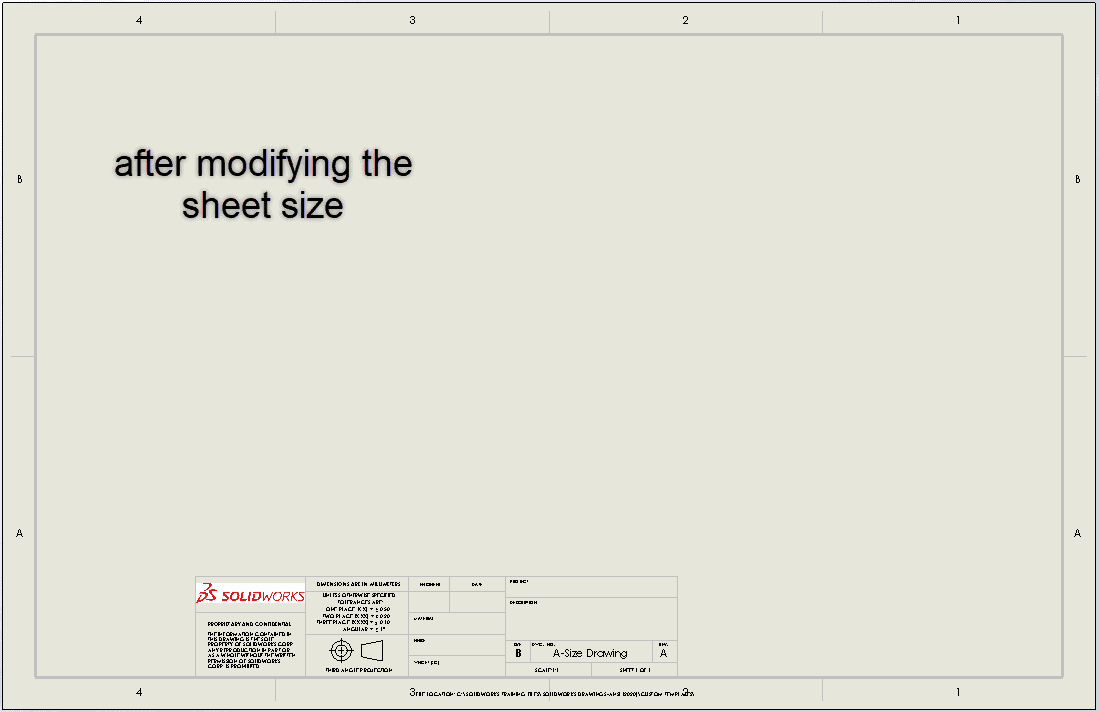
4. This results in the resizing of the original paper, and the title block and border moving, now needing to be modified to fit the new Sheet Format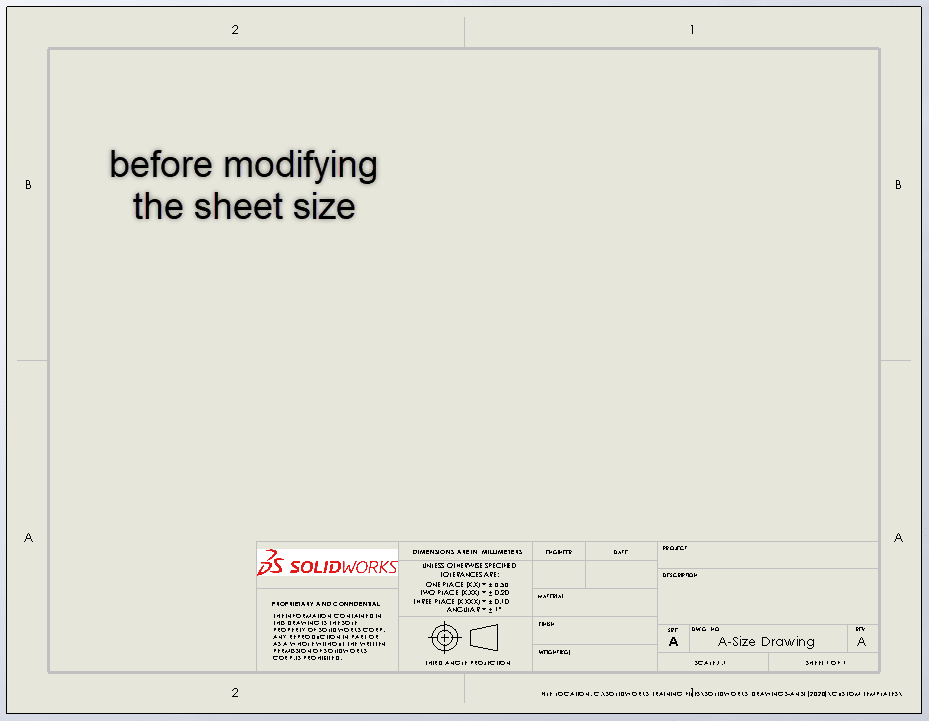
5. Click Edit Sheet Format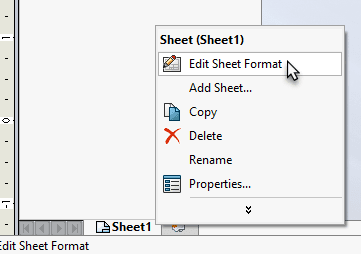
6. Ensure that Sketch Relation are visible in the drawing by expanding the Hide/Show drop-down and clicking View Sketch Relations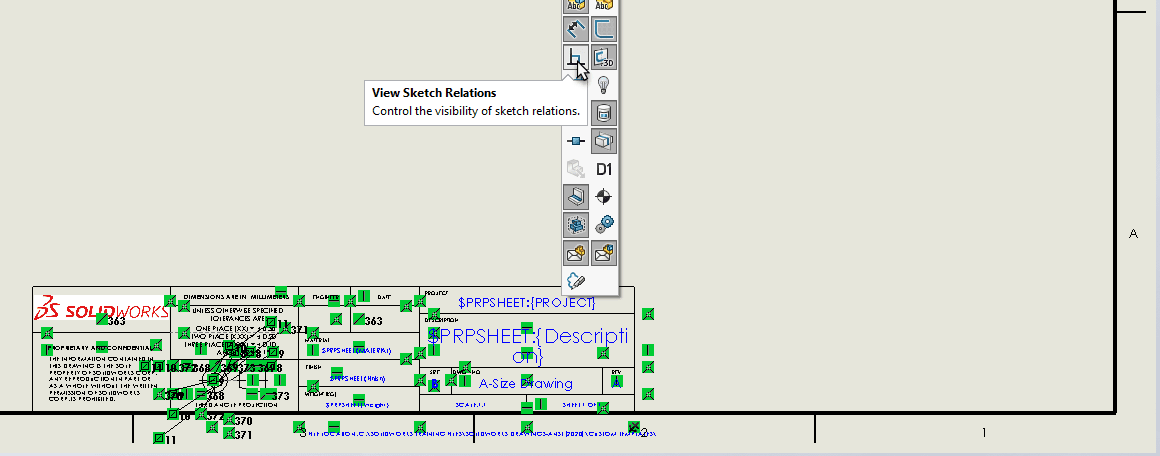
7. If a Fix relation exists, delete it (right-click > Delete) from the lower right corner of the title block.
8. Drag the cursor to box-select all the title block sketch entities and notes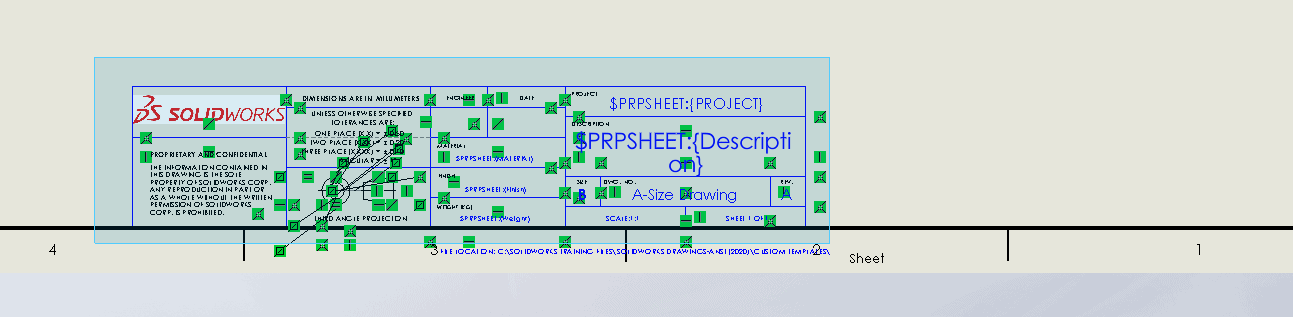
9. Click Sketch > Move Entities and then select on the lower right corner of the title block as the Start Point and then click the lower right corner of the border as the location to move to.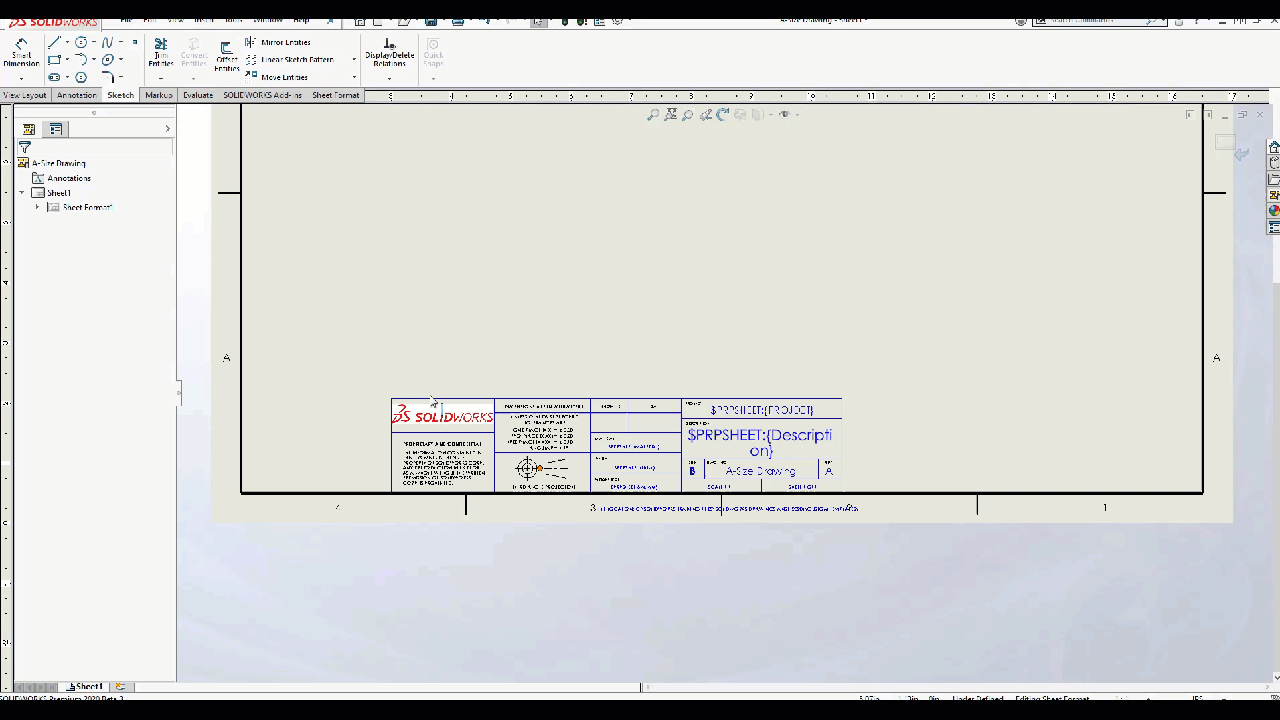
10. Select the lower right corner of the title block and add a Fix relation, if desired
11. Double-click the logo/Sketch Picture and drag the picture to a position in the title block as desired. Repeat for any other logos or entities that didn’t move with the title block
12. Edit the Title Block Fields/Notes as desired/necessary
13. Exit out of Edit Sheet Format mode 14. If preferred, you can set the table anchors that might exist in the FeatureManager design tree
15. Once finished, click File > Save Sheet Format, and name it your newly desired Sheet Format size and close the file
Now within SOLIDWORKS, you can browse to and use the updated Sheet Format size or create and save out a new Drawing Template which hosts that size Sheet Format.
Nathan Marsh
Sr. Support Engineer
Computer Aided Technology, LLC