How do I complete a frequency study with SOLIDWORKS Simulation?
Every study in SOLIDWORKS Simulation follows the same six general steps. You can learn more about these steps in our Six Steps To Your Simulation Study blog post. Frequency studies are no different.
If you have landed on this blog it’s a safe bet you are interested in the natural frequency or resonant frequency of your design. Our designs are often subject to outside frequencies. Electric motors, rotating fan blades, rumble strips on the road, and wind loads are a few examples.
Natural Frequency is defined by where Wn is the natural frequency, k is the stiffness of the system, and m is the mass.
The stiffness of the system is material and geometry dependent. The mass of the system is defined by the density of the material.
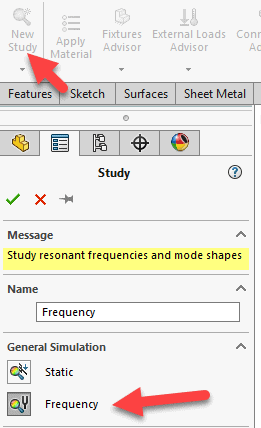
To start a frequency analysis, go to the Study Tab of the Simulation Command Manager, and choose Frequency for the study type.
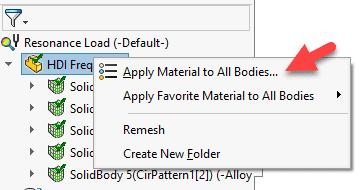
Assign your material to the model. Keep in mind this defines the mass of the system based on the material density.
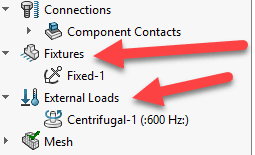
Apply the fixtures and loads according to the model’s setup in real life. Note that any loads applied to the model will affect the natural frequency. Similar to how tightening or loosening a guitar string changes its pitch, tensile and compressive loads affect the natural frequency of a system.
Mesh the model, but do not run it yet. A natural frequency analysis needs additional input through the study properties. Right click on the study name at the top of the simulation tree. Choose Properties.
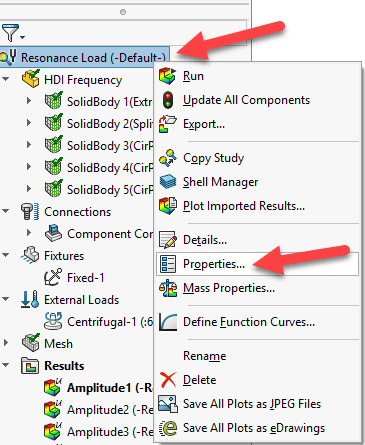
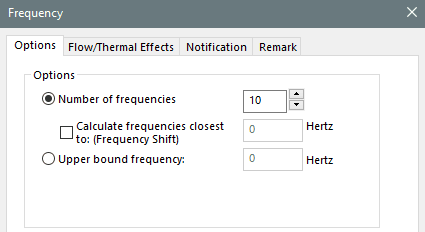
The natural frequency study properties include the ability to list the number of frequencies solved for. For example, the first ten resonant frequencies. Next, you can choose to calculate the natural frequencies around a given value. This is helpful if you know the frequency the system will experience and want to make sure the natural frequency is far enough away from the induced vibration such that it will not affect the design. Lastly, you can specify an upper bound. This eliminates any frequency above the set value to be calculated. Remember, the higher the frequency the less it affects the system.
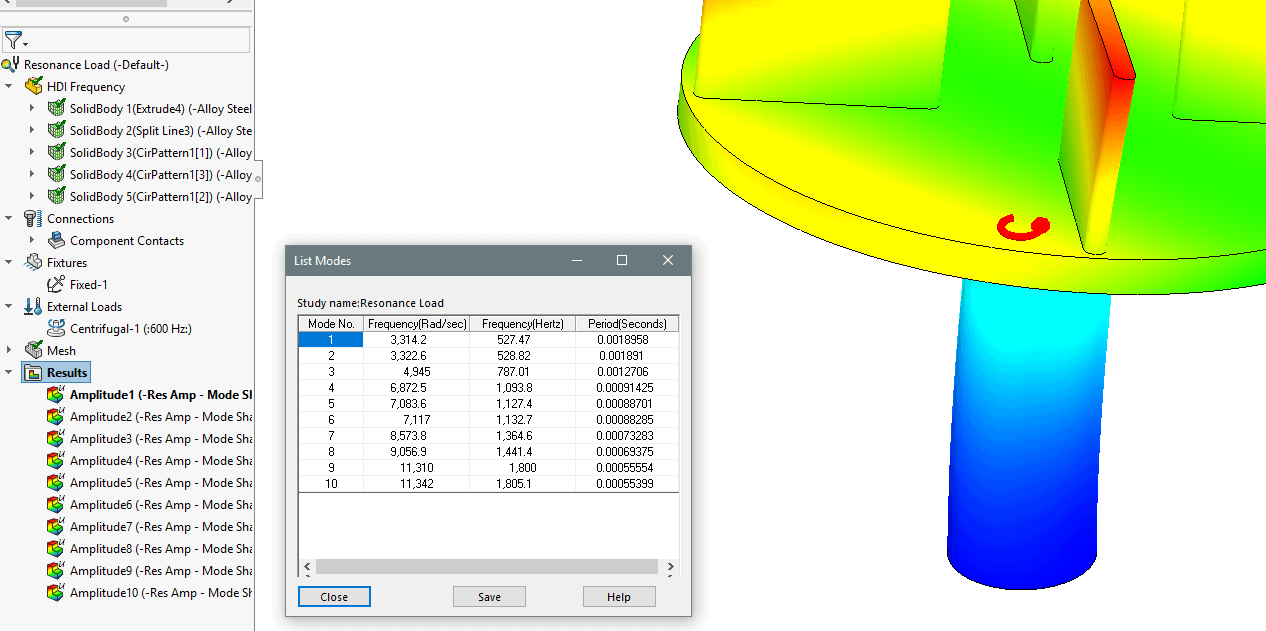
Run the study and view the results. Note the output is in a general amplitude and is there to show how the system will vibrate according to its mode shape. A list of resonant frequencies can be obtained by right clicking on the Results folder and choosing List Resonant Frequencies.
This blog has an accompanying video under the same title. Check out the Computer Aided Technology video page for more information.

Robert Warren
Simulation Specialist, Elite Application Engineer
Computer Aided Technology, Inc.