Designing Custom Packaging (Part 3)
Today we are going to pick up where we left off in my last blog article;
Designing Custom Packaging (Part 2). Here’s Part 1 if you’d like to start from the beginning.
We had finished creating the negative space in the packaging material for the Rolling Crate and the Clam Shell.
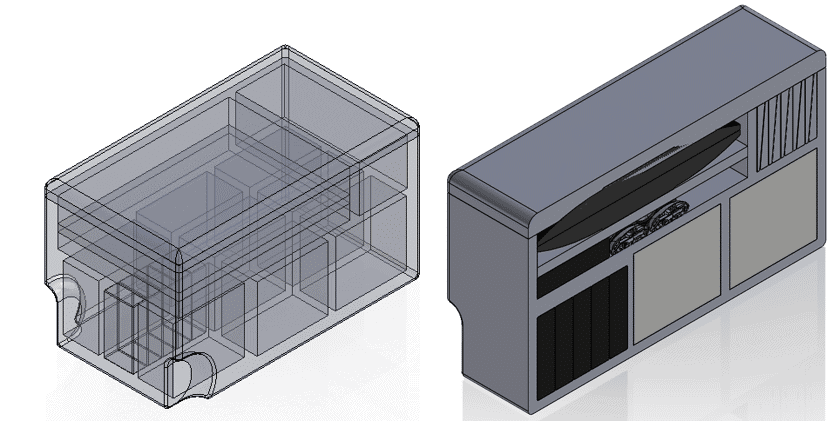
Rolling Crate
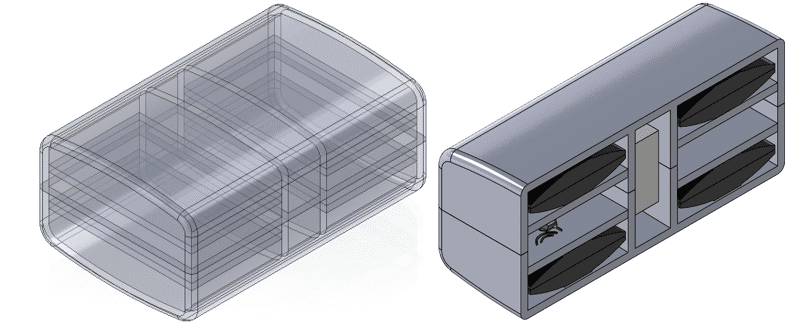 Clam Shell
Here are the two containers showing the negative space and the cross section showing the packaged items.
It is impossible to carve the spaces out of the medium density foam I wanted to use for the packaging, so I decided I would build the packaging to be placed as the items were added to the containers. I will show you the techniques I used in SOLIDWORKS to separate the foam into a cut list so I could document the pattern into a drawing. For the sake of brevity, I will only be showing the steps I used with the Rolling Crate.
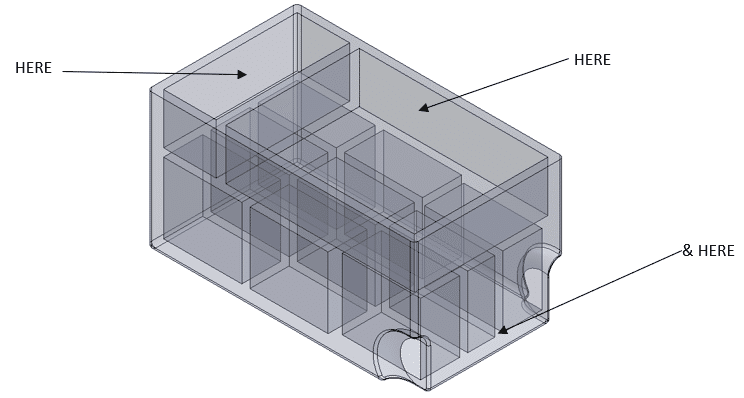
After the cavity feature was created in the assembly there are some spaces that need to be cleaned up in the part named CPU Cavity that will become the foam packaging. The cuts need to be offset from the outside and other interior surfaces by a minimum of one inch. This will make the spaces slightly smaller than the cavity to create a friction fit. They are shown as spaces in the image on the top left and here below.
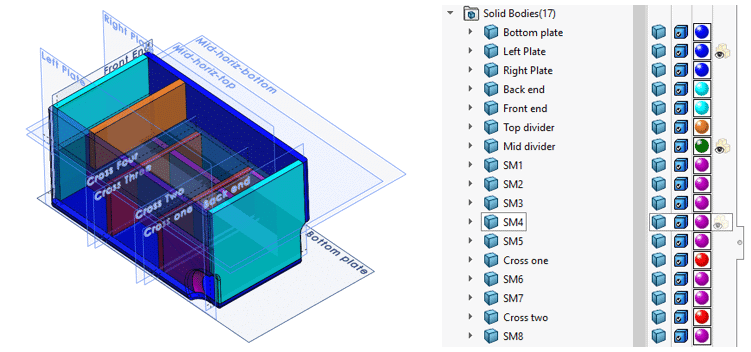
Next, I will insert reference geometry planes coincident with the interior surfaces of the open spaces to create separate bodies for the packaging pieces. I will name each plane as it is created to identify which section is defined.
Now, by using the Split feature I will cut the internal body into separate pieces (Shown in the order of the bodies created and colored).
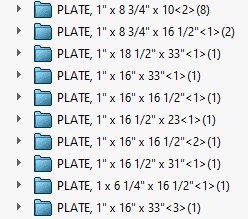
 Right now, I have no idea what the dimensions of all these bodies are, except that they are all 1” thick. Here is where the Weldment feature
  comes in handy. It will convert the solid bodies to cut list items, group the parts with the same size. By adding a bounding box to each cut list item SOLIDWORKS will assign dimensions to the length, width, and height and rename the items with the dimensions.
Just edit the names of the items and when cutting out the foam pieces. There is no need for a drawing.

Thanks,
Dennis Barnes
Applications Engineer, SOLIDWORKS Technical Support
Computer Aided Technology, Inc.