Convert Files Fast and Free With This One Weird Trick!
GrabCAD Print can work with almost any file you can throw at it. But sometimes you really need an STL file. There’s no ‘Export to STL’ option… is there?GrabCAD Print is the next-gen slicer and scheduling tool from Stratasys, with support for all current FDM and PolyJet machines. Unlike most slicers, GrabCAD Print opens not just STL files, but parametric and mesh files too! Native SOLIDWORKS, Inventor, CATIA, Unigraphics/NX, Solid Edge, ProE/Creo; neutral parametric STEP, Parasolid, IGES, JT files; VRML and OBJ mesh bodies; and the new 3MF 3D Manufacturing Format, are all supported. Not only that, it has a built-in file repair utility. Oh – and it’s free!
Today, GrabCAD Print augments Catalyst, Control Center, and Insight, but someday all that functionality (and more) will be built into this one tool. Until then, there are still cases where Insight will be needed for advanced toolpath optimizations, and it can only load STL files. Today I’ll show you how to use GrabCAD Print to convert files (or repair a bad STL) in just a few minutes.
Prepare The Model
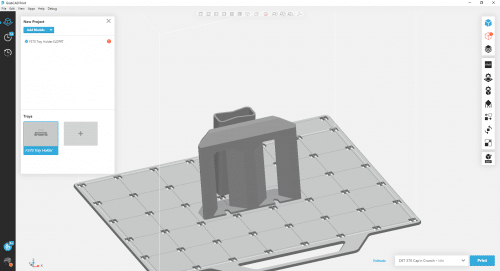
Begin by loading the file into GrabCAD Print (available on GrabCAD.com, after creating a free GrabCAD account).
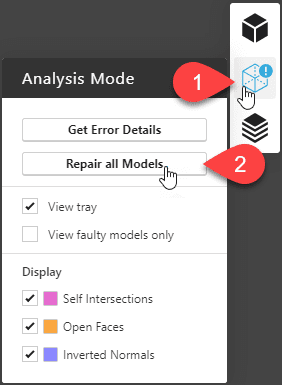
If the model has errors, enter Analysis Mode and Repair All Models.
Note: It is rare to encounter errors in parametric models; I’ve intentionally added errors to this SOLIDWORKS Part.
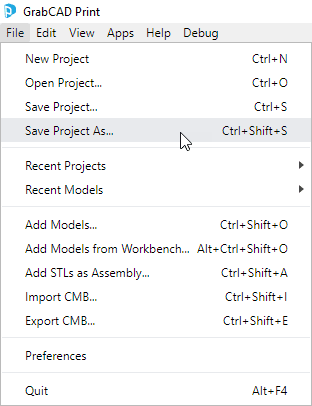
Then simply Save the Project (be sure to note the location of this file).
That’s it for GrabCAD Print! The rest of the process will be completed in Windows File Explorer.
Access The .Print File
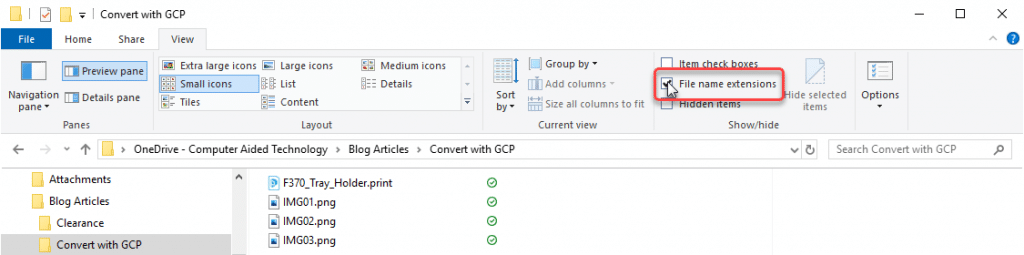
Browse to the file location in Windows File Explorer.
GrabCAD Print project files have a distinctive icon, but we’ll need to also see the file extension for this. In Windows 10, show ‘File name extensions’ from the View tab. Now you should see “.print” at the end of the filename.

Right click the file and ‘Rename’ it, simply adding “.zip” to the end.
Note: Windows will warn about changing the file extension; click ‘Yes’ to dismiss the message.
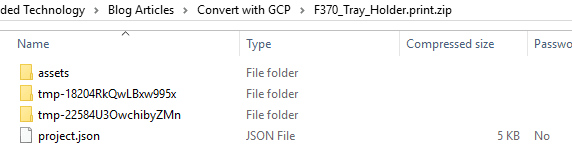
Windows is now able to open the GrabCAD Print project file as a compressed (.zip) folder.
Inside will be several files and sub-folders with cryptic names.
Here’s where it gets interesting! It turns out that GrabCAD Print can’t work natively with every supported file format, so it converts them automatically in the background to formats it can use.
Parametric models are first converted to parasolids, which are turned into high quality variable-density mesh bodies; repairs are applied to that mesh, and finally converted to STL and VRML. All of those formats are then stored within the .Print project file. And if you know what to look for, you can extract the parasolid, VRML, and STL files for use in another software.
Extract Converted Files
Dig around in the folders, and you’ll spot files with apparently random (and pretty much useless) names, some with unfamiliar extensions. To extract a file, simply copy it into a (non-compressed) folder.
In the screenshot below, I have copied several files into a single folder for clarity.
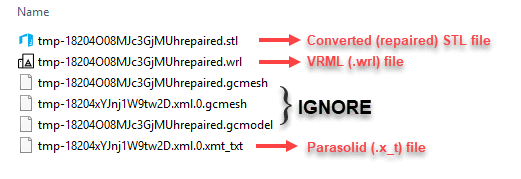
Files with the extension .XMT_TXT are parasolid versions of any parametric models (before any repairs); add the extension “.x_t” to make them usable.
Mesh files (STL, WRL) can be extracted and used as-is. Repaired versions include the suffix “repaired” in the filename, so are easy to spot. If the original model was texture-mapped (e.g., OBJ or 3MF), the resulting WRL file will be accompanied by JPEG files – those are the texture images, and will need to be copied to the same directory.
The GCMESH and GCMODEL files are only used internally by GrabCAD Print – ignore those.
Once extracted, you can rename the files as desired, except for texture images. Note: If JPEG texture must be renamed, edit the WRL file in a text editor to update the referenced filename.
There you have it – another reason to install GrabCAD Print! While I can’t guarantee that this trick will work forever, it has become my tool of choice for creating STLs. Very high quality, but smaller file size than anything else I’ve used.
The model featured in the screenshots is our F123 Tray Storage hanger, available in the GrabCAD Community.
Dan Erickson
Manufacturing Solutions Printed Parts Team Lead
Computer Aided Technology, Inc.