SOLIDWORKS: Sheet Metal Flat Pattern Info in a Bill of Material
In a recent support case, we were asked if sheet metal flat pattern info, specifically the flat pattern area, can be shown in a SOLIDWORKS drawing bill of material. After a little research it turns out that the answer is surprisingly yes and it’s not that difficult to achieve.
So, you are probably asking yourself, “Where do you start?” Well, you first start by creating a drawing of your sheet metal assembly. See Figure 1 below. Next, we will add a bill of material. Before we place the BOM into the drawing we need to make sure we select the correct style of BOM to be used. For this we are going to pick the Indented No Numbering type. See Figure 2 below.
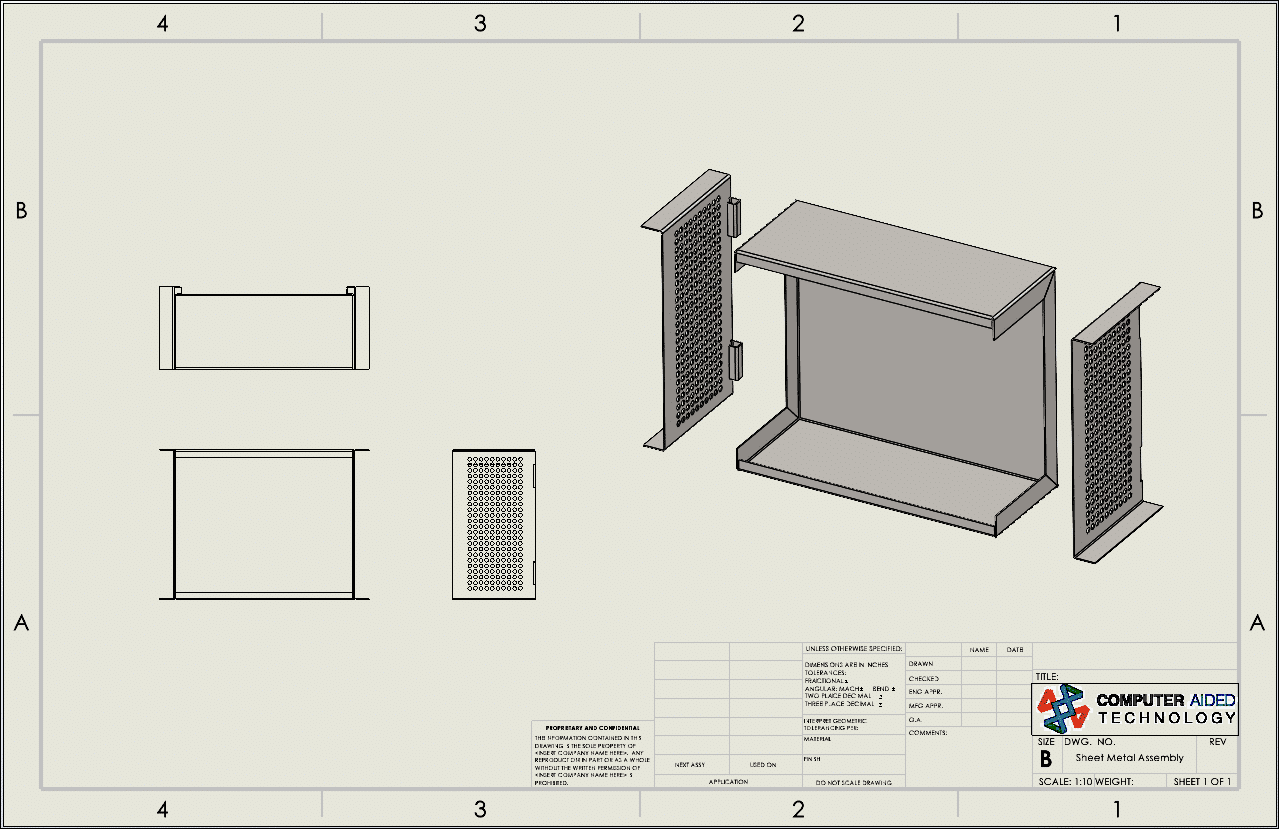
Fig. 1 Sheet Metal assembly drawing with no BOM
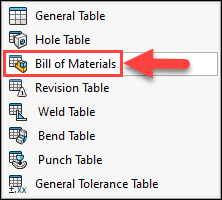
Fig. 2 BOM type
After choosing the correct type of BOM it should look something like the one shown below. See Figure 3 below. You now may be asking yourself, “Where did the flat pattern description come from?” In order to show this info you will need to open each sheet metal part file followed by right clicking on the Cut-List property icon in the feature tree and choose Properties. See Figure 4 below.
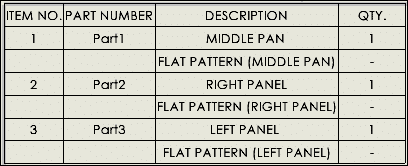
Fig. 3 BOM with Indented no numbering
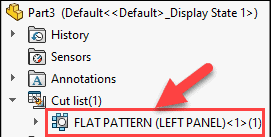
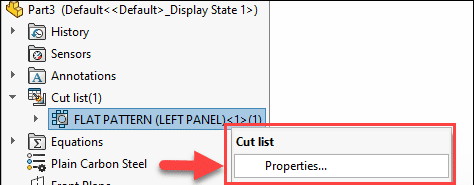
Fig. 4 Cut-List properties icon and option
In the Cut-List properties you will see three tabs. Under the Cut-List Summary tab you will see a column called Property Name. Within that column you will see the Bounding Box Area row which proves this custom property exist and is able to be shown in a BOM. You will also see a Description row which is where you go to fill in manually the name of the parts flat pattern description. See Figure 5 below.
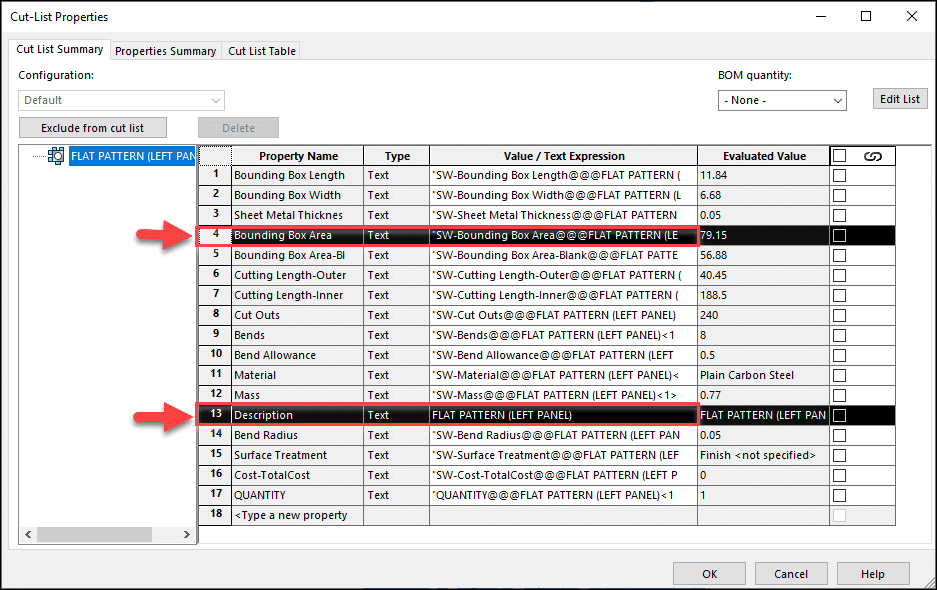
Fig. 5 Bounding Box Area and flat pattern description info
Once you have filled in the flat pattern description manually, you will then go back to the drawing that has the Indented No Numbering BOM type in it and see the flat pattern descriptions are now shown under the description column. The last thing we need to do is show the Bounding Box Area custom property column. In order to do this, you simply double click on a column in the BOM and next choose to show the custom property called Bounding Box Area. The finished drawing should look something like the drawing shown below. See Figure 6 and 7 below.
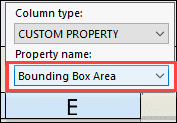
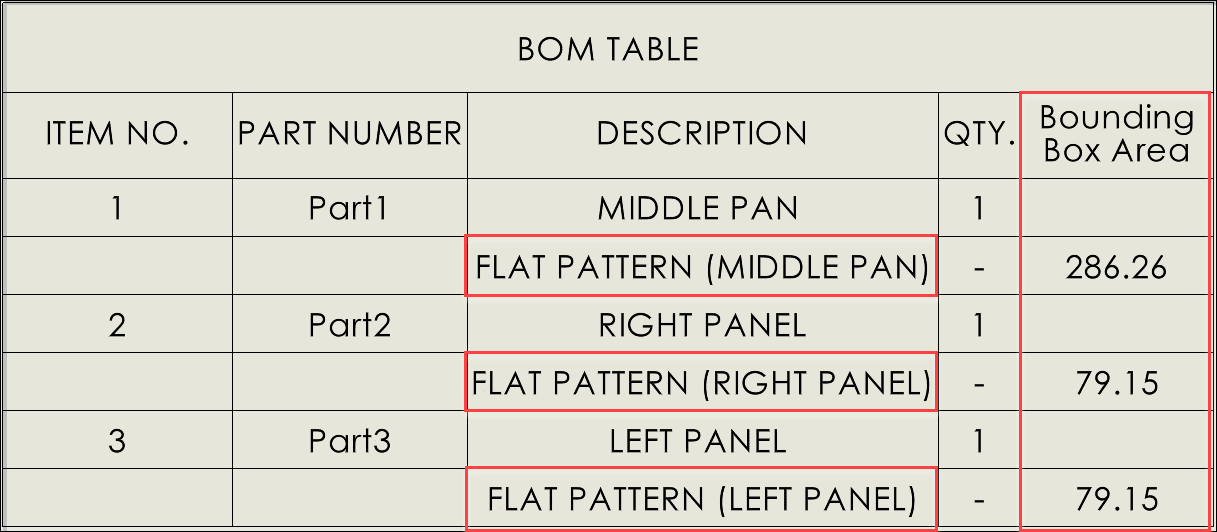
Fig. 6 Flat Pattern description and bounding box area Info
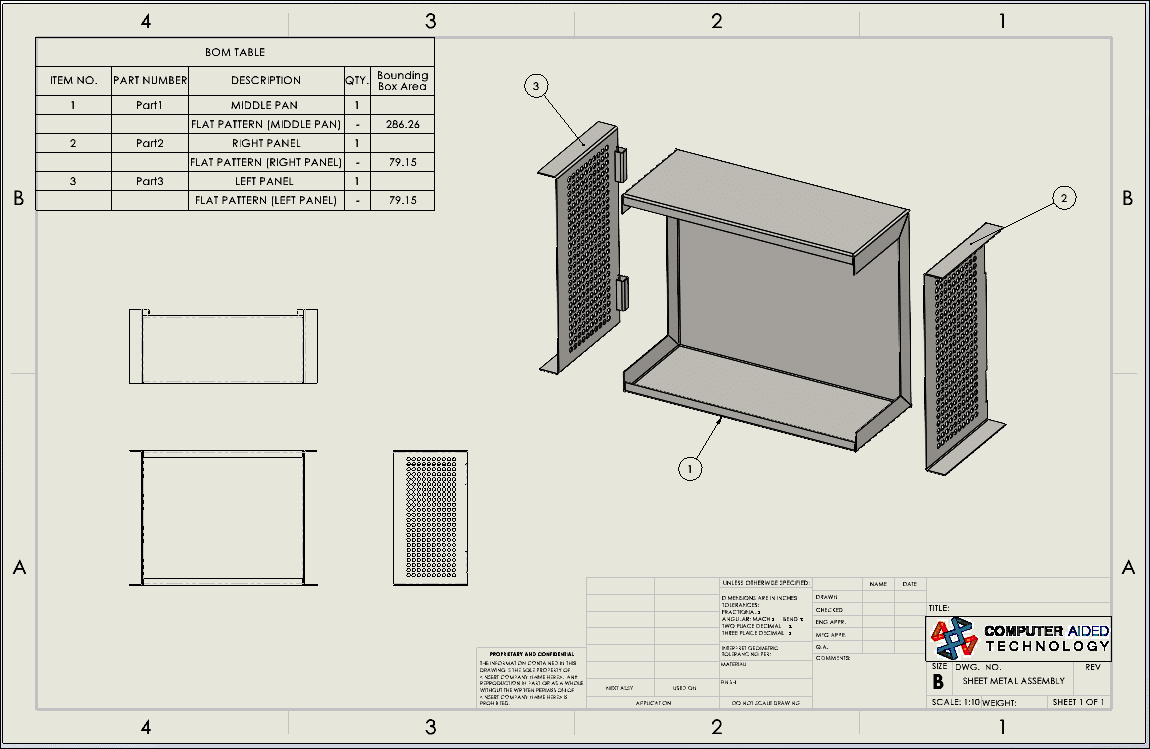
Fig. 7 Final drawing with BOM
It’s great that SOLIDWORKS gives you different ways to show specific information in the bill of material of your SOLIDWORKS drawings. SOLIDWORKS does offer a more streamlined way of populating flat pattern info into a bill of material using a Macro with specific API code written in it that could do it all in one click. If you would like to know more about how this could be done, please reach out to us here at CATI.
Nick Pusateri, CSWE
Application Engineer
Computer Aided Technology, Inc.