SOLIDWORKS Composer Detail views, round 2
My co-worker Ryan Field put together a great blog on SOLIDWORKS Composer recently. He gave several examples on how to use the Digger tool to generate Detail views in your Composer files.
After reading Ryan’s post, I got to thinking about the other methods Composer offers to generate Detail views.
Detail Views
The detail view is all about bringing emphasis to an area of your Composer files. This option exists for both High Resolution Image and the Technical Illustration Workshops and the settings are identical for each. Once you are comfortable with one type, you already know how to create the other.
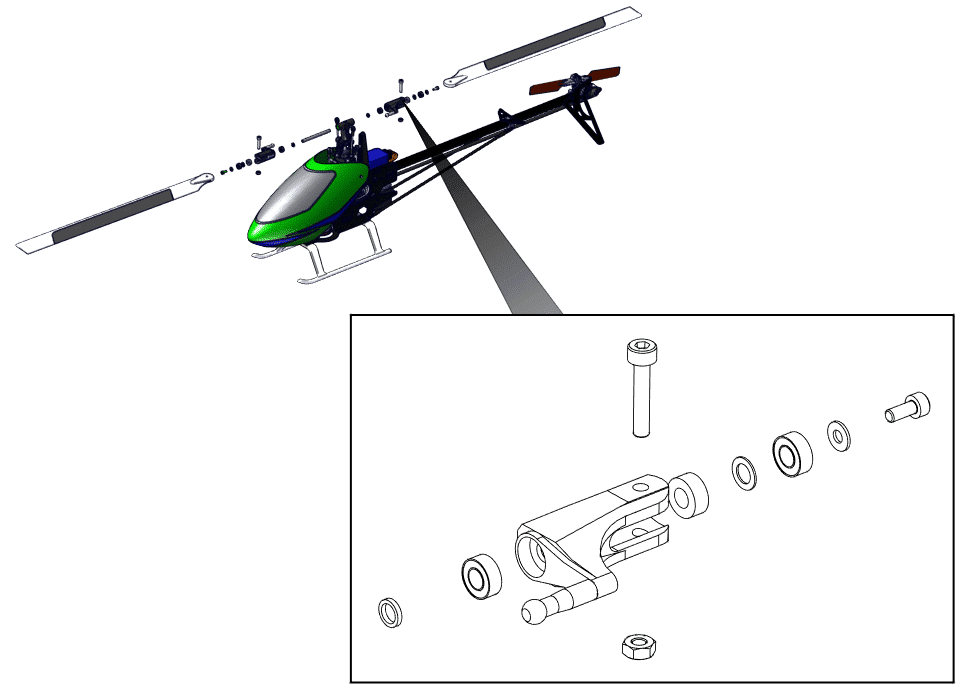
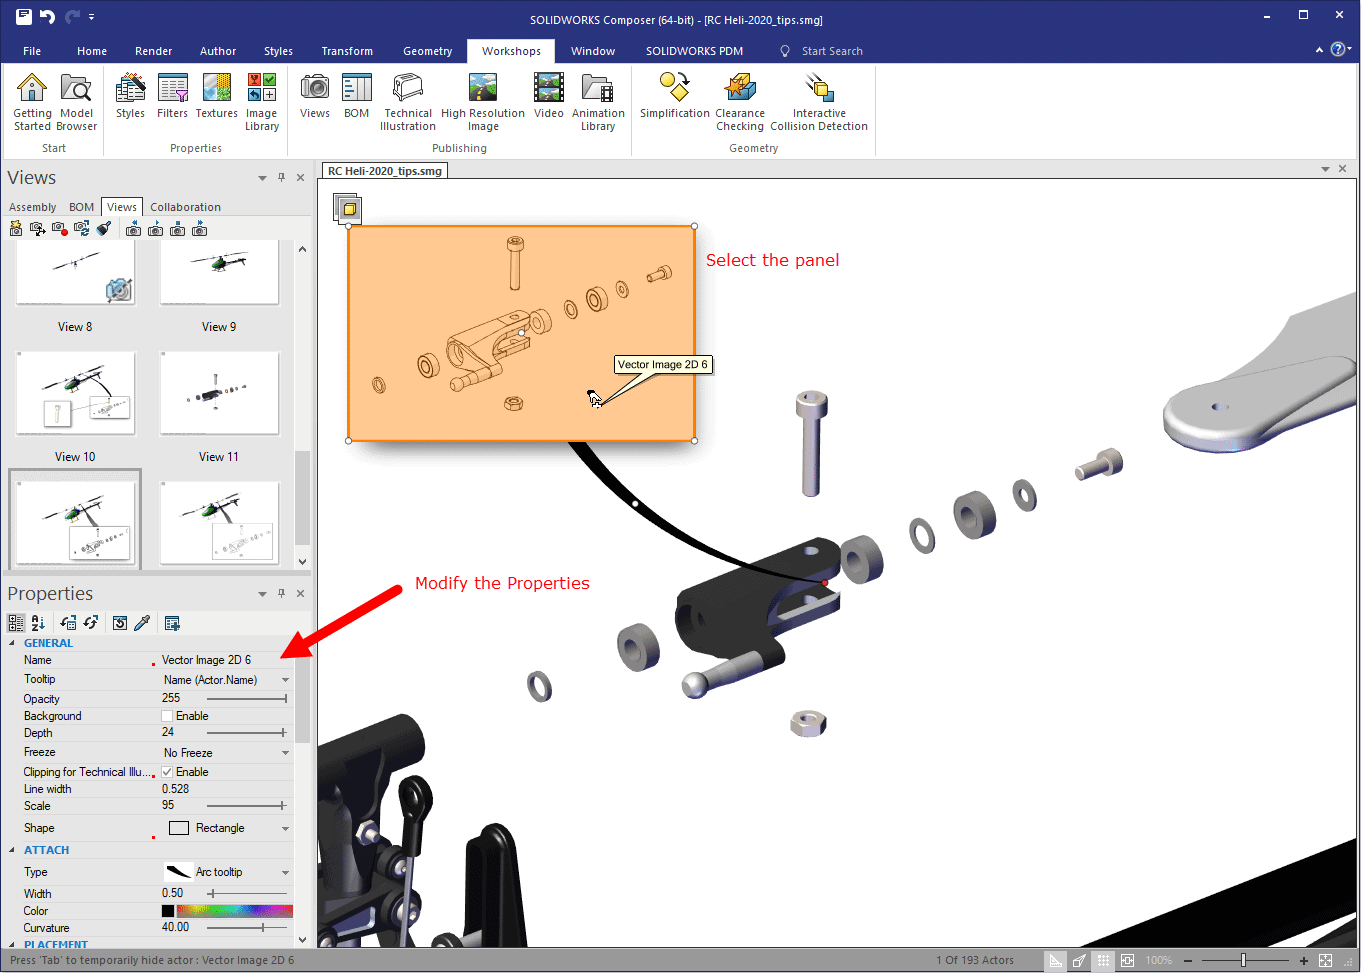
The example below is from the Technical Illustration Workshop and the resulting detail view is a vector 2D image panel. Here is an example using a vector-based detail view that clearly shows the assembly order for the blade holder components.
Creating the Detail View
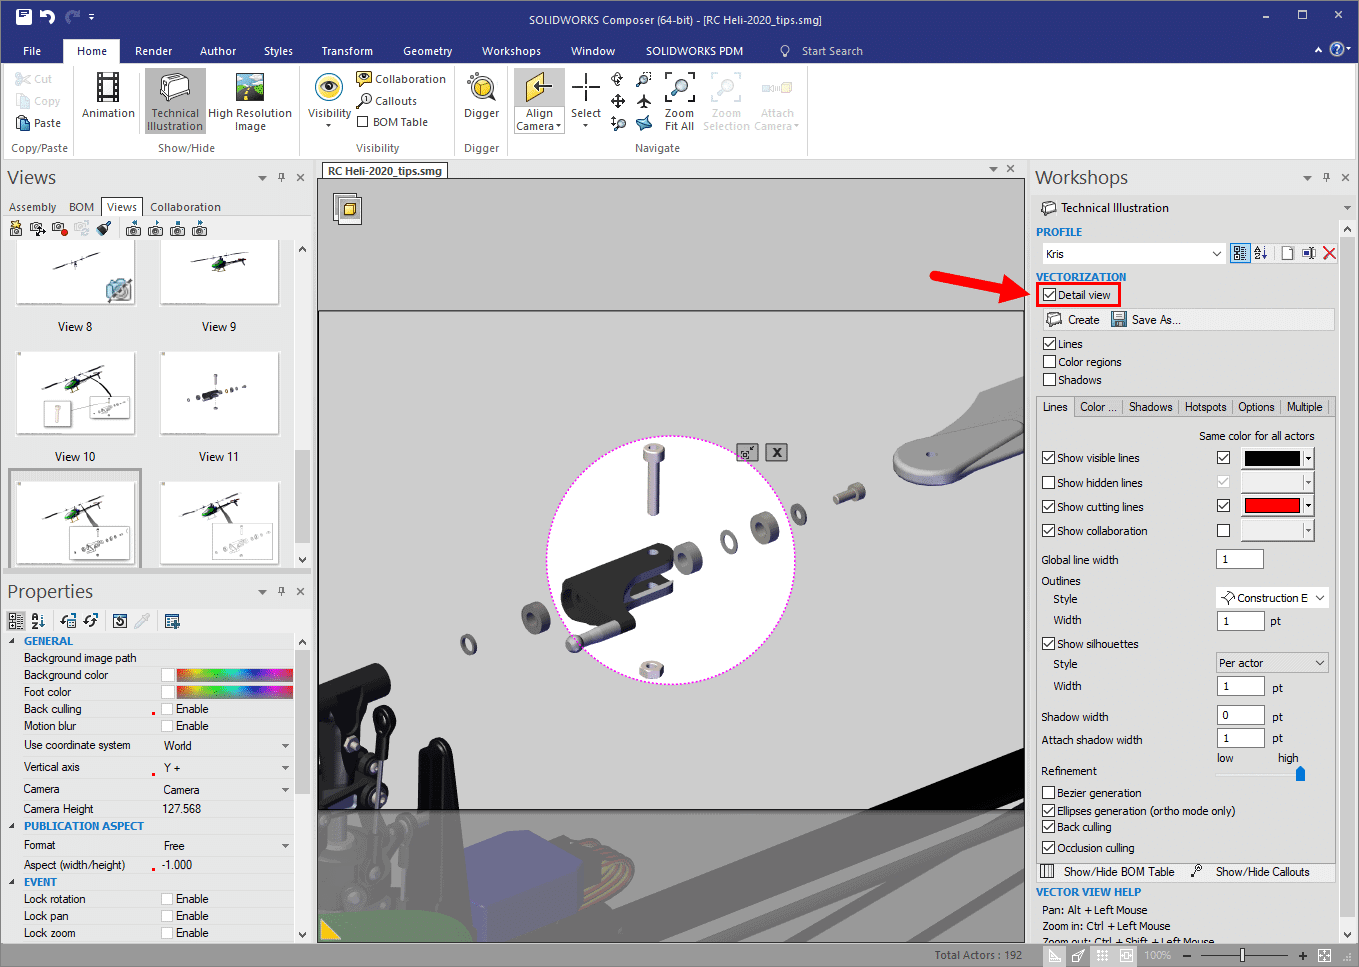
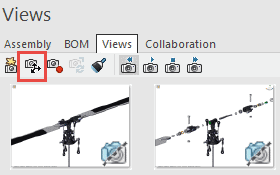
The “Detail view” option is one of those that I refer to as hiding in plain sight. It is a simple check box to enable this functionality within the desired Workshop. Hopefully, I have successfully pointed it out. Once selected, you can see the graphics window “goes grey” and there is a magenta dashed circle in the center. All visible components and collaborative actors within the circle are what the detail view captures.
The detail view is easily modified dragging the grips to resize the circle and the circle itself to adjust the position. Click to play the video.
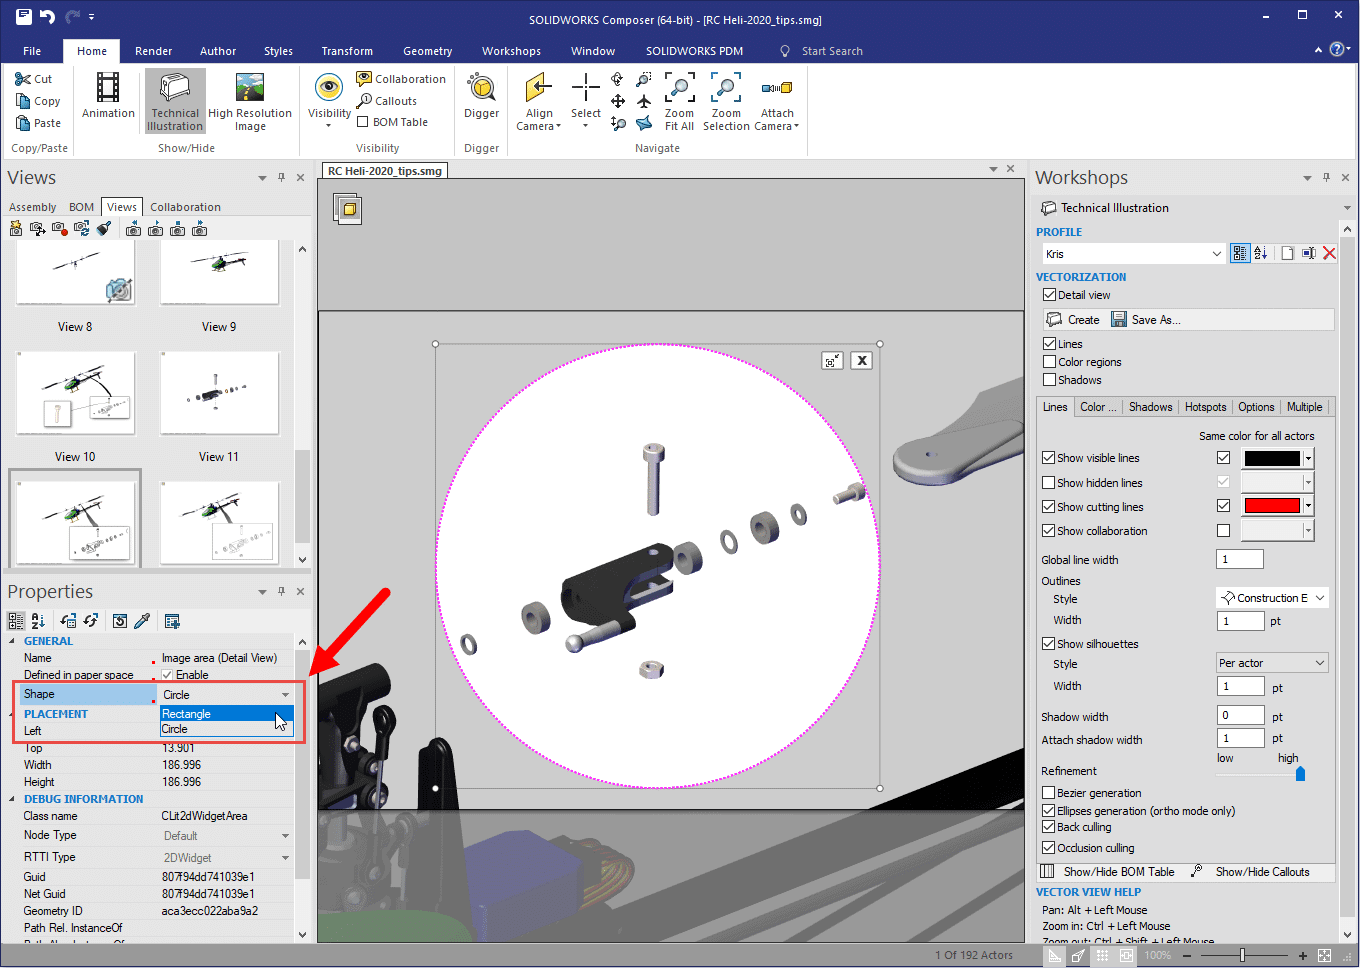
If a detail circle is not what you need, select the detail view, and change the Shape to a rectangle in the Properties Pane on the left.
Like the detail circle, the rectangle is easily modified by dragging the corners. Click to play the video.
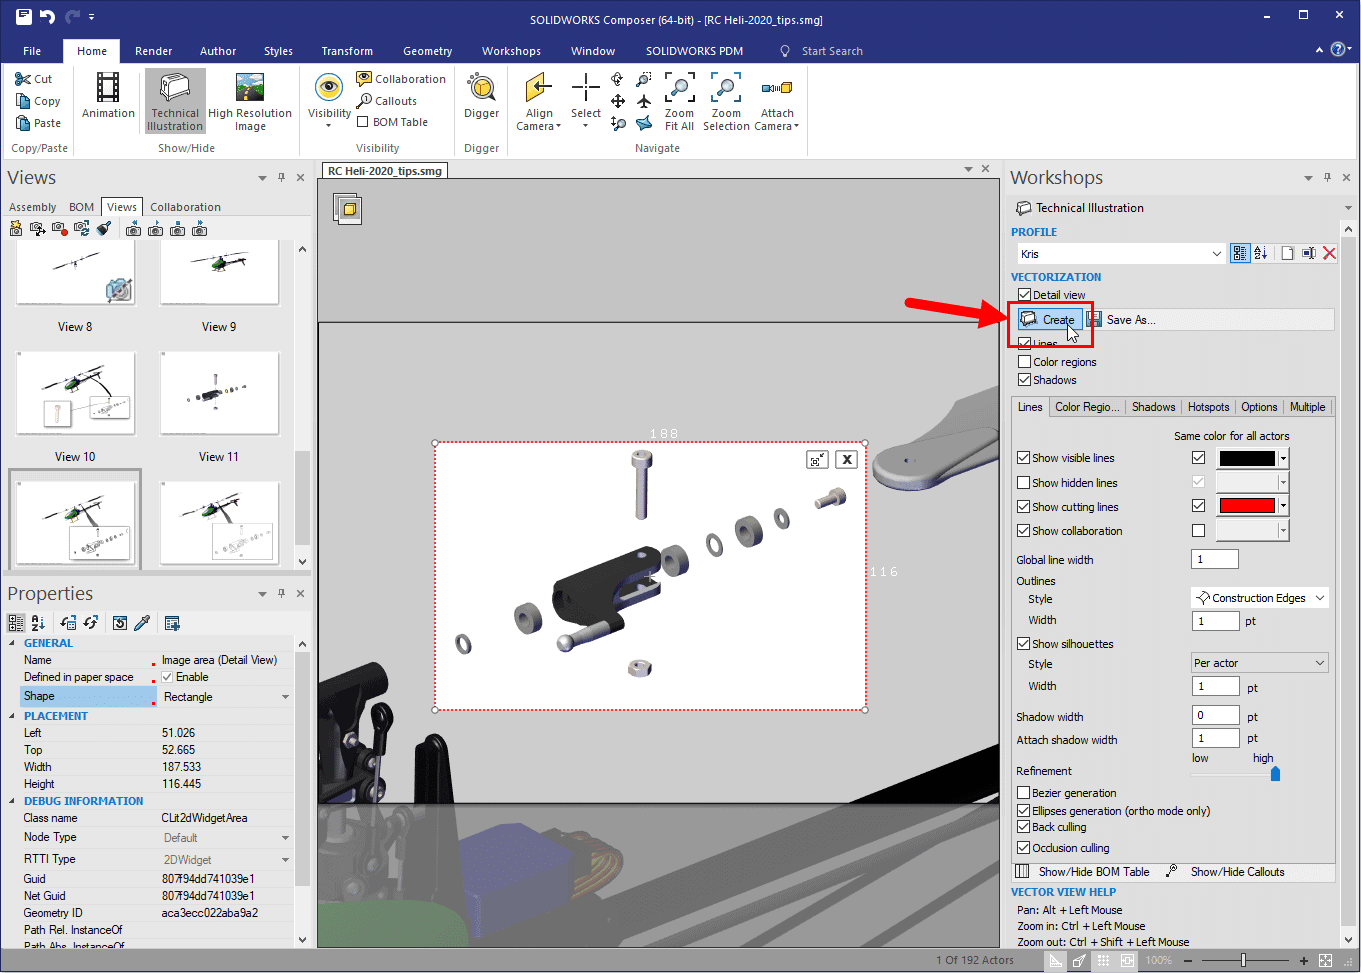
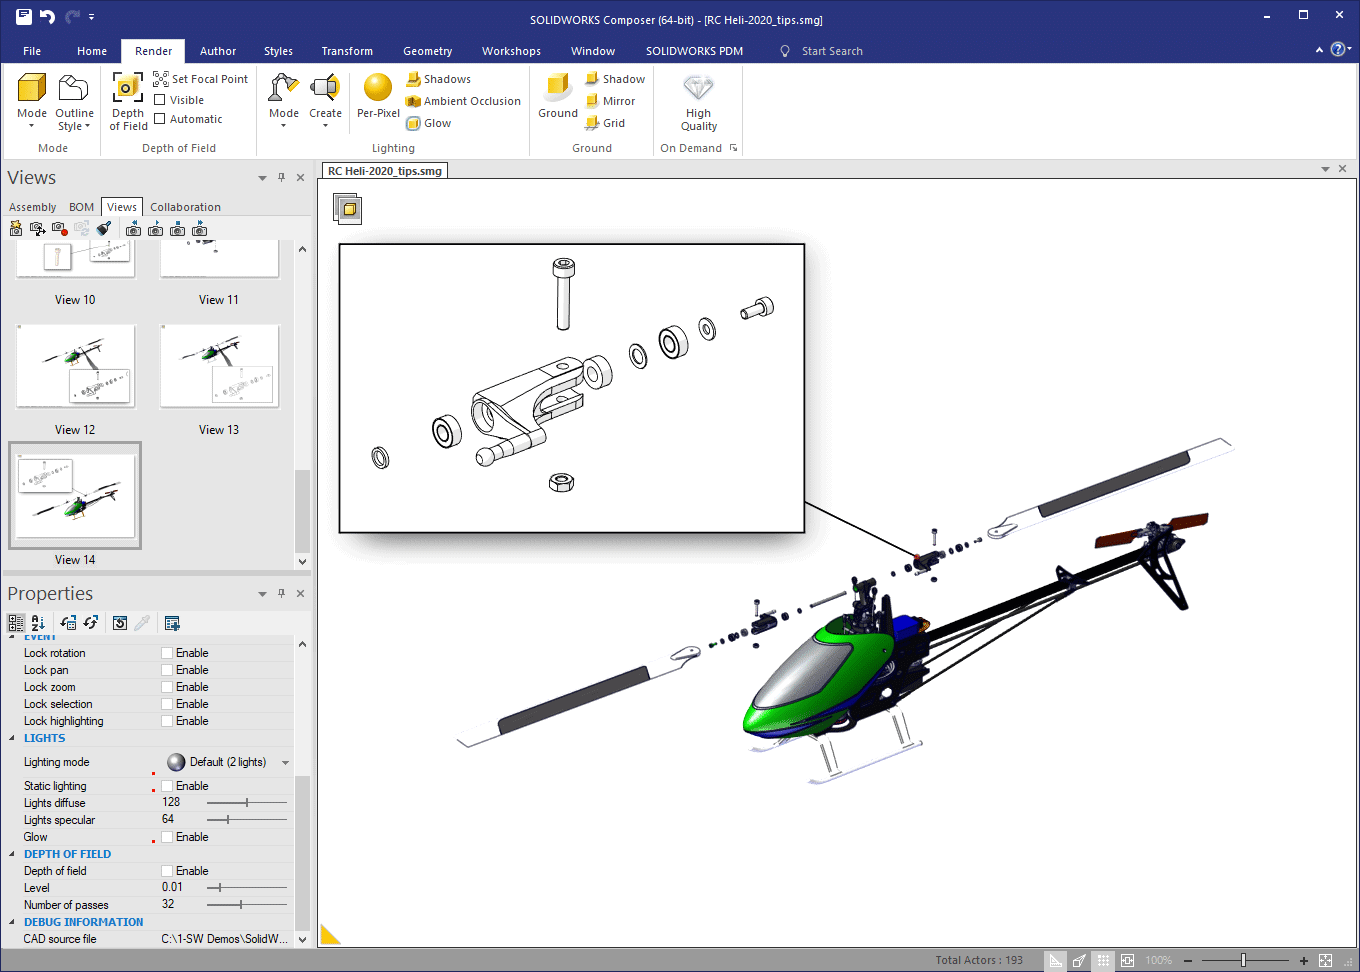
When satisfied with the “preview” within the shape, select Create and the detail view is added. The detail view is still enabled to create multiple views, deselect the option or close the Workshop pane.
Finishing the View
Upon closing the Workshop panel, you will have a 2D panel (image or vector) with an attachment to the center of the preview area. This panel can be moved, resized, hidden, or shown in other Standard Views. Like all collaborative actors, its properties are available to modify. I suggest experimenting will all the possible settings to find a combination that works for you.
Before saving, or updating a Standard View, adjust the camera orientation and the detail view to capture exactly what you need.
Tips
The Composer Detail View is WYSIWYG and getting the “right” detail view is all about getting the graphics window set up. What I mean is take some time exploding components, hiding unnecessary components and collaborative actors, and getting the Camera orientation set correctly. Anything that is visible in the detail view preview region will be captured in the finished view.
You will likely find that you need adjust the model and view orientation in a way that is not useful for the saved Standard view. Because of this, I find using Camera Views very helpful by saving multiple camera orientations to quickly jump back and forth between.
I hope that this shows you what you can do with the detail view option and gives you what you need to give it a try. Thank you for reading.
Kris Dubuque
Application Engineer Manager
Computer Aided Technology, Inc.