Adding Custom Details to Balloons in SOLIDWORKS Drawings
The more detailed we can make our drawings, the less likely we are to have incorrect parts or assemblies created.
In this blog, we will discuss how to:
1) Easily add the Quantity of each ballooned part to its respective balloon
2) Override this “Quantity” to type any text we wish next to the balloon.
3) Grouping other custom properties of the part with the balloon.
Adding Quantity to SOLIDWORKS Balloon:
To add the quantity of a part to a balloon, select the balloon(s) that you wish to add this quantity to and check on the Quantity option in the Balloon Property Manager.
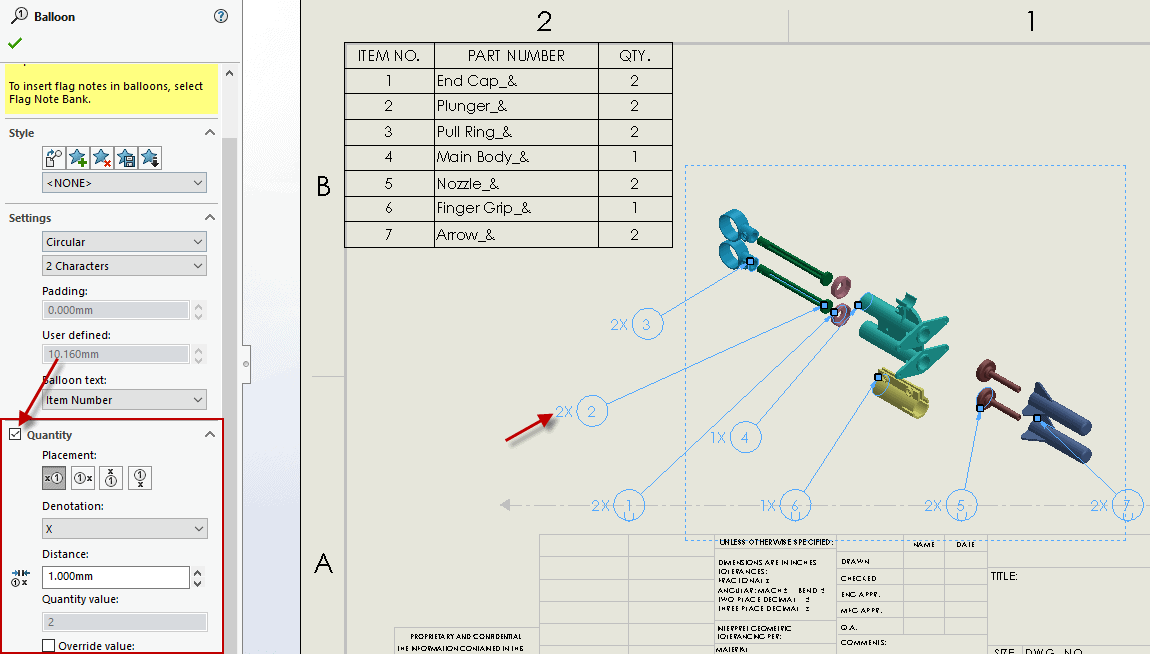
Then you can choose the Placement of the Quantity, relative to each balloon, and its Denotation.
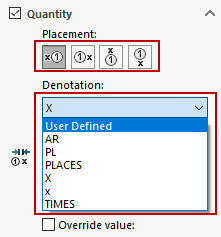
Overriding Value to Add Custom Text By Balloon:
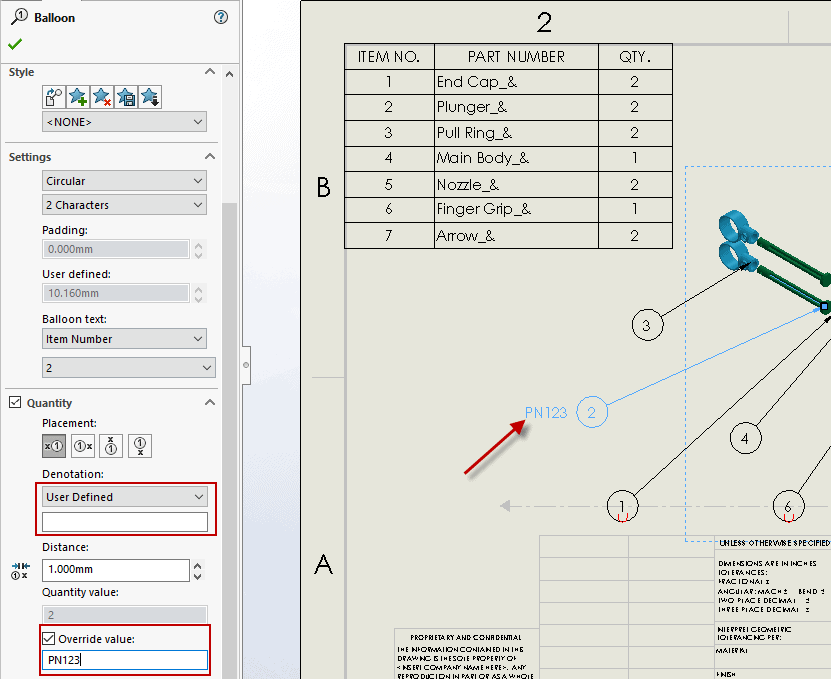
You can also “Override value” if you prefer to manually add in your own text. Be sure that Denotation is set to User Defined and is blank and that Override value is checked on before typing your custom text in the box.
NOTE: adding custom text here is not linking the text to any custom property and will not update unless you manually update it. See below, where I entered a custom note for the part number of the green plunger part:
Grouping Linked Custom Properties in Note to a Balloon:
This third method allows us to Group the balloon to a note that has been linked to a custom property. This will make sure that the note updates if the custom property of the file updates.
First, make sure the custom property you are linking to the note is set in the Custom Properties of the part file.

Next, link the note to the custom property in the drawing by creating a new Note, clicking to place it within the drawing view that includes the balloon, and choosing Link to Property.
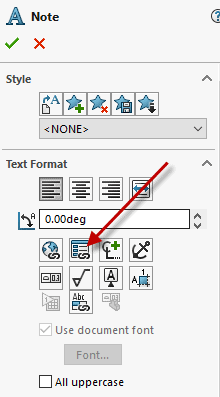
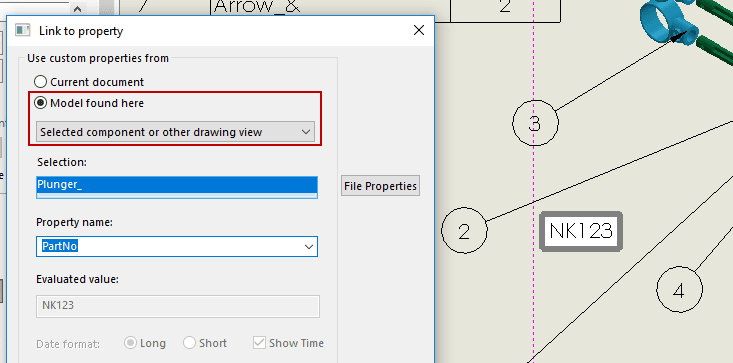
In the “Link to Property” window, choose “Model found here” and “selected component or other drawing view” and select the component from the graphics area. Then, choose the Property name.
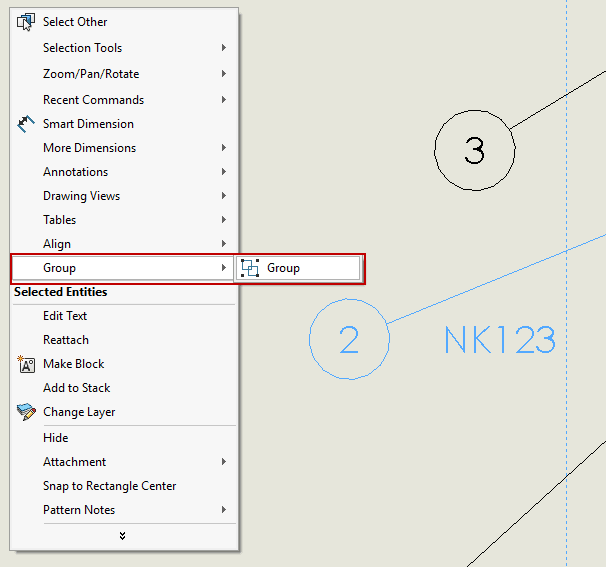
Finally, once our note has been linked to the custom property of our choice and we have moved the note to the position close to the balloon, we can group the two so that they move together. To do this, pre-select the note and the balloon, right click, and select “Group” to keep these two annotations connected.
NOTE: It is important to make sure the note that you originally placed is WITHIN the drawing view; otherwise, you will not be able to use the Group command.
Nicole Kelley
Support Engineer
Computer Aided Technology, LLC

 Blog
Blog