Create NFTs with SOLIDWORKS Visualize
Non-fungible tokens (NFTs) have become a huge market online. Being able to own a unique piece of digital media has driven some investors and collectors to spend hundreds, thousands, even hundreds of thousands on NFTs. One New York Times journalist sold a PICTURE of his FREE TO READ article for over $500,000… SO If you’re anything like me, you may have seen a few of these online “masterpieces”, often 3D models, and thought to yourself… “I could make one of those”. Well, I am here to tell you, that’s true with the help of SOLIDWORKS Visualize. Let’s jump in and see how we could create an NFT with SOLIDWORKS Visualize.
If you just want to see The Essential Steps, skip to the bottom of this article.
The Set Up
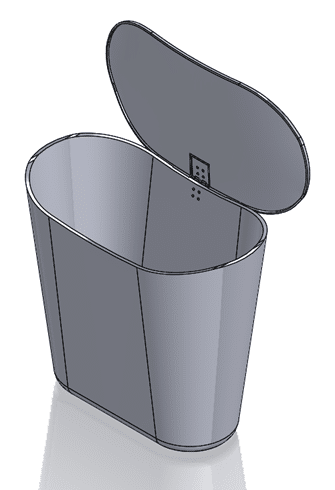
Now, personally, I don’t have a very keen eye for art. Most of my art projects end up in the dust bin… so I thought, “Why not make the dust bin my art?”. You can see below the beautiful bin I have created in SOLIDWORKS, complete with a lid! This is the model I will eventually make into an NFT.
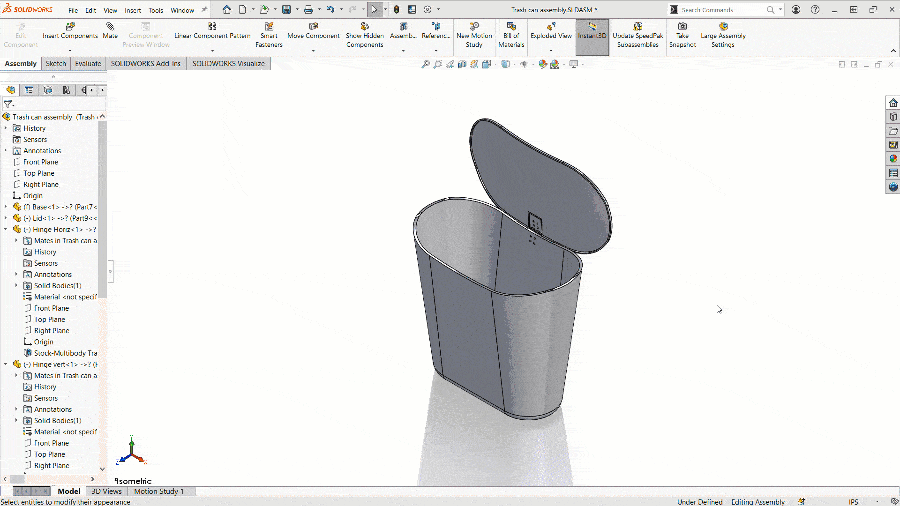
Before I take this model into Visualize, I am going to add appearances to the part. These appearances will stay shown when we export the assembly into Visualize. If you need a refresher on how to add appearances, check out this blog.
NFTs can be made from audio files, videos, pictures and, probably most popularly, 3D model art. BUT, to create an NFT from our SOLIDWORKS model (.sldprt or .sldasm) we first need to convert the model to one of the below file types.

SOLIDWORKS itself CAN’T export models to any of these file types. Luckily, SOLIDWORKS Visualize CAN export to a .glb or .gltf file. Visualize comes with SOLIDWORKS Professional or Premium, so this tool may already be available to you even if you have not used it before.
The Export
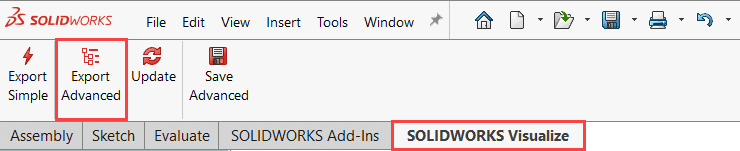
To start with, lets export our model to Visualize. This is done by turning on the Visualize add in (Tools>Add-Ins>Visualize) and using the Export Advanced command from the SOLIDWORKS Visualize CommandManager Tab (see below).
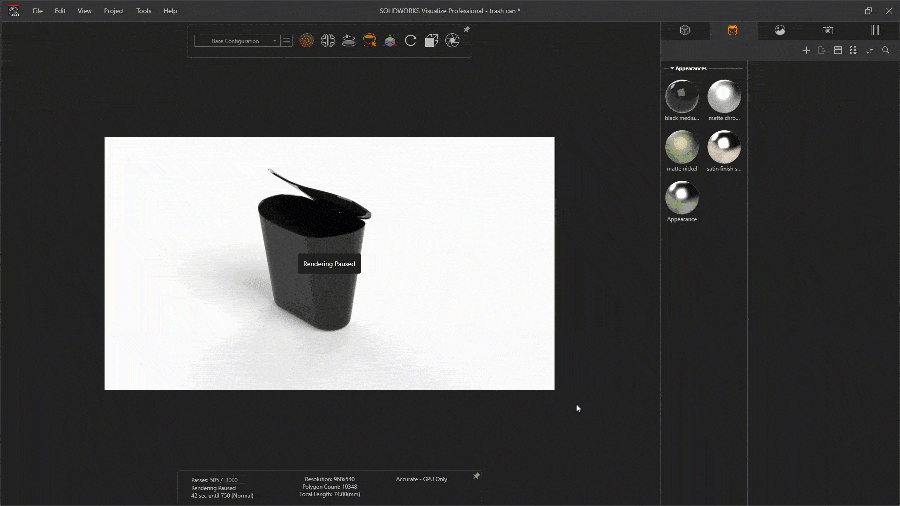
This will open Visualize and import our model. Notice all the appearances that were applied in SOLIDWORKS are still visible in Visualize. You can change appearances in Visualize as well, but this can looks good as is!
From here all we need to do is go to File>Export>Export Project and save the file as a .glb or .gltf file type. You can view your new file using Windows 3D Viewer.
Once we have that .glb file, all that’s left is to create the NFT. There are multiple sites that you can use to do this.
The Essential Steps
In short, the steps to create an NFT with SOLIDWORKS Visualize are:
- Create SOLIDWORKS model
- Apply appearances
- Activate Visualize Add-In
- Export model to Visualize
- Export Visualize project>Save as .glb/.gltf
- Create NFT on website of your choice
The Short Cut
SOLIDWORKS has an Extended Reality exporter tool in beta mode as of 2021. With the XR exporter you can export SOLIDWORKS models directly to .glb or .gltf files. Download and install the SW XR exporter from the downloads page of the customer portal. Once installed, the Save As command in SW will allow you to save as a .glb/.gltf without the intermediary steps of Visualize.
Have fun creating your own masterpiece collection with SOLIDWORKS!
Hey, maybe I should take a picture of this article…