Draftsight Highlights - Easily draw "Isometric Views" within Draftsight
Draftsight Highlights – Easily draw “Isometric Views” within Draftsight
Draftsight is a 2D CAD program, but that doesn’t mean you can’t create an isometric view. If you are in the process of creating a Draftsight drawing – and need to create a quick isometric view – you can follow the process below:
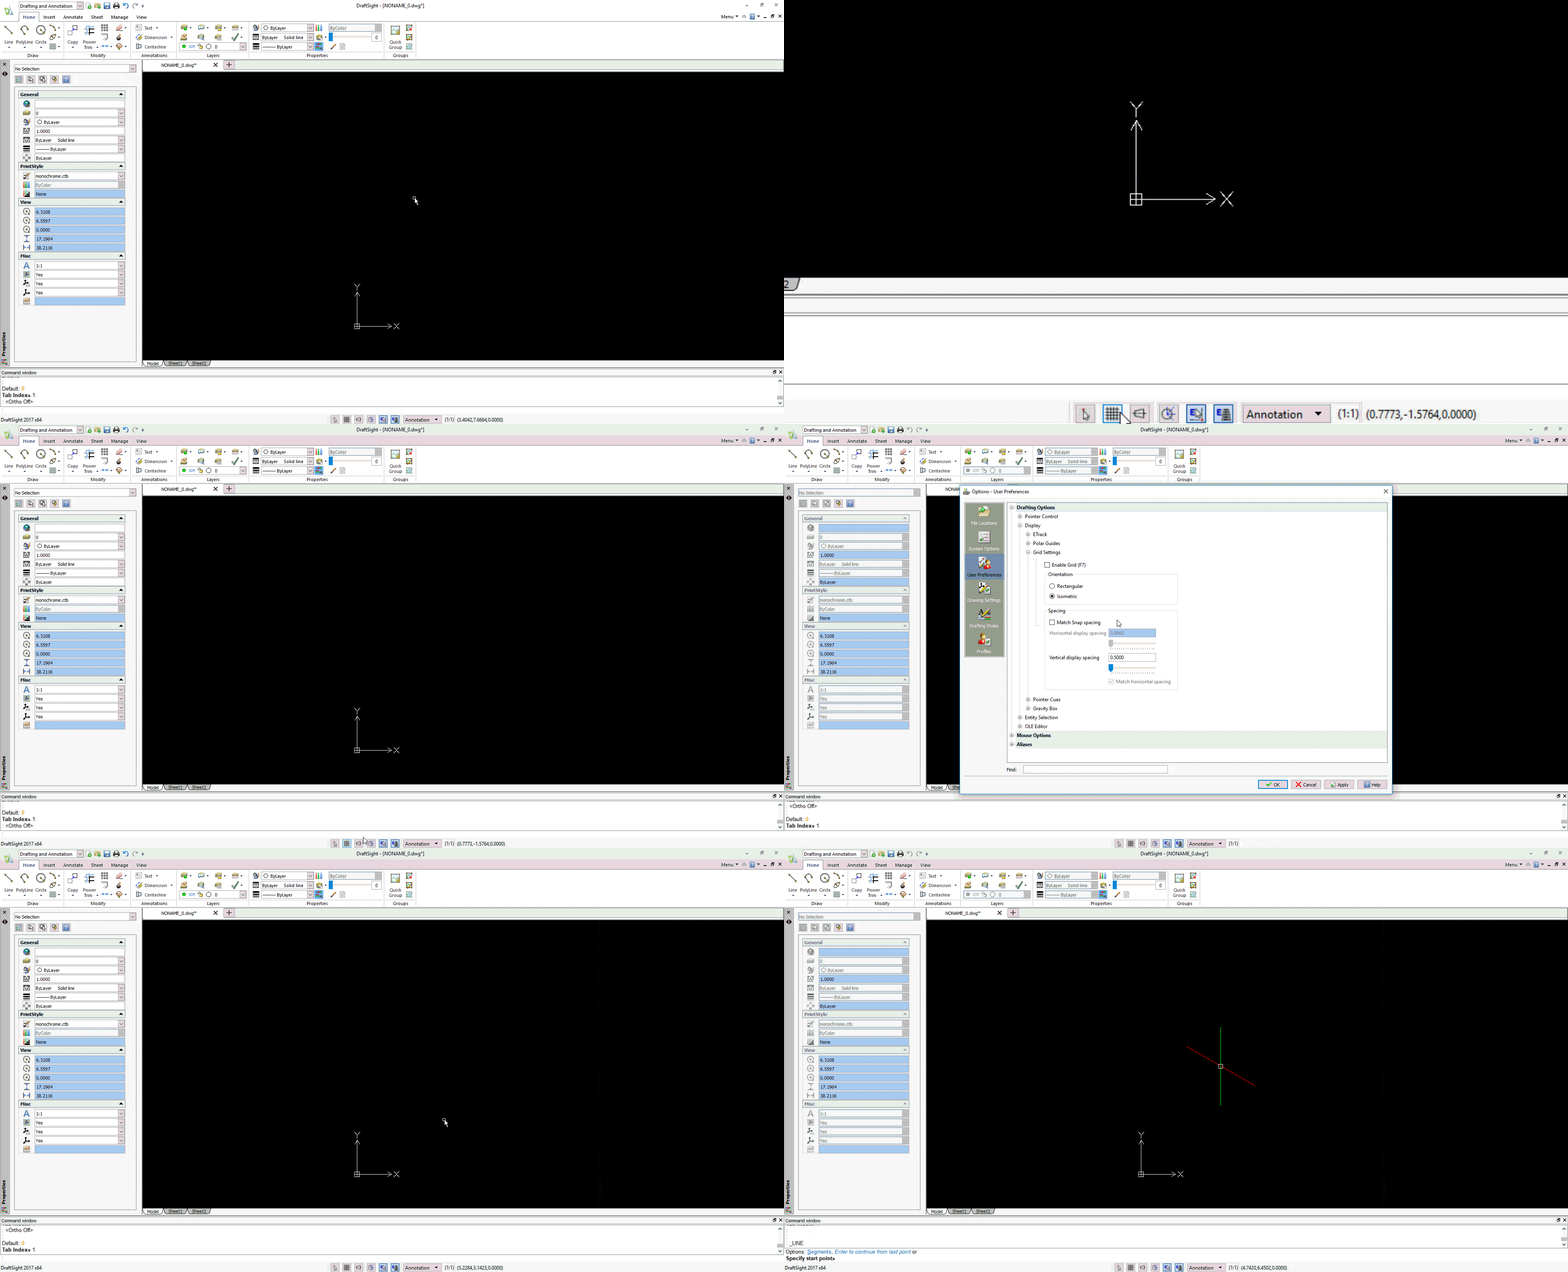
Step 1: Switch your grid settings to Isometric. (RMB on the Grid icon on the bottom, hit Settings, then hit the Isometric radio button under “Orientation”.)
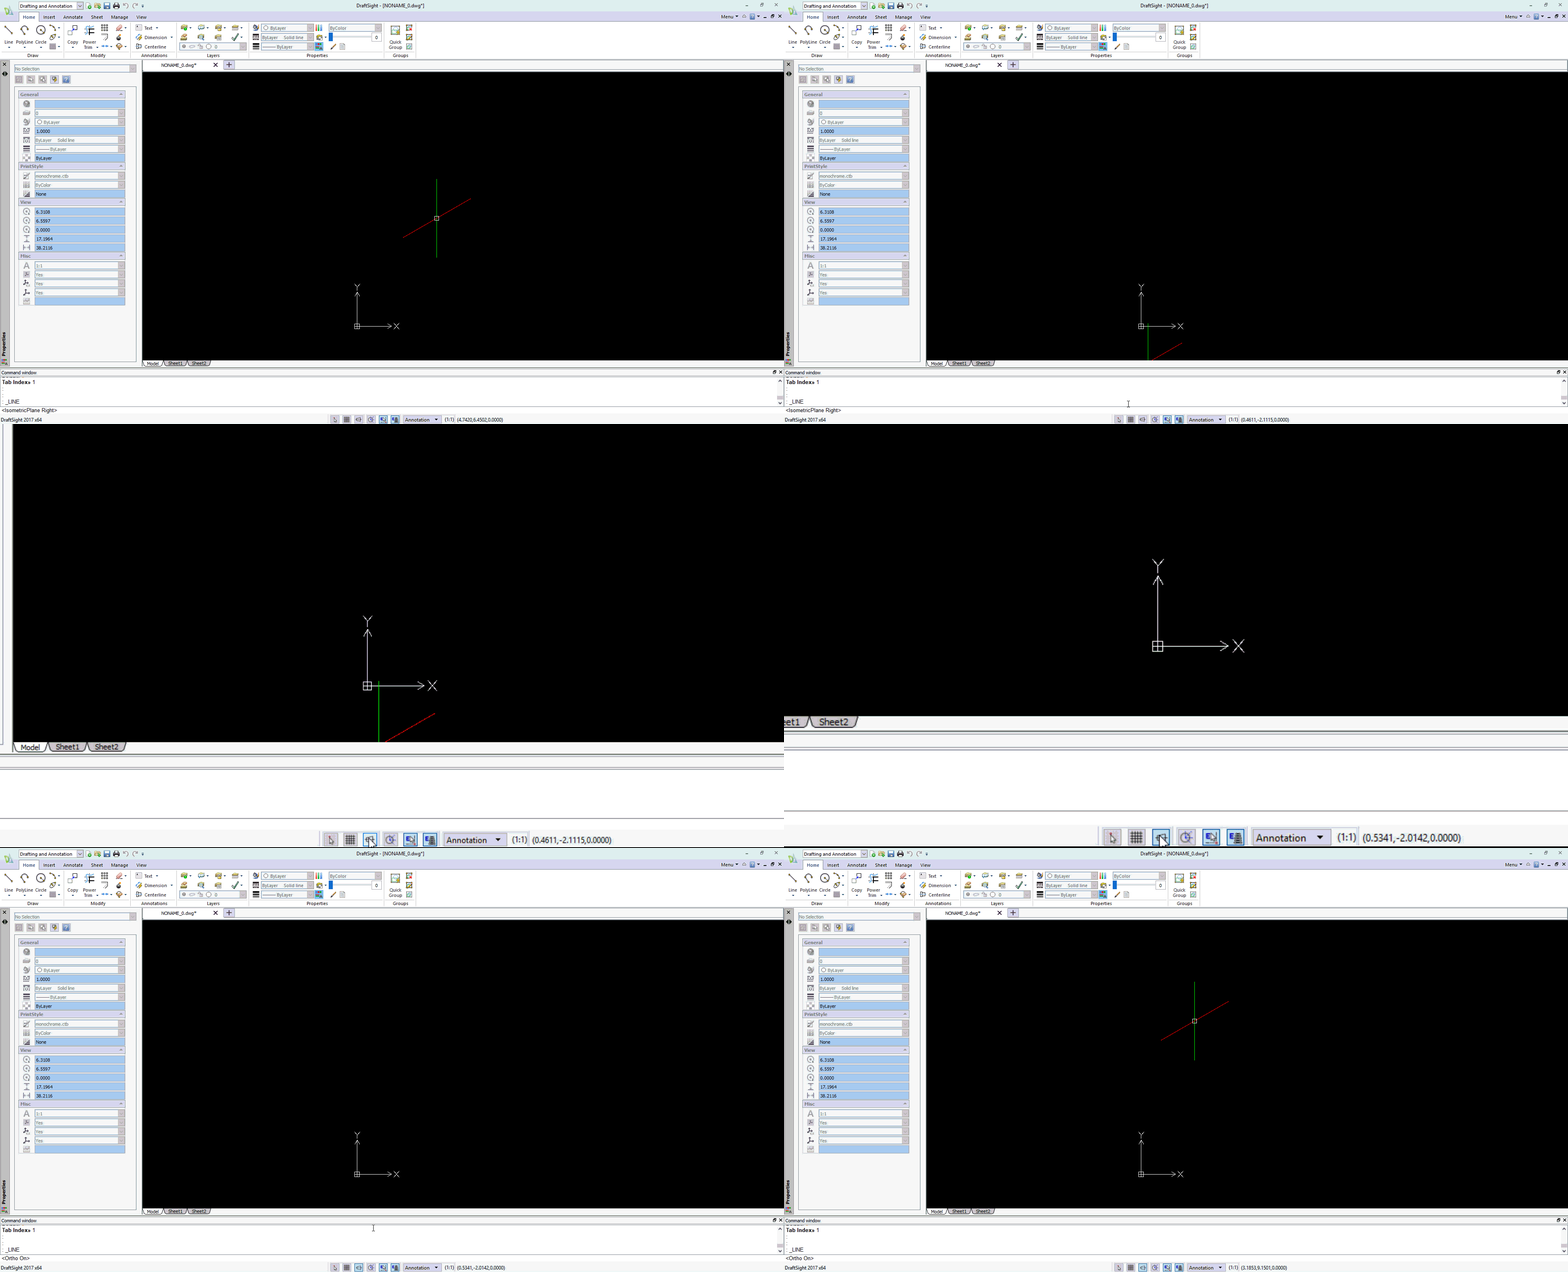
Step 2: Turn on Ortho Snapping (Select the “Ortho” button on the bottom)
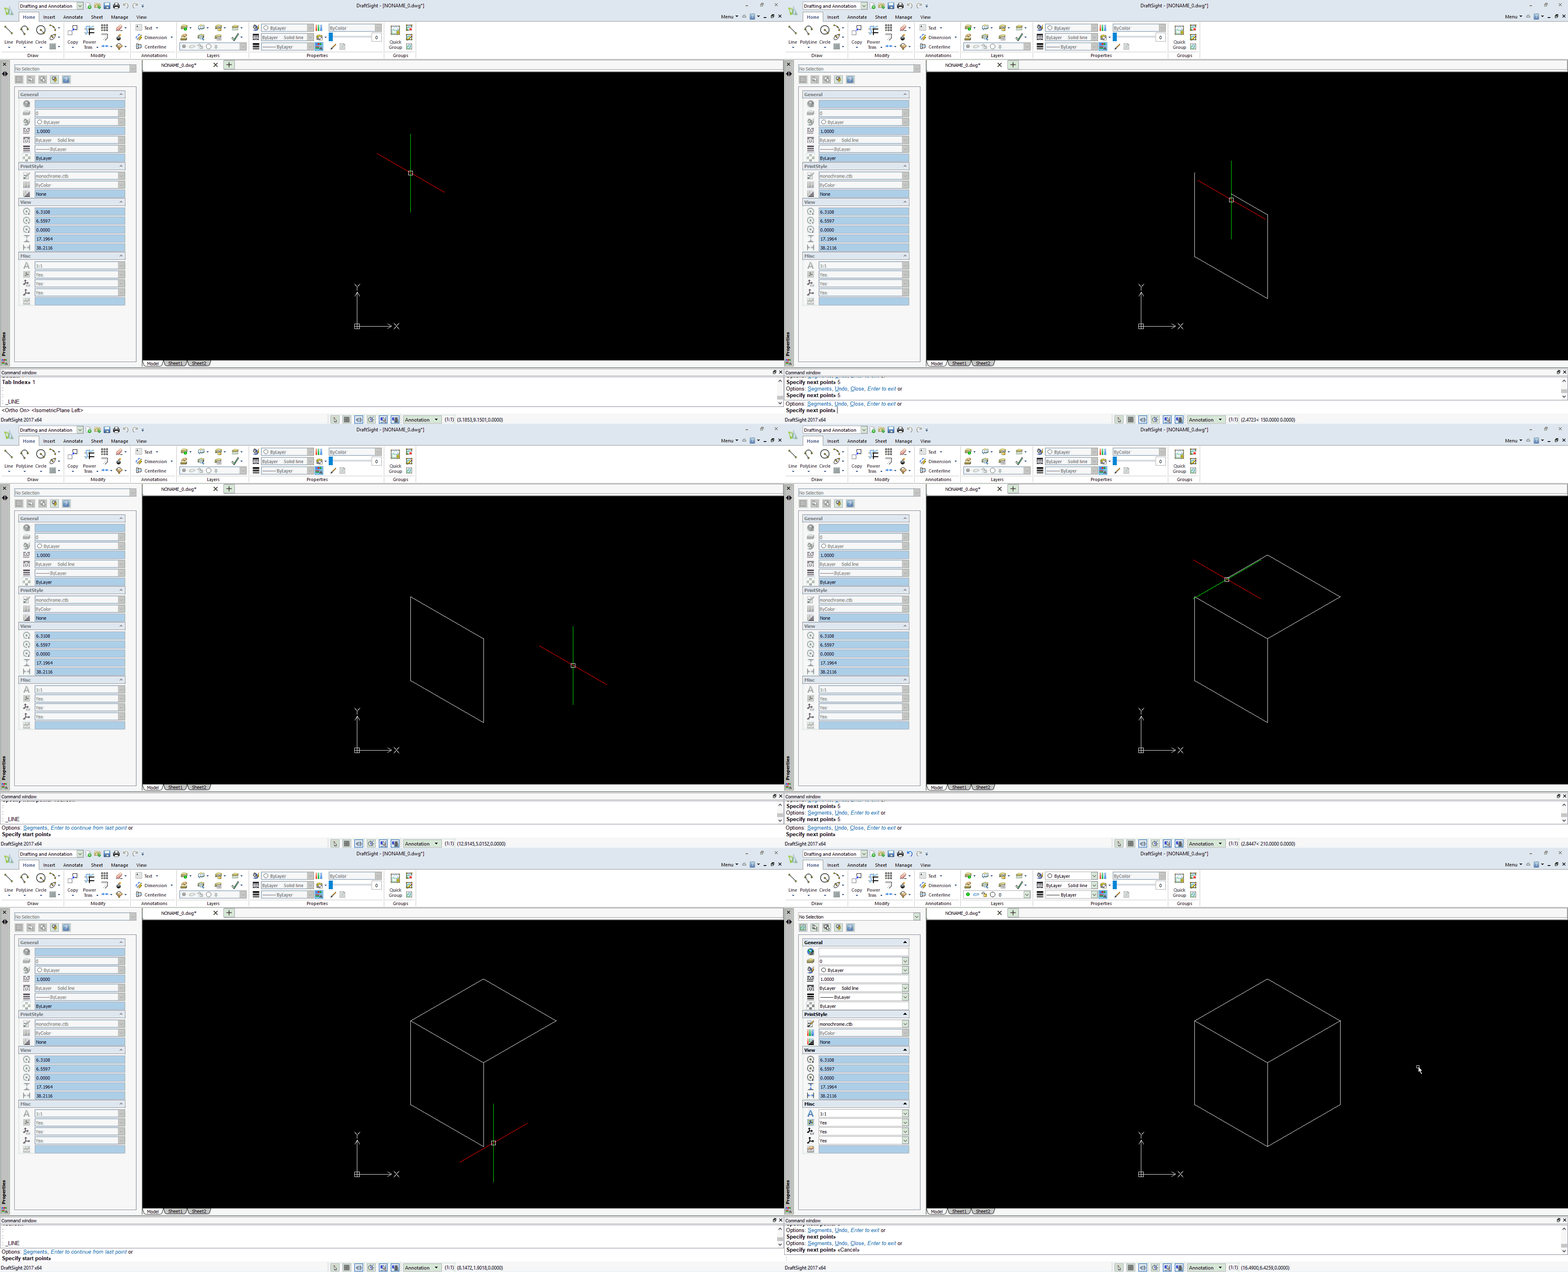
Step 3: Draw! Switching “planes” is as easy as hitting the F5 button on your keyboard. For the cube below, it’s just takes switching between 3 easily accessible “planes”.
Traditionally, I was always taught to sketch isometric views in other 2D CAD programs by calculating the angles and drawing extension lines from the 2D profiles. This process eliminates that slow tedious work by changing your sketch orientation to Isometric, and snapping to the normal angles you’d need and expect is super easy by activating the Ortho snap settings.
Have any questions? Let us know! Learn more about Draftsight.
Justin Maxwell
Application Support Engineer
Computer Aided Technology

 Blog
Blog 

