Effective Usage of the SOLIDWORKS PDM File Version Upgrade Tool
 So you’ve recently upgraded to SOLIDWORKS PDM but now all of your assemblies are taking forever to open. Why? Isn’t a new version supposed to be better and faster? Well, you’ve upgraded the software version, but not the SOLIDWORKS files. Every time you open models in SOLIDWORKS they will need to be converted to the newest version. This can be especially frustrating if they’re released files, so you can’t just check them out, update, and check them back in. Now every time you open the same file, it’s upgrading and therefore taking much longer. Fear not! There is a solution called the File Version Upgrade tool. It is important to plan and run the tool responsibly. That’s where this blog comes in. Let’s get started.
How to install the File Version Upgrade tool
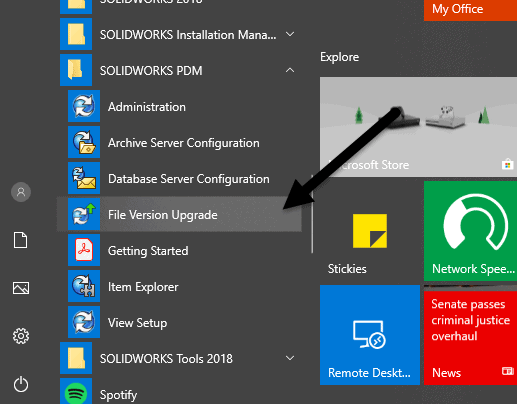
First, you need to install. The installation files can be found in your SOLIDWORKS DVD/Download at /SWPDMClientSupportFile Version UpgradeFile Version Upgrade.exe. Double click the .exe to install. Once complete, it will show in your start menu under SOLIDWORKS PDM. Click to run it.
How to run the File Version Upgrade Tool
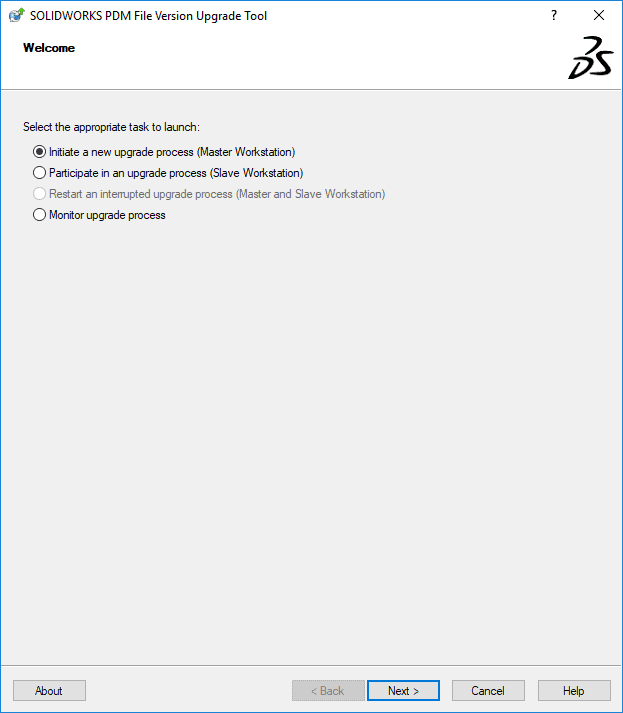
On the initial screen, select the option to “Initiate a new upgrade process” and click Next>.
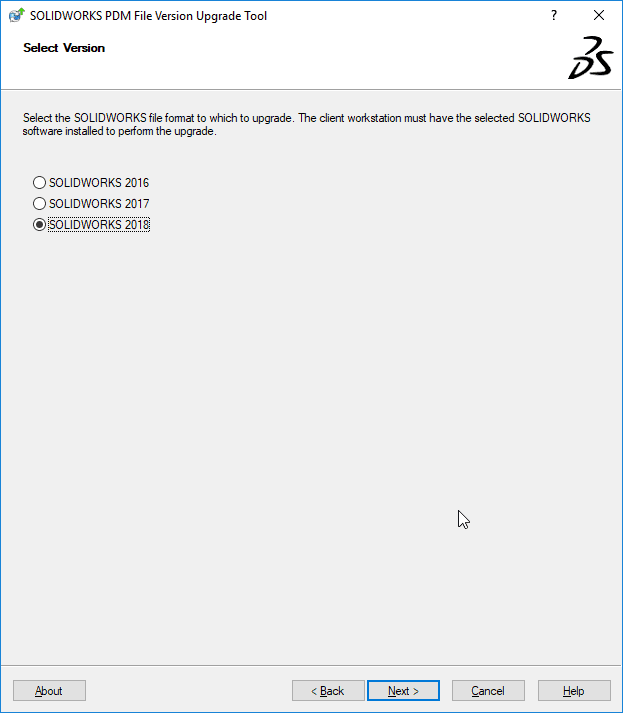
On the Select Version screen, select the version of SOLIDWORKS you would like to use for the upgrade and click Next>.
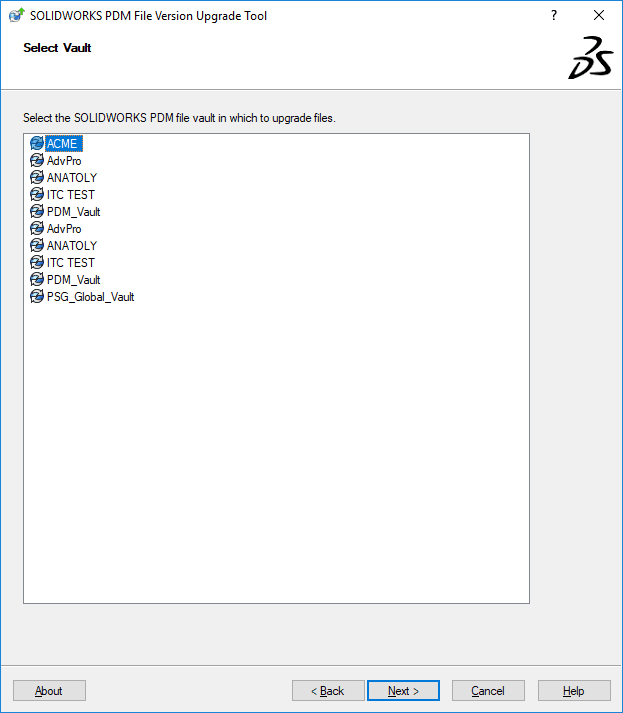
On the Select Vault screen, select your vault and click Next>. (You may be prompted to log in).
On the Search Files to Upgrade screen, you can input conditions for only certain states, file locations, file types, or files with certain variable values. If you don’t want to filter the files chosen for the upgrade, leave it all at the defaults. When ready, click Next>.

The next screen shows you a list of files that met the conditions of your filters. Here you can uncheck files individually if needed. Click Next> when ready.

The Version Settings screen is extraordinarily important to the success of the version upgrade. When upgrading, you need to choose to either create a new version of the file (recommended) or overwrite the existing version.
Overwriting the existing version will save space in the archive, but ultimately could cause issues if the upgrade was to fail. If you create a new version, you need to decide what to do with revisions and files referencing older versions of subcomponents. The recommended settings are shown below.
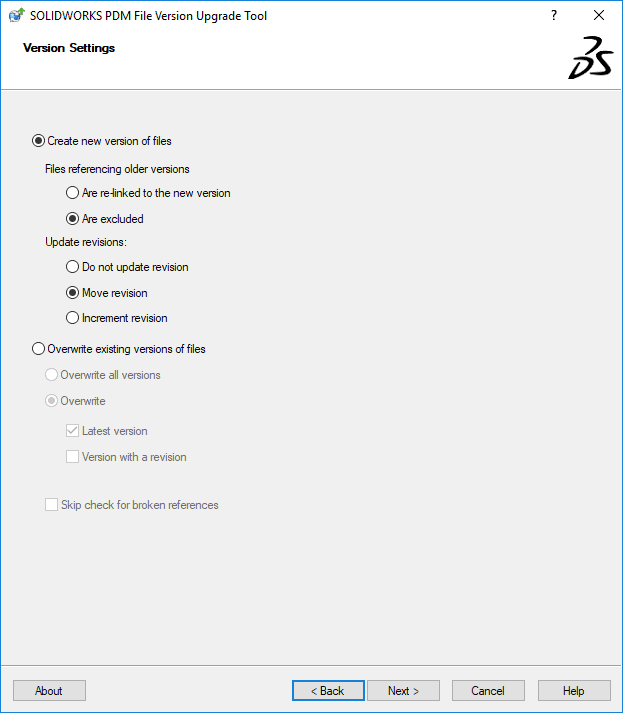
If you choose to overwrite the existing version, you need to decide if you are just upgrading the latest, latest version with revision or overwriting all versions in history with updated copied (this will take a long time).
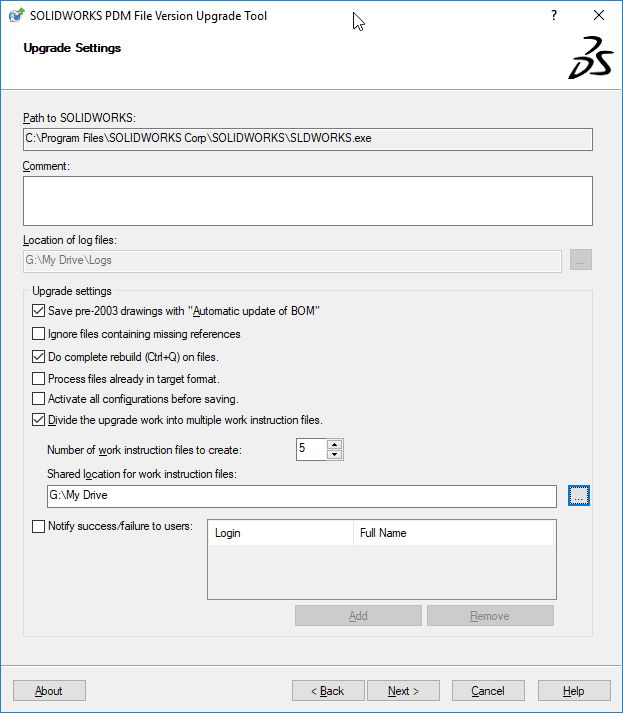
The final screen has an input for the comment you would like to put in the history along with some additional options. The comment section is required. It is recommended to also check the option to divide the upgrade into work instruction files. Currently, the File Version Upgrade tool works in one big batch. It checks everything out, upgrades, and checks everything back in. If something does go wrong along the way, you can potentially end up with thousands of files checked out and no recourse. Therefore, I recommend that you do a search for all SOLIDWORKS files to see how many are in your vault. You can do this by putting a *.sld* in the file name search.
I would then decide how many files you would be comfortable with. I recommend something between 2,000 and 5,000. Divide that number and that’s how many work instructions you need to have. Finally, choose a shared drive location to save the work instructions (this isn’t optional). When you press Next> again, it will create the work instructions.
You can start the upgrade right away or run them later. To run a work instruction, you must choose the option on the initial screen to participate in an upgrade process. It is recommended to run them outside of working hours though because it will slow down the performance of the vault and make certain files inaccessible. It can be run from one machine or several to speed up the process.
And that’s a wrap! I hope you found this helpful. For more SOLIDWORKS tutorials, guides, and how-tos subscribe to our newsletter below.
Related Articles
How to Create a Sandbox Vault in SOLIDWORKS PDM
Leveraging the Where Used Tab in SOLIDWORKS PDM for Standard Parts and Toolbox Components
6 Questions (and Answers) for a Succesful PDM Vault Implementation
About the Author
 Lindsay Early is an Application Engineer Consultant and has been with Fisher Unitech for seven years. Lindsay is a Certified SOLIDWORKS Expert and Elite Application Engineer having earned over 14 SOLIDWORKS Certifications including Mechanical Design, Simulation, and Data Mangement.