Enterprise PDM Dispatch Addin
What is the Dispatch Add-in?
The Enterprise PDM Dispatch Add-in lets you automate tasks and Processes in EPDM. This is particularly useful if you want to perform an action at multiple, consistent occurrences (such as updating a data card variable with a value after a Workflow state Change), or if you want to perform something a number of files (Like selecting multiple files, and renaming them according to some naming schema). We’ll take a look at how to install the Dispatch Add-in to your EPDM systems and create an example task
Adding Dispatch
Dispatch add-in comes with Enterprise PDM, but is not installed by default.
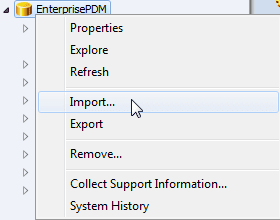
This Add-in can be added by from the Enterprise PDM Administration tool. Right click on your vault and then select Import.
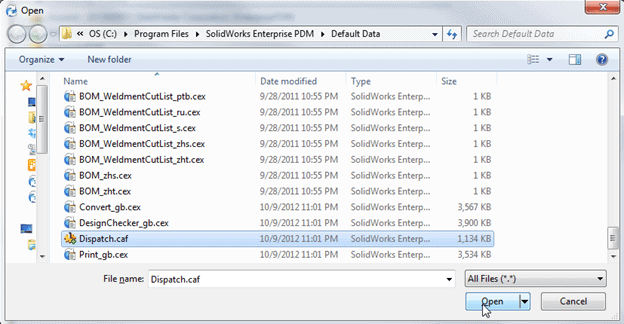
In the folder: Default Data select the file Dispatch.caf (you may need to change the file type to be “All Files”) and click Open.
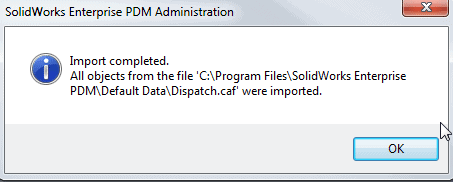
Click “OK”.
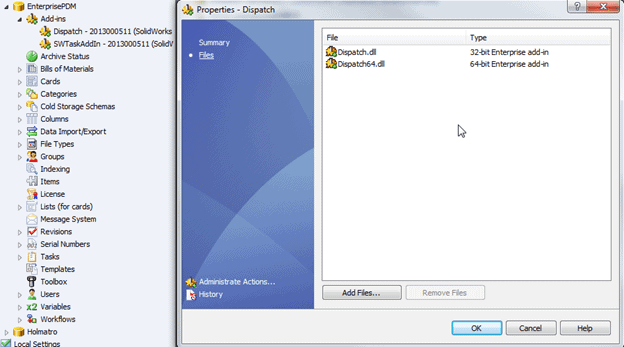
This will install Dispatch dll file for both 64 bit and 32 bit systems. To verify this:
• Expand the Add-ins menu in the Enterprise PDM Administration tool and
• Double click on Dispatch
• Click on Files in the Dispatch properties window
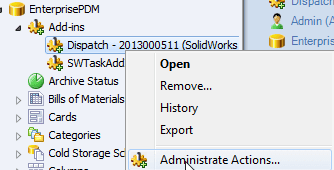
Administrate actions
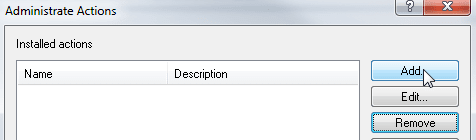
Now that you have Dispatch installed, you will want to create an action. If you still have the properties dialog box open, you can select “Administrate Actions…” from the bottom left corner of the dialog box. Otherwise, you can right click on Dispatch, and select “Administrate Actions.
To create a new action, click on the “Add” button.
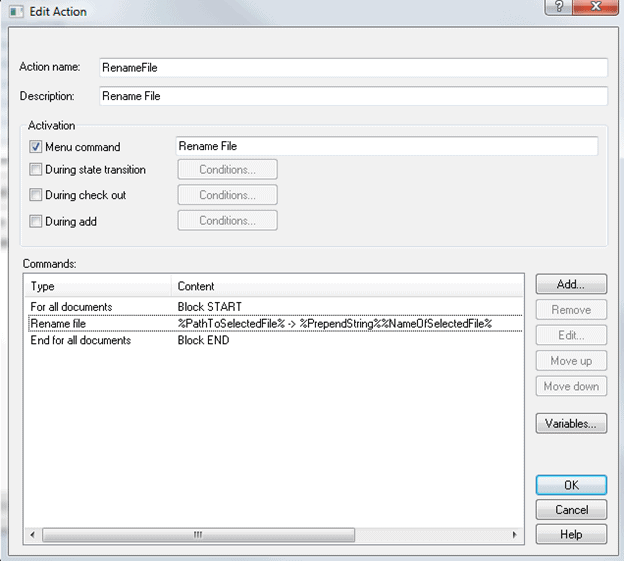
This will bring up the dialog box for creating your actions. This dialog box can be broken up into 3 areas.
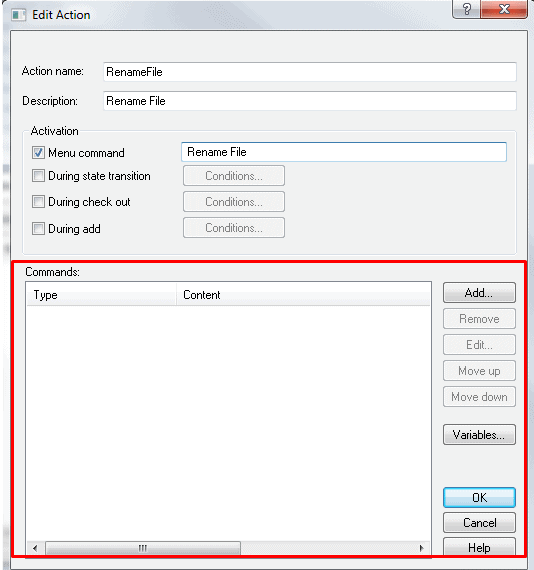
The first area, at the top contains the basic information about the action. This is where you name it and give it a description. The task we’re creating here is going to rename a file.

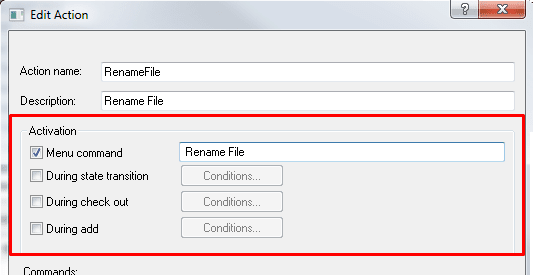
The next area is where we define when this action will run. You can have this be a user selected menu command, or have it automatically run when certain conditions are met (a specific workflow state, a file is checked out, etc). In this example, we’ve chosen to have it be from a Menu command.
The third and final section is contains the action or process that you want to perform. This is where you define what you want to perform, you can define variables, actions conditions and other things to help you specify your action.
To walk through this example, Here is what we want our action to do:
• For Multiple selected document
• Rename the file by putting the characters “S-“ in front of it
When created in the action dialog box this is what it looks like:
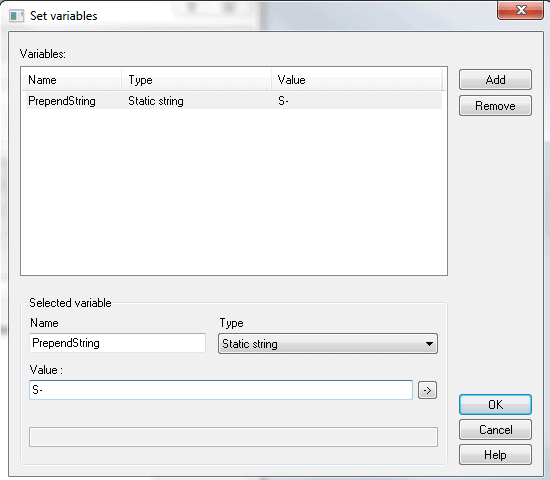
• Create a variable for the characters that we want to prepend.
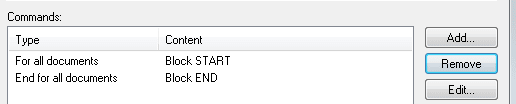
• Create a “For all Documents” Clause (so that it performs this action on all selected documents with a start and an end).
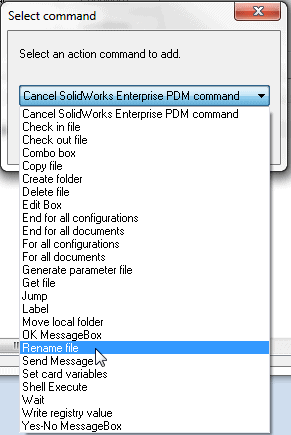
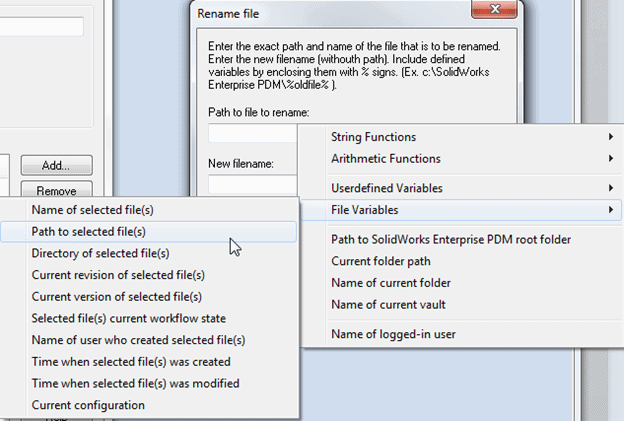
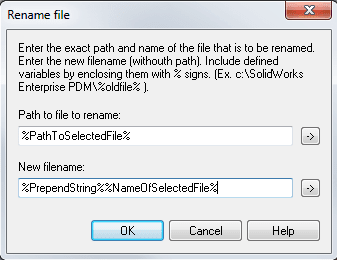
• In between the clause, insert a rename command as follows:
• The end result should look similar to this:
Using Dispatch Action
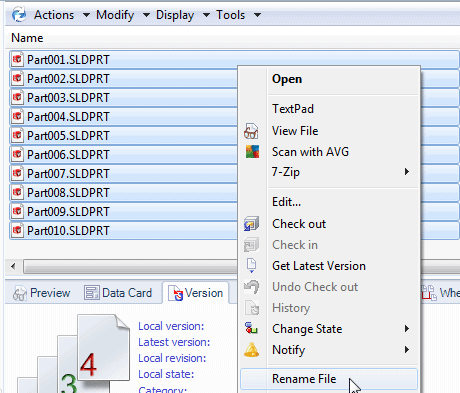
Now that you have created your action, you can test it. Select a group of files in your vault. Right click, and select your newly created action.
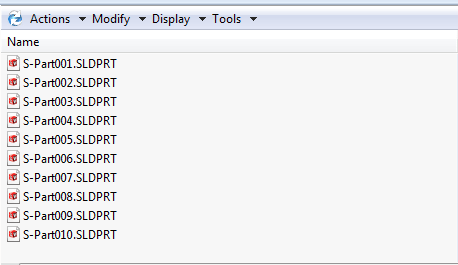
If your display doesn’t update automatically, you have have to hit refresh (F5 in windows), but your files have now been renamed:
Click Here to read more articles on EPDM.
Author: Clay Mosher