Holes In Your Model? No Worries with SOLIDWORKS Plastics
When dealing with different customers or vendors you will inevitably run into a situation where you need to import a model from another CAD software. With advancements in import technology, models open better than ever. But there are times when you get a hole in your model. This can be troublesome as SOLIDWORKS Plastics requires the Mold Cavity to be watertight.

This can be fixed by using the SOLIDWORKS modeling tools but may require some surfacing techniques. Fortunately, SOLIDWORKS Plastics offers a host of modification tools that repair the model at the mesh level, including an automatic Solid and Shell meshing algorithm, in addition to more robust manual controls.
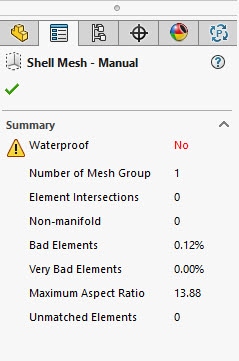
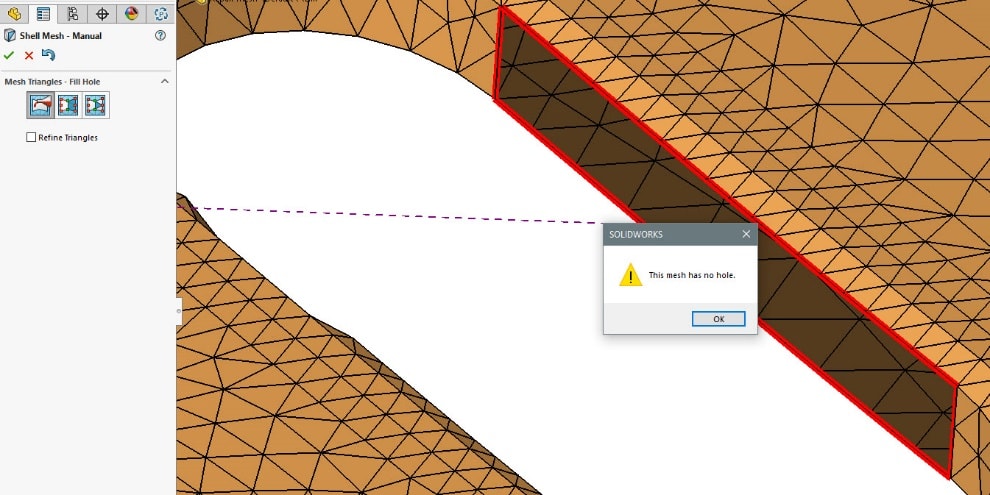
Start the Plastics analysis like normal and generate the SOLIDWORKS Plastics mesh. The Mesh summary step will warn you if the mesh is not waterproof.
After selecting the green check the Mesh Editing tools become available. We will focus on the Fill Hole Tools.
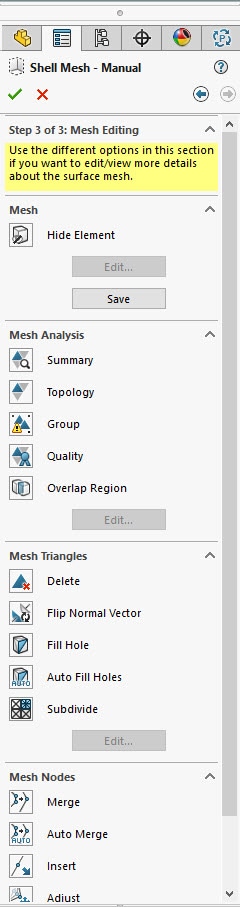
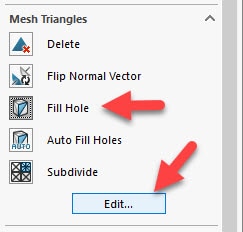
Auto Fill Holes does what it says and automatically finds/fills holes in the model. There are times when you may want more control over how the holes are filled, and to know where the holes are located. In this case, select the Fill Hole option and choose Edit.
Three options are available for manually filling the hole.
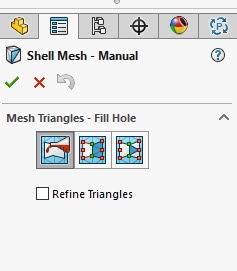
From Left to Right.
- Fill Hole (Fills the hole when an edge is selected)
- Fill Partial (Fills Multiple Triangles at a Time)
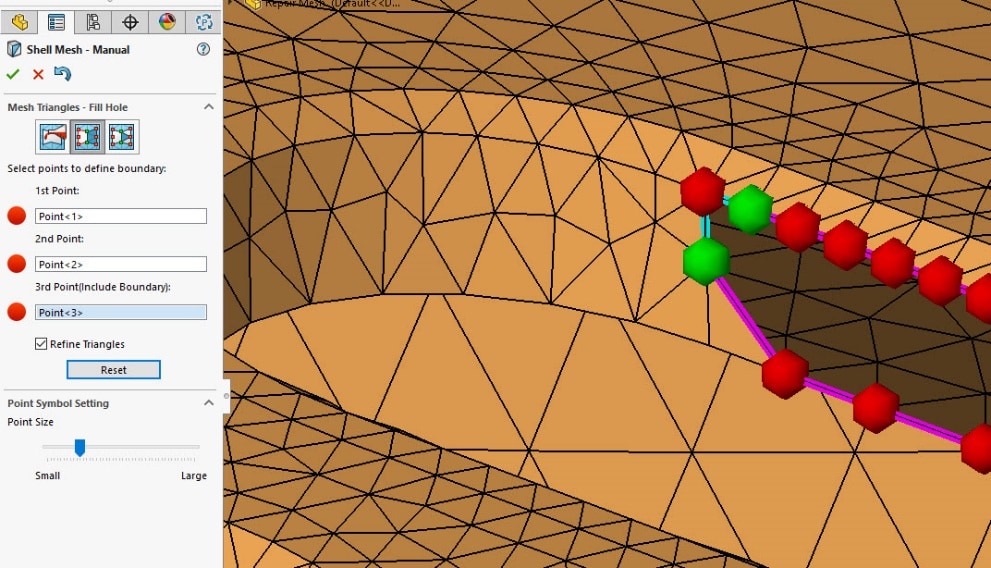
- Fill One Triangle (Fills One Triangle by selecting three nodes)
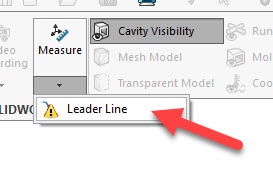
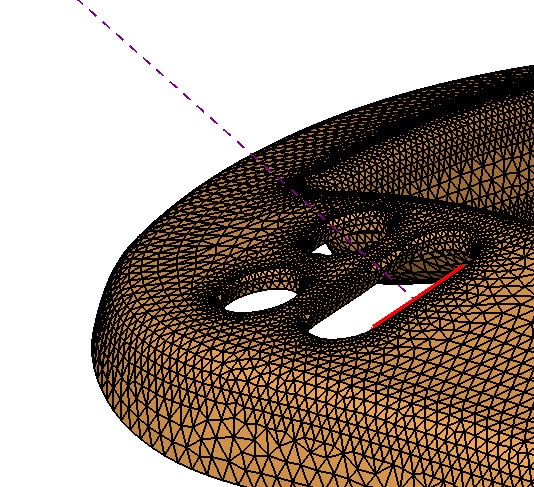
To locate the hole in the model, turn on the use of Leader Lines located under the Measure tool on the command manager.
Using the “Fill Hole” option healed the hole by selecting the red highlighted edge, however, the repair generated high aspect ratio cells, and would require further refinement.

In this model’s case the “Fill One Triangle” proved to be the best option, providing the most uniform mesh. This gives us complete control as to how the triangles are specified.
![]()
The easy to use SOLIDWORKS Plastics mesh editing tools give a wide range of options and solutions for all your imported geometry issues. Please let us know if you would like to learn more about SOLIDWORKS Plastics Simulation, or any of the SOLIDWORKS products.

Robert Warren
Simulation Specialist, Elite Application Engineer
Dad, Husband, Mechanical Engineer, Jeep and Sasquatch Aficionado
Computer Aided Technology