How to create a Decal Mask using Paint.NET
By default Decals are fully opaque so they’ll block all of the model behind them. Decals have controls to adjust their overall transparency but what if only a portion of the decal is transparent, this is where a Decal Mask file come to play. A Decal Mask is a black and white image of the original decal where the black areas of the decal are transparent and the white areas are opaque.
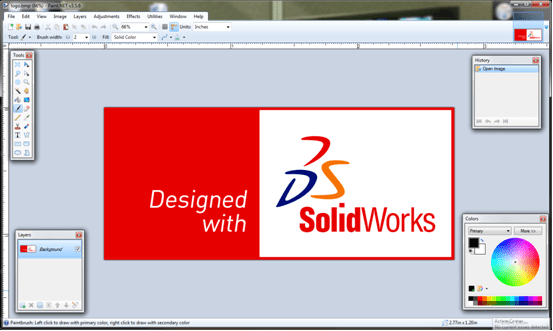
Step one, open the decal in your photo editing application of choice. In this example I would like the white areas of this decal to be transparent, including the “Designed with” text.

Use the contrast and brightness controls to force the image to black and white. Depending on which application you’re using, settings may vary. In this example using 100 contrast and -100 brightness gave the desired outcome.
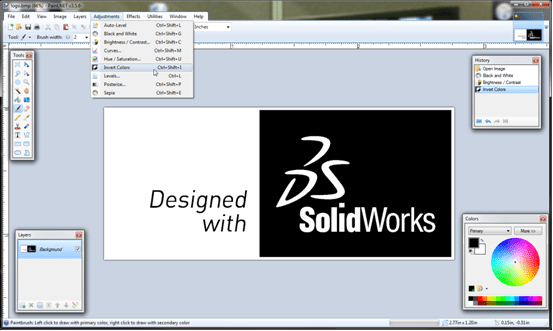
Once the image is black and white, we need to invert the colors. Any area that is black will be 100% transparent and anything that it white retains its original color and is 100% opaque.
Now is the time to save this file as a new name to use in SolidWorks.
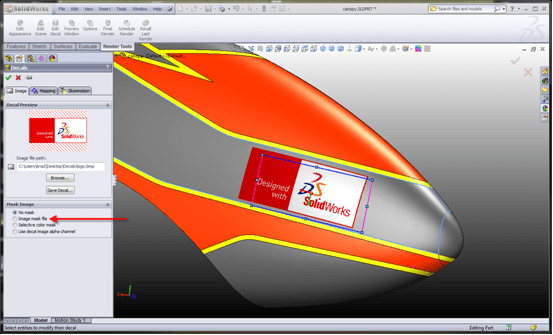
Let’s take a look at how to use a decal mask. Once you’re editing the original decal, switch the Mask Image option from No mask to Image mask file and browse for the file we just created.
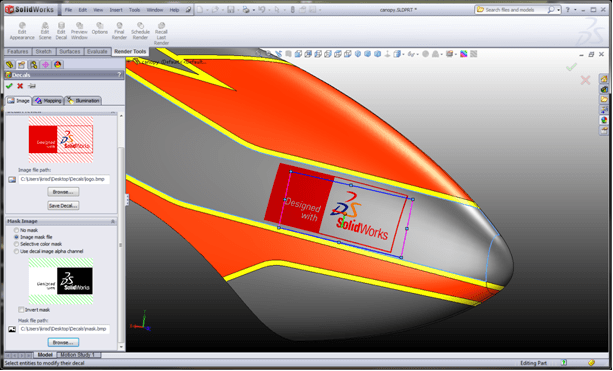
Here you can see the difference that using an Image mask gives the decal; more of a silk-screen look.
Kris Dubuque
Application Engineer
MCAD Technologies
 Once the image is black and white, we need to invert the colors. Any area that is black will be 100% transparent and anything that it white retains its original color and is 100% opaque.