How to create SOLIDWORKS Lofted Bends
How to create SOLIDWORKS Lofted Bends
Lofted Bends in SOLIDWORKS are a tool that has been in the software for years and a tool that I think a lot of time gets over looked for the abilities of what it can do for a user.
When we look at the Property Manager for Lofted Bends we are presented with quite a few options. Typically, when I want to know more about the feature that I am working on and what it can do for me I hit the? mark in the upper right. In the case of Lofted Bends, it takes me to a general help page for Lofted Bends telling us the basics of how to build a part with Lofted Bends.

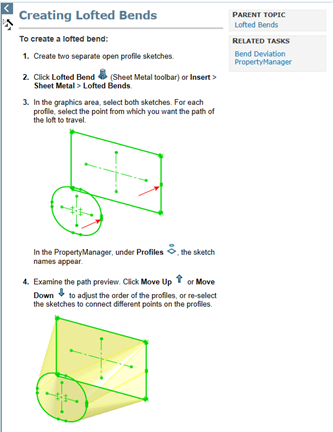
To find out more about Lofted Bends you need to dig a little deeper into help and do a search for Bent Lofted Bends, unfortunately at this current time I am only able to find information about Formed Lofted bends in the SOLIDWORKS Training Manual for Sheet Metal.
Lofted Bend Requirements
There are some characteristics of Lofted Bends that are unique from a standard Loft or Sheet Metal Part and they are:
- Cannot be mirrored.
- Only open contours may be used as sketch profiles.
- The gaps in the profiles should be aligned for flat pattern accuracy.
- No more than two sketch profiles are allowed.
- Use of guide curves is not supported.
- Use of centerline curves is not supported.
- K-factor applies to flat patterns of lofted bends only if the lofted bends are created from sketches that meet specific conditions.
Bent Lofted Bends
You can use Bent Lofted Bends to create physical bends, rather than formed geometry and approximated bend lines in a flat pattern. Bent Lofted Bends form a realistic transition between two profiles to facilitate instructions for press brake manufacturing.
With Bent Lofted Bends you have four different options as to how the bend regions are defined be selecting one of the Faceting Options, then specifying the values for the chosen option in the Facet Value field.
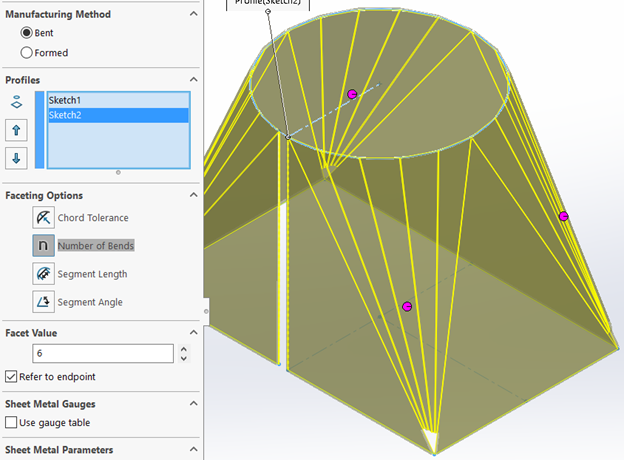
Faceting Options
|
|
Chord Tolerance |
Sets the maximum distance between the arc and the linear segment. |
|
|
Number of Bends |
Sets how many bends are applied to each transition. |
|
|
Segment Length |
Specifies the maximum length of the linear segment. |
|
|
Segment Angle |
Specifies the maximum angle between two adjacent linear segments. |
You can also control the individual bend regions by selecting the pink spheres in the preview.
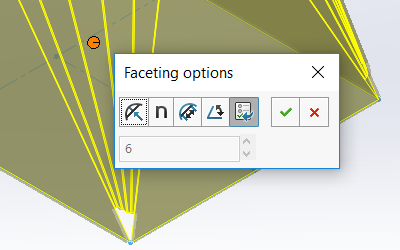
The last option is for Refer to endpoint to specify whether the created bends refer to a sharp corner in the profile or whether the sharp corner is replaced with adjacent bends to form an approximated arc in the corner.
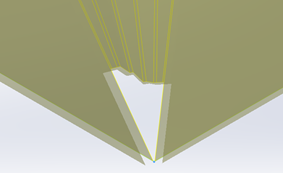
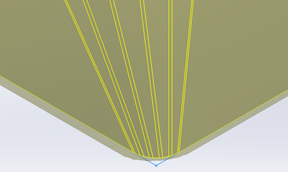
Refer to endpoint = Checked Refer to endpoint = Cleared
The rest of the options in the property manager are the same as any other Sheet Metal part.
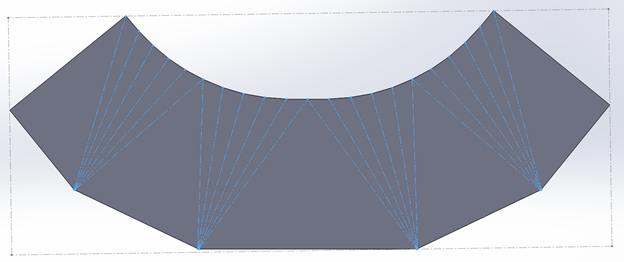
The resulting Flat Pattern looks like what you see below (Bend Lines Sketch selected to show detail).
Formed Lofted Bends
Formed Lofted Bends have a rolled or drawn look to the bend regions instead of being separated by bends and flats like in Bent Lofted Bends.
To create a Formed Lofted Bends, the profiles must meet an additional requirement:
- Profile cannot include sharp corners.
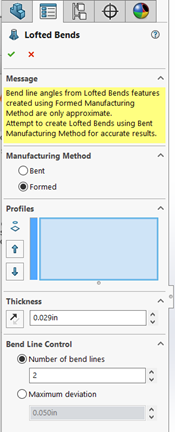
You can see with the Property Manager and the resulting preview that we have fewer options and a Message about the difference between a Bent and Formed Lofted Bend.
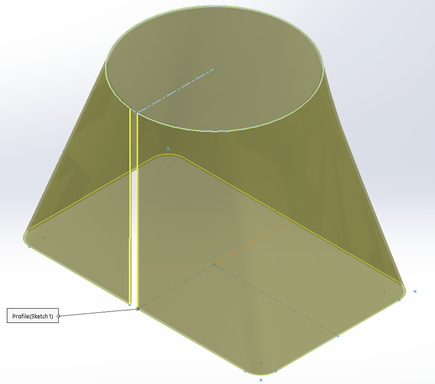
The resulting Flat Pattern looks like what you see below, note there are no Bend Lines like in the Bent Lofted Bends example.

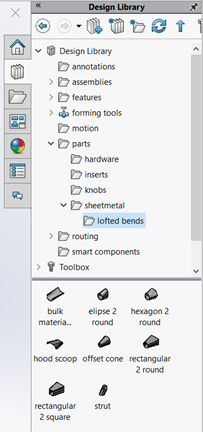
For more examples of Lofted Sheet Metal parts, you can find them in the Design Library under parts, sheetmetal, lofted bends.
We hope this helps you with your next sheet metal design project.
Enjoy
Josh Altergott
Support Manager

 Blog
Blog 


