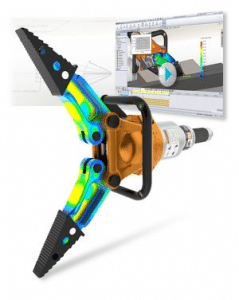
SOLIDWORKS Simulation Fixture Warnings
 You sit down at your desk to finalize the design for a new product you are working on. You want to verify that the product does not fail under loading, and expect the finite element model to be fairly easy to set up and run. However, much to your chagrin you run the model and a warning pops up.
If you have been working with SOLIDWORKS Simulation for a long time, you most likely have seen this warning box before. In today’s blog I will show a handy tool which can remedy this issue very quickly. It should be noted that all tips in today’s blog pertain to a traditional Linear Static Analysis, which is available in SOLIDWORKS Premium, SOLIDWORKS Simulation Standard, SOLIDWORKS Simulation Professional, and SOLIDWORKS Simulation Premium.
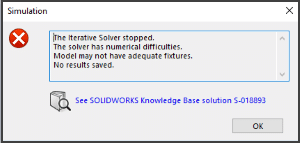
The synthesis of the error in the above figure is a symptom of an under-constrained model. When SOLIDWORKS sets off to solve a linear static problem, you must remember it is governed by linear static theory. Therefore, if this warning pops up it is indicating to you that the fixtures you have applied may not be adequate or, in other words, under-constrained. In the simplest terms imagine you are applying a load on an object, and in order for proper deformation to happen to the object, that object must be held in place. Otherwise, the force on the object will just push it and not cause it any deformation to occur. That is what is happening when you see this warning box, it is telling you that the fixtures you are applying are not restraining the model and thus it cannot solve the analysis.
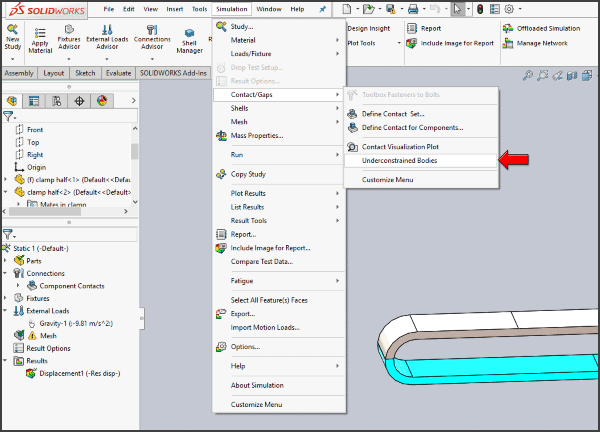
So what can be done to remedy this error? There is a tool within SOLIDWORKS Simulation called the underconstrained bodies tool, which will look at your model and determine the locations which are under-constrained. The tool can be found under the simulation menu, under the contacts, and then clicking on the underconstrained bodies tool, as indicated in the figure below.
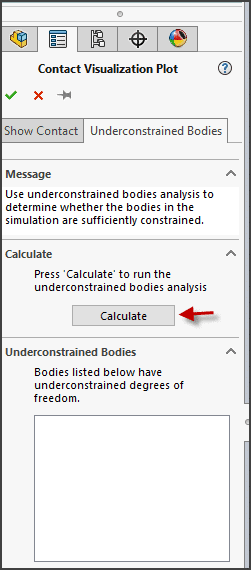
Upon clicking on the underconstrained bodies tool, it will then look at your simulation analysis and calculate the locations where the model is free to move. The tool will then spit out to you all of the locations which are free to move. The process for utilizing the tool is simply just hitting calculate as shown below in the figure, and it will look at every part of your simulation model and determine the bodies which are under-constrained.
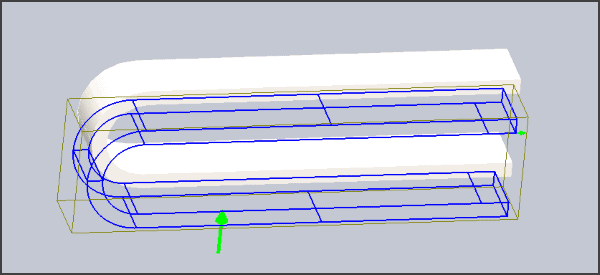
The advantage of this tool is that it will identify every location in the model which is currently free to move (either translationally or rotationally). Through identifying these locations, the user can then go back to the model and apply new fixtures to restrain the model. For the example model below you can see in the diagram that it is free to translationally move vertically. In actuality the entire clamp should not move at all, therefore a new fixture should be applied to ensure that the top body of the model does not move.
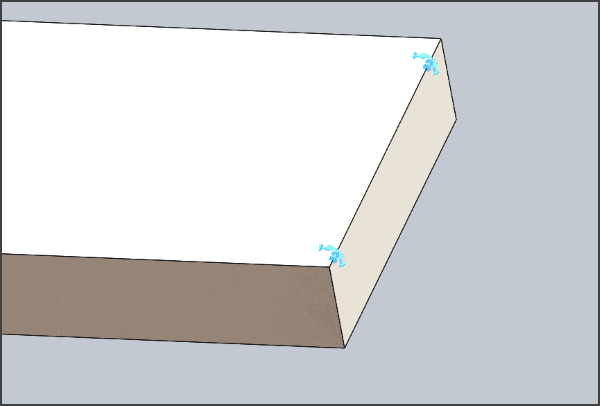
Upon looking at the underconstrained bodies tool and understanding that the clamp is free to move vertically, I needed to apply a fixture to restrain this motion. For the clamp model, I wanted to make sure that the model does not translate in any direction, so I went back to my simulation analysis and applied a reference fixture on the top edge as indicated in the figure below.
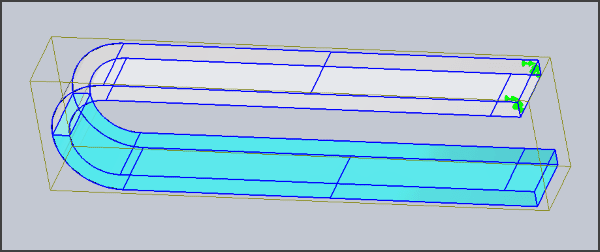
After I added this fixture, I then went back to the underconstrained bodies tool and recalculated to determine if there was any remaining translational movement in my model. Upon rerunning the tool it determined that there was no remaining translational movement, as indicated in the figure below.
I was very quickly able to determine and ascertain the free movement of the model via the underconstrained bodies tool. I then applied an appropriate fixture to restrain the movement of the model, and at that point I could run and obtain the stress results I was after.
Debugging a simulation can be one of the most difficult aspects of finite element modeling. However, with this helpful tip, you will be much more easily able to remedy fixture problems.