Insight Overview
Many of our FDM customers are used to working with a program called Catalyst. Catalyst is the included printing software used with the uPrints and Dimension Printers. The next step up is the Fortus Printers, they use a software package called Insight. I wanted to take a few posts to give you some Insight into this fantastic software (pun intended)!
Once your printer is installed, the technician will install and setup Insight. If you ever need to reinstall, here are some simple guidelines to get you back up and running. click on the Modeler Configuration Utility.
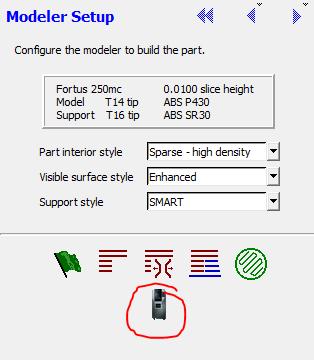
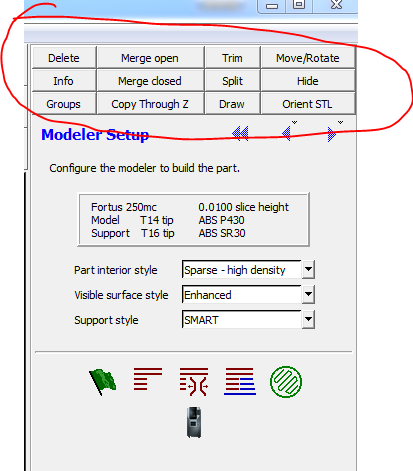
Make sure your Printer model is selected.
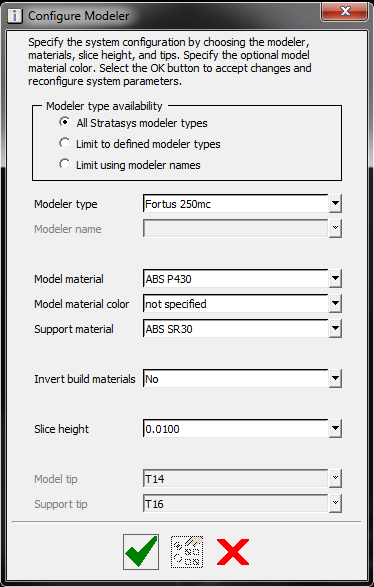
You will also use this window to select material and support types as well as your slice height for future jobs. If you primarily stick with one material and slice height, your choices will be remembered until you need to change them again.
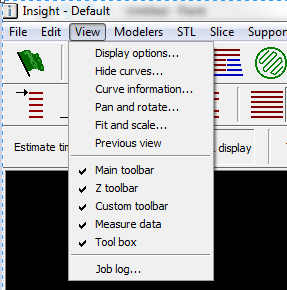
From a fresh install, there are a few settings I like to verify before working within Insight. On the View menu, there are a few checks at the bottom. Main Toolbar, Z Toolbar, Custom Toolbar, Measure Data, and Toolbox. Make sure these are all checked. This is of course personal preference, but I use all of these and find this setup is very user friendly.
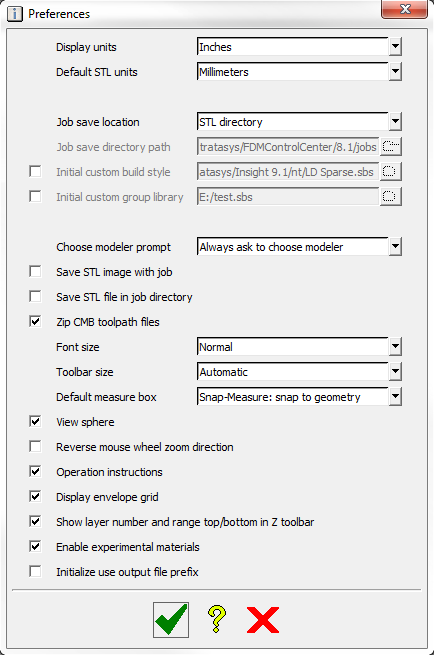
Next go to File – Preferences. Your default STL units should match your Default STL output settings from CAD. SOLIDWORKS will default to Millimeters.
Check the View sphere and Display envelope grid. The View Sphere is helpful for moving around the graphics area, especially if you batteries die in your mouse. The envelope grid helps to better estimate the size of parts you are working with.
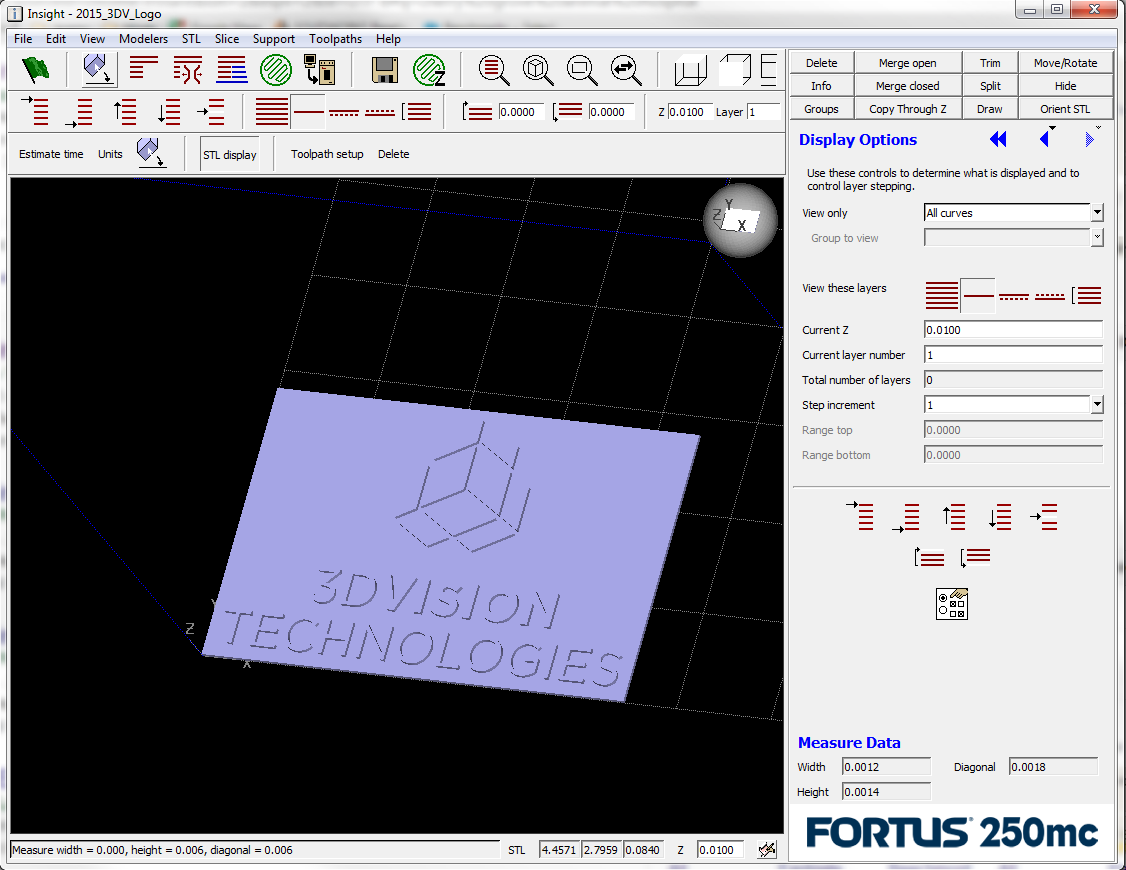
That should cover us for initial setup, let’s take a look at the interface. The main menu is divided into (3) separate rows. The top is where we spend a lot of time (at least initially) working within Insight. This is where we slice, generate supports & toolpaths, as well as other useful buttons.
The middle menu is the Z toolbar. This is a quick way to maneuver through the Z layers (go up a layer, down a layer, range of layers).
The Bottom menu is the custom toolbar. Stratasys has included some common commands right from the get go, but I have found I change them rather quickly. If you find yourself hunting for a command in the menus (a lot), that is the command that should be added to the custom toolbar. Below are some of the buttons I have added.

The toolbox is located above the current operations window (Right side of the screen). This is more common commands that I find useful and is customizable as well.
At the bottom of the screen is measure Data and some feedback from the system during different commands.

Between all the menus and status bar is the Graphics area. Just like any other CAD like program, this is where we see the results of our work before printing.
Over my next couple posts, I want to highlight some of my favorite tips and tricks within Insight. It is very powerful, allowing you to customize your builds in almost any way!
Is there anything you’d like to see along with my favorites? Let me know in the comments below.