Reserve a license in SOLIDWORKS Network Licensing
Network licensing provides a great deal of flexibility with regards to providing access to SOLIDWORKS in your company’s environment. You can install the software on as many computers as you like, but only the number of users defined in the network can actually use it at the same time. This way everyone can run SOLIDWORKS from their own computer and not just the one workstation to which the entire company has acess. If all the licenses are being used simultaneously, the next person that tries to start SOLIDWORKS is informed that there are no licenses available and must wait until someone currently running SOLIDWORKS shuts it down before another session can start up.
Often when this happens, the question of reserving access for a particular individual comes up – i.e. Can I ensure that my top designer always has access to SOLIDWORKS? The answer is yes, and it is achieved by using an ‘Options File’. The Options File must first be created and then the Network License must be reactivated. This is easy to do.
How to create an Options File
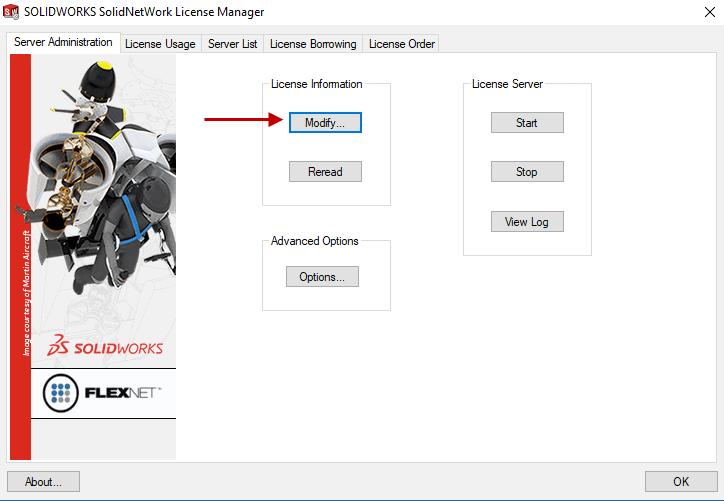
Launch the SOLIDWORKS SolidNetWork License Manager and choose ‘Modify’ on the Server Administration tab.
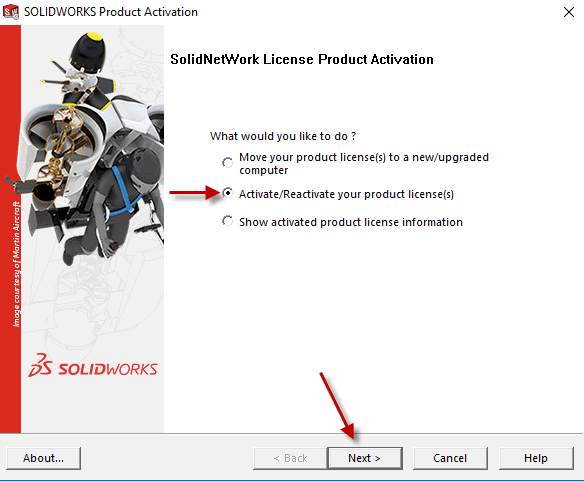
Choose ‘Activate/Reactivate your product license(s), then click Next
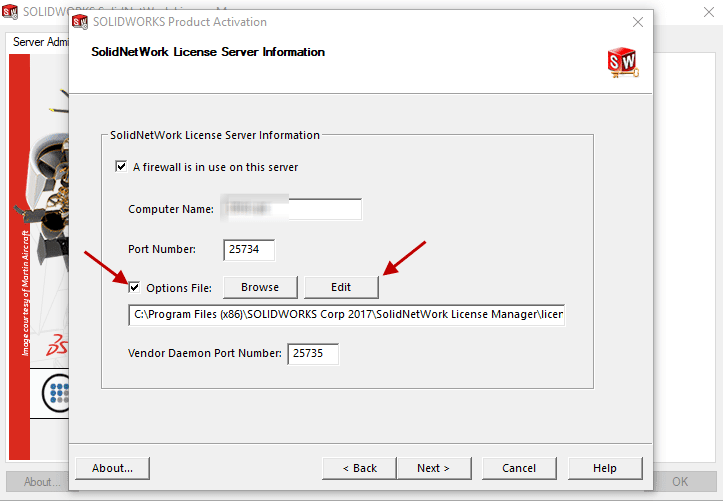
Check the box for Options File and then click ‘Edit’.
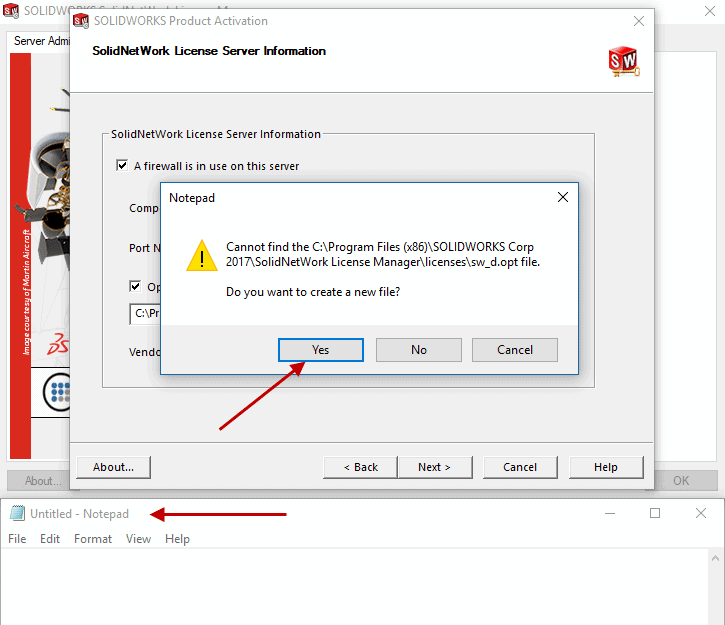
If a file doesn’t already exist, you will be prompted to create a new file in the default path. Click Yes. This will start Notepad. Now you are ready to write the Options File.
Writing the Options File
The syntax (what you need to type in the Notepad file) is as follows: (do not include <>)
![]()
So to reserve 1 license of SOLIDWORKS Standard for Chris, it would look like this:
RESERVE 1 solidworks USER Chris
Once finished, save the file and close Notepad. The name of the file should be ‘sw_d.opt’.
(The Options File can be used for lots of other things. I highight a few of those at the end of this post.)
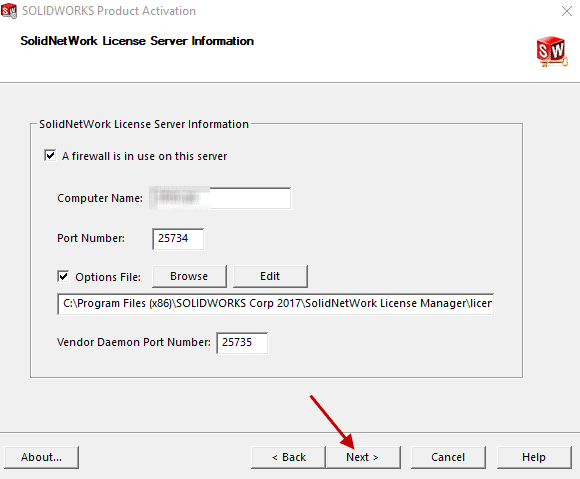
Click Next on the SOLIDWORKS Product Activation window
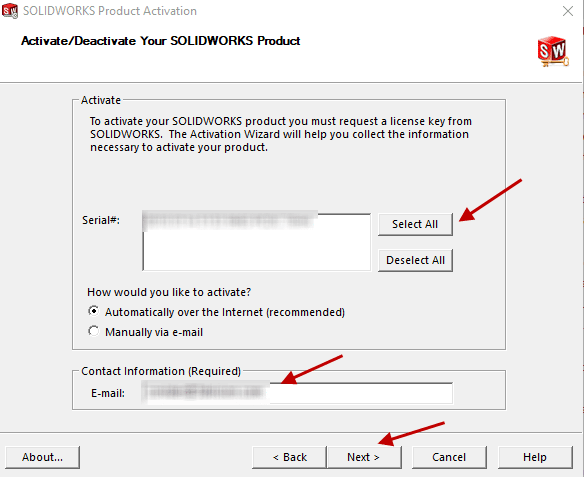
Choose Select All, enter your E-mail address info and click Next
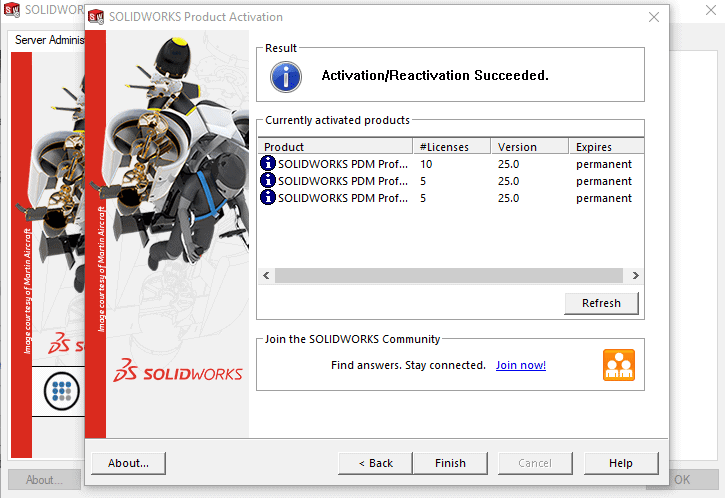
Activation/Reactivation Succeeded
What else can I do with the Options File?
In the Options File you can also create groups, exclude groups from using particular products, set a maximum number of licenses to be used per group, prevent all licenses from being borrowed or shorten the timeout period for when idle licenses will be returned to the license pool. These options and more are detailed in the FlexLM license administration guide which can be found in the default install location: “C:Program Files (x86)SOLIDWORKS SolidNetWork License ManagerDocsflexuserlicencingenduserguide.pdf”. See chapter 13 – Managing the Options File.
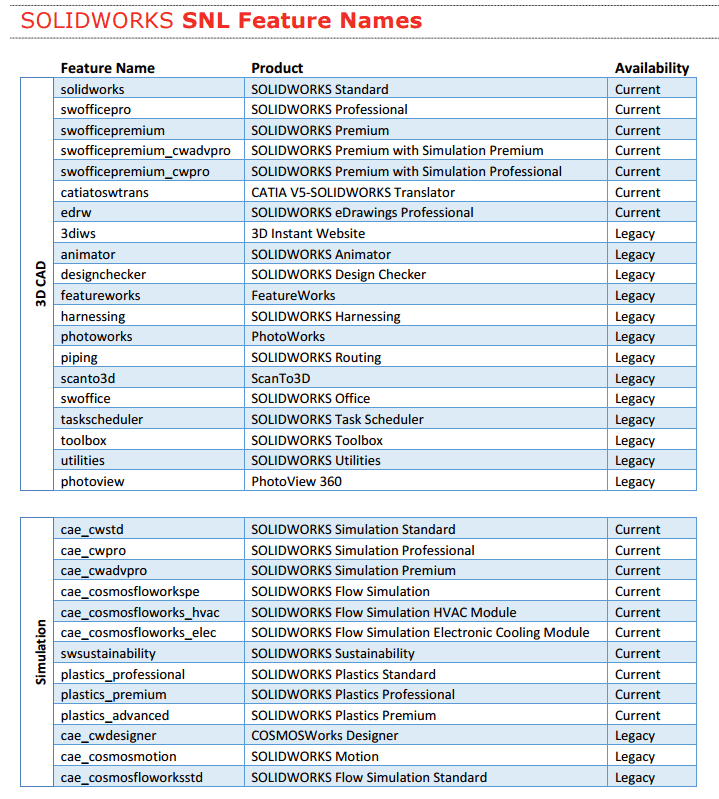
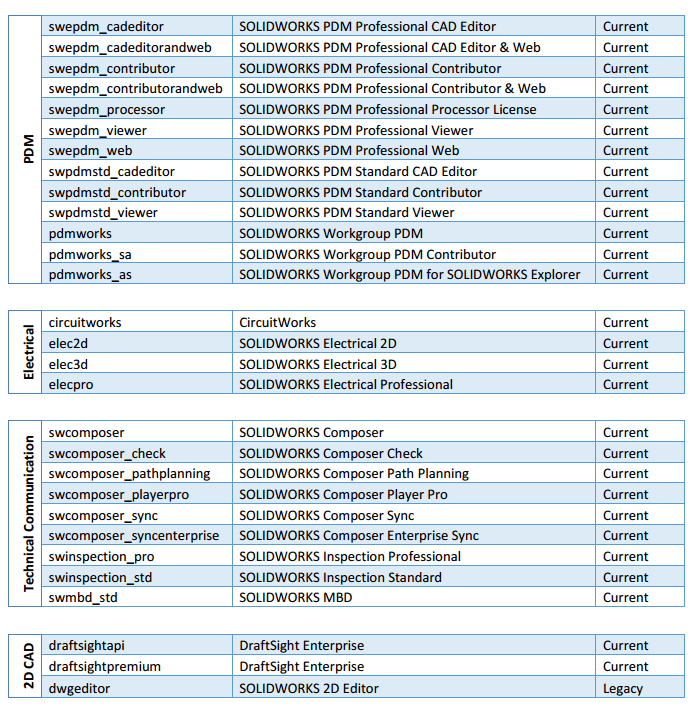
In addition, the table below details the SOLIDWORKS SNL Feature Names: