SOLIDWORKS – Choosing the Right Surface Patching Tool
There are four Surfacing commands within the first grouping of features in the Surfaces Command Ribbon that are somewhat interchangeable for Patching.
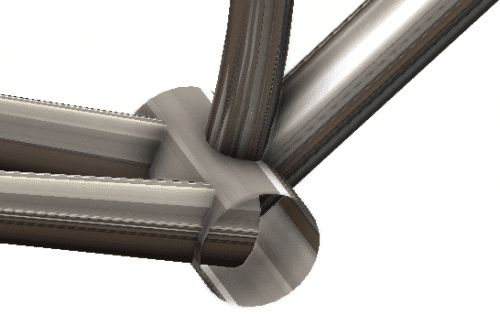
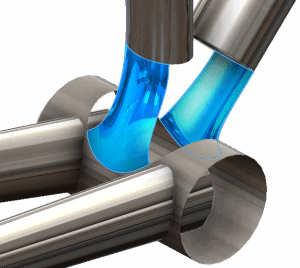
Which of these commands; Sweep, Loft, Boundary, and Fill, will work best for creating smooth transitional blends for knitting? We’re going to highlight each of them and learn which features are most ideal for different situations.
SWEPT SURFACE:
The first of our four major Surfacing features is the Swept Surface command. While this feature works identical to its Solid Body counterpart, it’s less ideal for patch modeling directly. Sweeps and Lofts are comparable features when modeling with Solids, but they tend to differ in Surface modeling.
A Sweep requires a Path Sketch as well as Profile Sketch or Circular Profile. If uniform geometry is intended along the path, this is an ideal choice as geometry is interpolated between intermediate profile sections along the path. Additional control is available by use of Guide Curves and specifying twist values. Tangency is available for Start/End Constraints.
Due to the type of control provided, the Swept Surface command is most ideal for extruding profiles along a specified path or creating reference geometry. This might situationally be more comparable to using the Extruded Surface command with advanced control in more than one uniform direction.
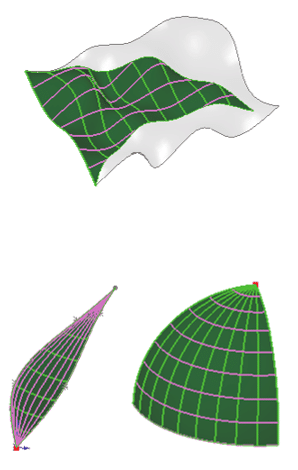
LOFTED SURFACE:
More specific to patching gaps in Surface Bodies, the Lofted Surface command is the first of our focused features that allow us to connect surfaces together to form smooth transitions to ultimately knit together. By nature, Lofts offer additional control over Sweeps for both Solid and Surface Body modeling. Lofts interpolate geometry between intermediate profile sections like Sweeps, but the curvature created appears more natural for more complex surfaces. Guide Curves are an optional source of additional control like with Sweeps, but the key advantage lies in the additional control over Start/End Constraints. In addition to Tangency with Surface Sweeps, Direction Vector and Curvature to Face are also offered for Lofts.
As a path sketch is not required, the Lofted Surface is a great choice to bridge gaps between open profile edge selections on a Surface Body as well as replacing faces where high-quality surfaces aren’t crucial.
BOUNDARY SURFACE:
The Boundary Surface command builds off the Lofted Surface command. It is a step up in allowable control. Similar surfaces can be created with Loft and Boundary Surfaces. Additional control is offered in the Normal to Profile Start/End Condition. Scenarios that lend themselves to the Boundary feature include enclosed regions to patch that have two distinct directions, namely a four-sided area. Rather than indicating Profiles and Guide Curves within the Lofted Surface Properties, Boundary Surface Properties define Direction 1 and Direction 2.
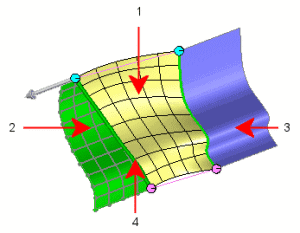
These selections are somewhat perpendicular in nature which allows for further control in Direction 2, or what would otherwise be the Guide Curve selections. All previously mentioned Curvature Control options are available for Direction 2.
Many times, the choice comes down to preference by trial-and-error or by simple comparing results. Boundary Surfaces often result in higher quality surfaces than Lofted Surface, resulting in longer rebuild times. Use the Boundary feature when ‘High-Quality’ Surfaces with curvature continuity are required.
FILLED SURFACE:
The final of the main Surfacing commands for the purpose of Patch Work is the Filled Surface command. This command is almost in a category of its own because of two advantages. First, it’s not limited to a four-sided region. Second, the Surface is a true patch in the sense that a mesh of curves is laid out in a perpendicular fashion as they are in a four-sided region and then trimmed to fit the selected boundary.
This is especially important because the same Mesh of Curves typically extend between selected profile edges. When enclosed regions contain sides with zero length, curves converge at the vertex point and singularities result. These singularities can often cause issues later in the design process for certain features like fillets, shells, and offsets.
As more than four edges are allowed for the selected region, the Filled Surface command allows for further curvature control at each selected edge of the selected boundary to fill. Due to the robustness of the Filled Surface command, it’s ideal for repairing imported geometric gaps as well as replacing complex faces.
We should now have a better understanding of patching situations that call for specific features to be used. While there is a myriad of scenarios, the same feature that works for one may not work for another. As previously mentioned, a trial-and-error approach is recommended with Surface Modeling. Within the application of any given feature, the graphic preview will often dictate if the intended feature will fail by disappearing altogether. Some additional changes in the Property Manger may allow the preview to return. Keep in mind that each of these highlighted features are a step up in allowable control and with most anything that allows further control, additional rebuild time is likely. Should a similar surface with less need for control be acceptable, then it is likely the best choice to save on overall rebuild time.
Gabriel Rodriguez
Application Engineer
Computer Aided Technology