SOLIDWORKS: Dimensioning Arcs and Circles
Here is a quick trick for dimensioning arcs and circles in SOLIDWORKS.
When creating Smart Dimension and clicking on the circles, SOLIDWORKS will attach the dimension to their center points.

The SOLIDWORKS setting that controls how the dimension is attached to arcs and circles is called “Arc Condition.” Selecting the dimension, and viewing the property manager, we can easily see our options. By default, the arc conditions will be placed with the “Center” condition.

The “First Arc Condition” corresponds to the first arc selected. If you have two circles, like this example, you will also have a “Second Arc Condition.” Adjusting these settings can produce these various results.
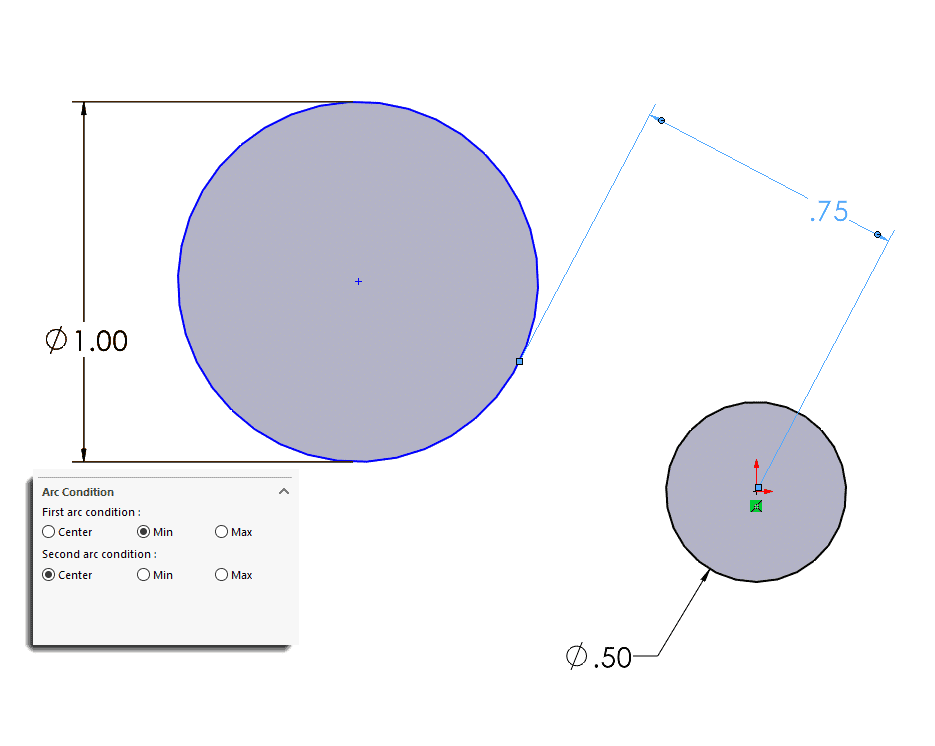
Minimum to Center
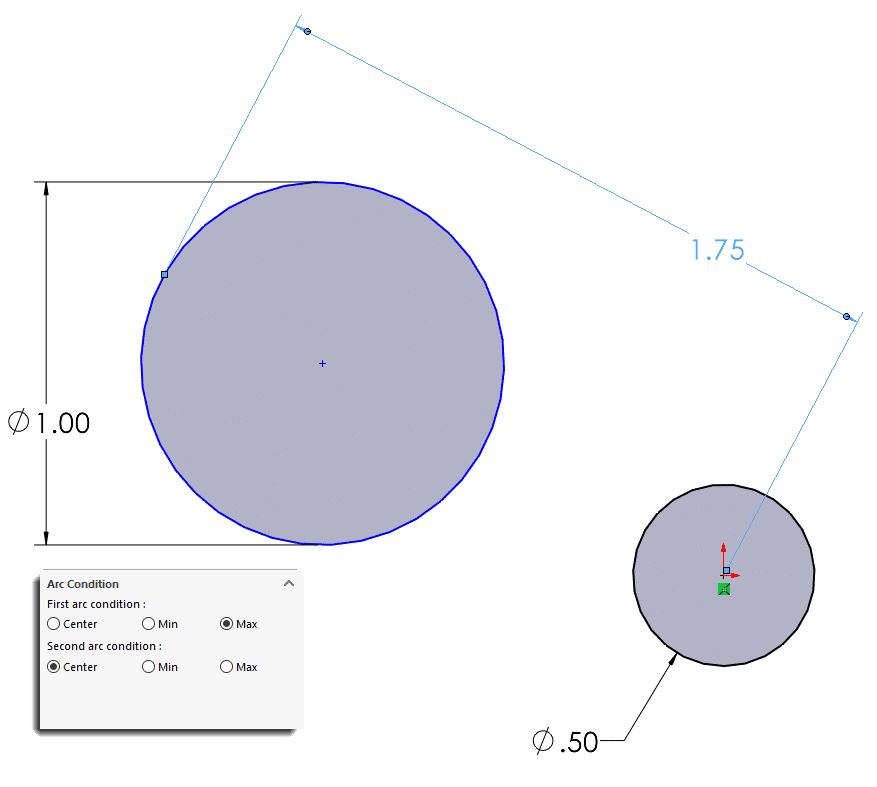
Maximum to Center
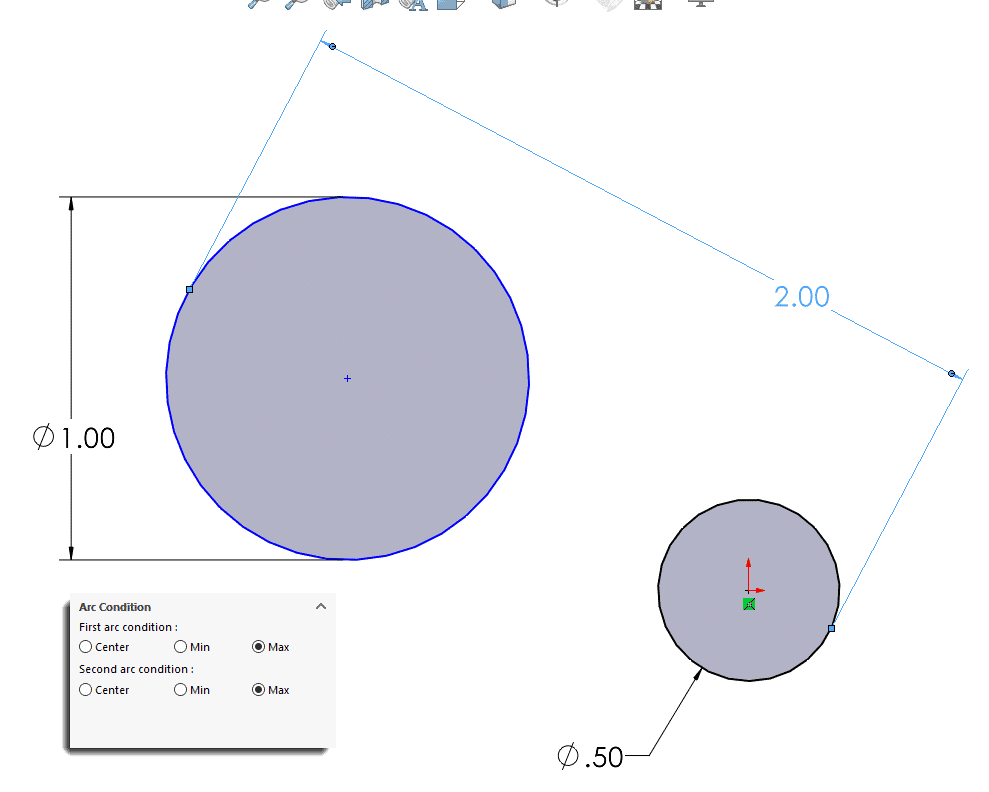
Maximum to Maximum
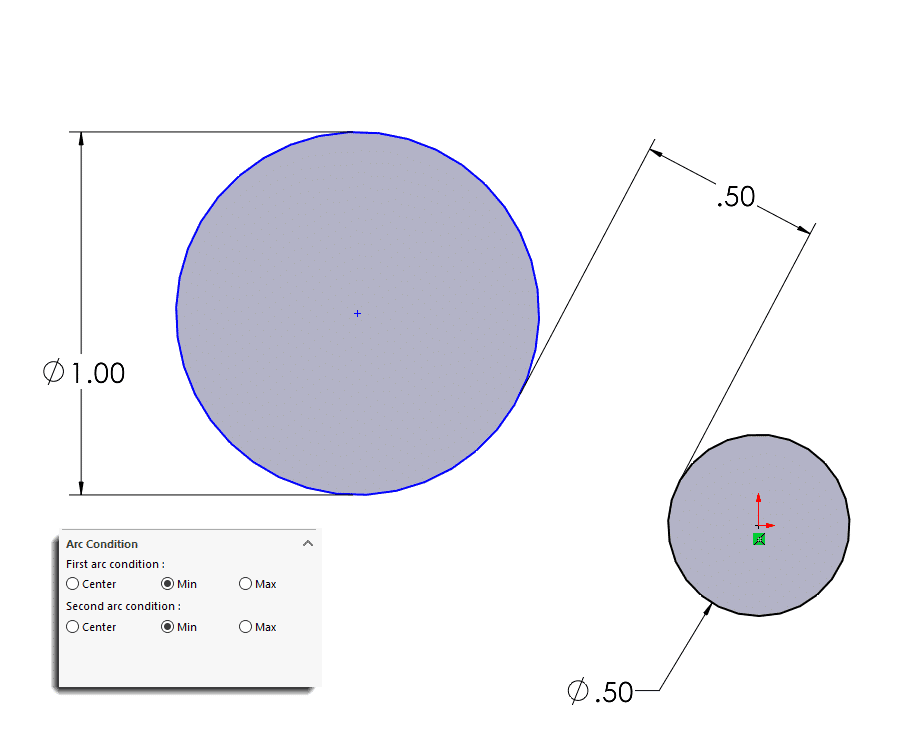
Minimum to Minimum
This same functionality also applies to adding dimensions to your SOLIDWORKS Drawings! Here, we have the dimension attached to the Max Arc Condition of the rounded tab in a drawing view. This makes it easy to call out the overall height of this part.

A keyboard shortcut makes this even easier. Just hold down SHIFT when you make your initial selections on the circles. SOLIDWORKS will automatically select the appropriate Min or Max “Arc Condition” based on the location of your selections.
This should make capturing your design intent and fully defining your sketches that much easier!
Greg Buter
Application Engineer Manager
Computer Aided Technology