SOLIDWORKS Free Tools – Utilities – Compare Geometry
Do you have the need to compare model geometry? If so, SOLIDWORKS has an integrated tool to identify the differences between two part or assembly files or even between two configurations within the same file.
‘Compare Geometry’ is a free tool within the SOLIDWORKS Utilities Add-In and is available at all levels: Standard, Professional, and Premium.
Open each of the two files in question, then navigate to Tools>Compare>Geometry and the Compare Tool will open in the Task Pane on the right side of your screen.
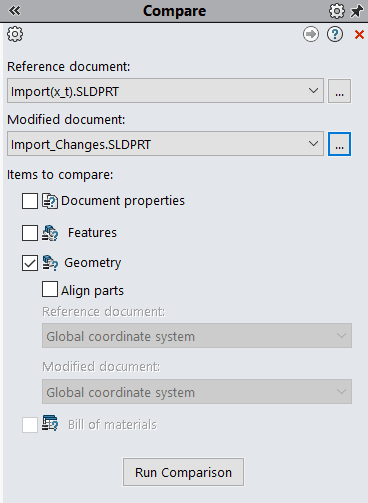
Under the Reference document dropdown, select the In-Work file from the list. Do the same for the Modified document dropdown choosing the other open file. If configurations are being compared, select the ellipsis icon to the right of the dropdown as highlighted below.

Selecting the ellipsis icon will launch the SOLIDWORKS File Explorer which allows you to browse for the intended file and specify the configuration before choosing Select. Otherwise, SOLIDWORKS cannot open the same file twice by traditional means, regardless of alternate configuration selections.
With each of the two files now selected, we will choose the ‘Geometry’ option in the ‘Items to compare’ section of the Task Pane for this example. If both files are oriented the same, the ‘Align parts’ checkbox does not need to be selected. However, sometimes an extrusion direction could be flipped from the sketch plane which changes the relative position between the two models in 3D space. Misaligned models may cause inaccurate results. Reference Coordinate Systems can be created and used for each file selection if necessary.
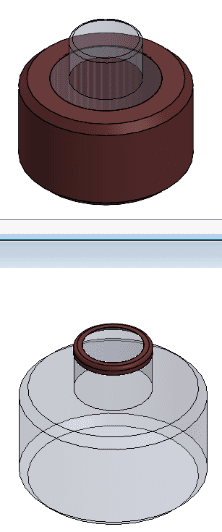
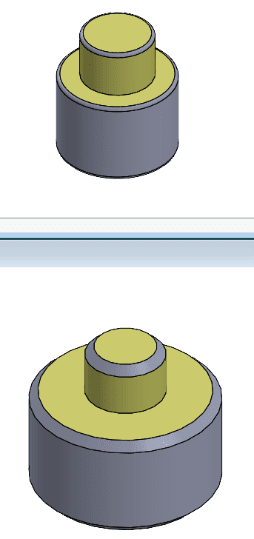
Select ‘Run Comparison’. Once the geometry has been processed, both parts will be tiled horizontally, and the next page of the Compare Tool displays graphical results for Volume and Face comparisons. Here, I have the original imported ‘.x_t’ file on the top and the modified version below.
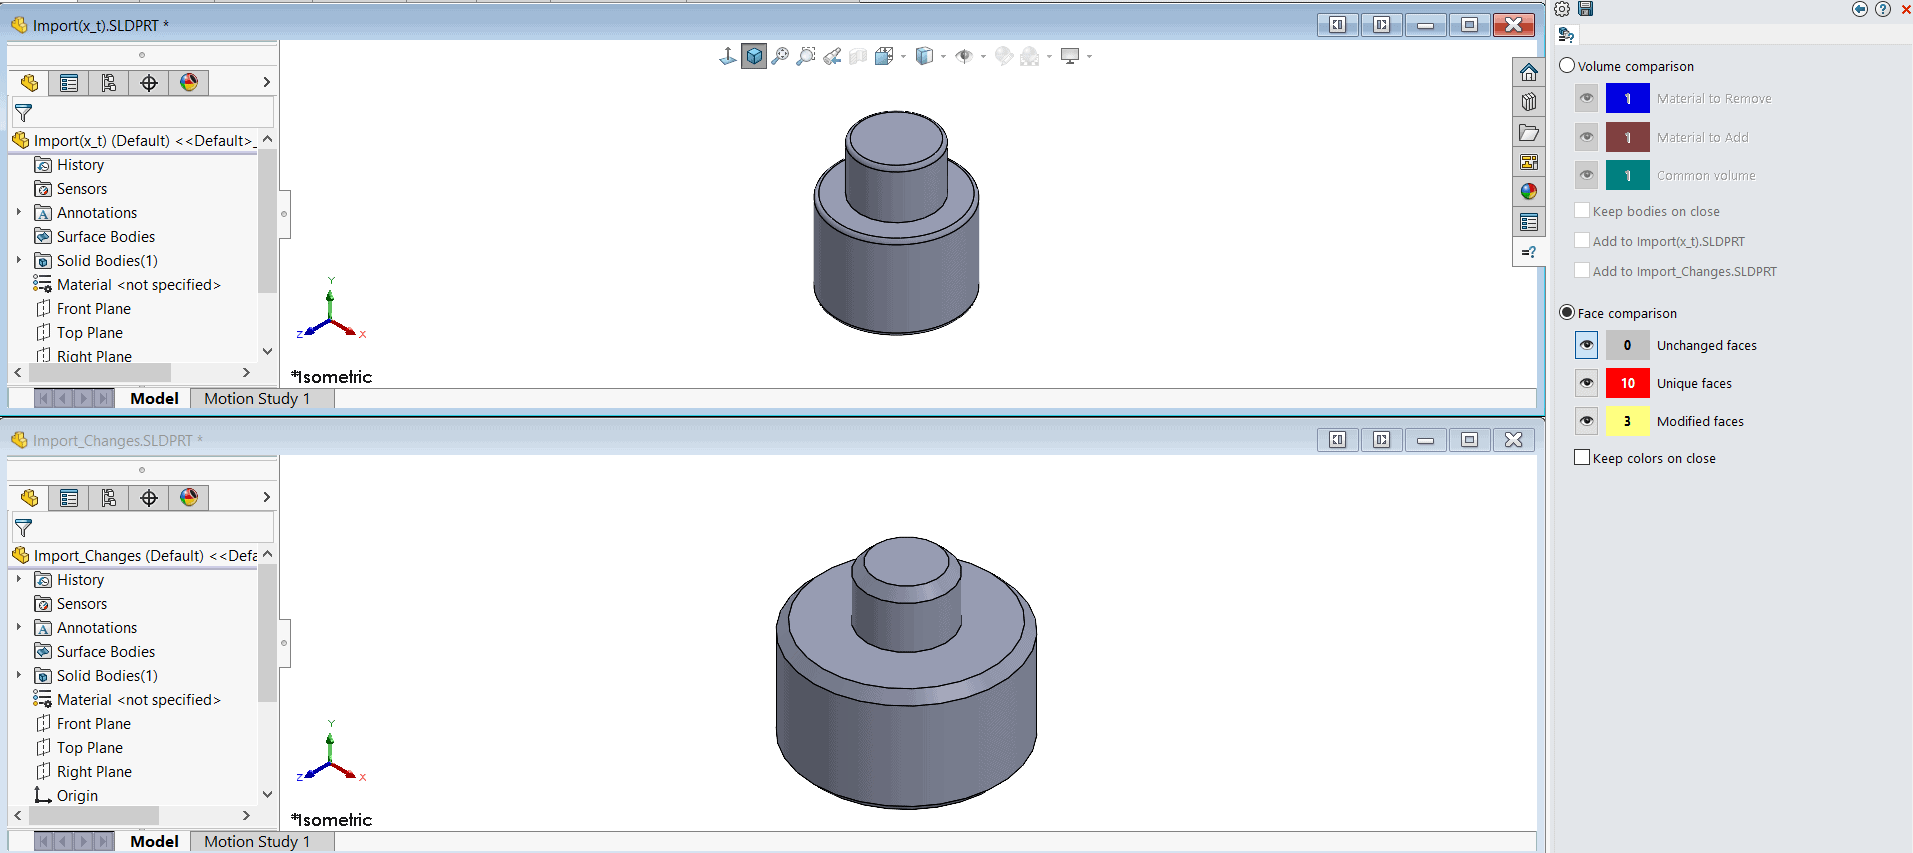
Orienting one model (translate, rotate, zoom) will orient the other in unison for a true apples-to-apples comparison.
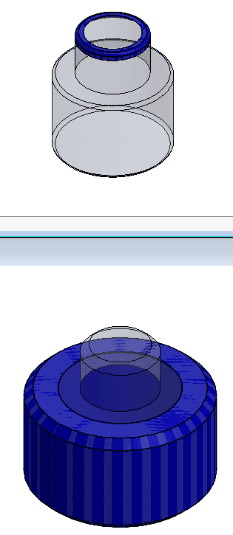
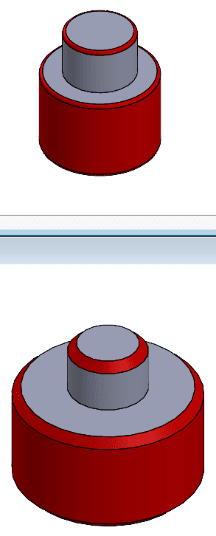
Selecting the volume comparison option enables Hide/Show for both added and removed material between the two models, as well as the common volume. Unique colors will be added to both models to easily pinpoint the geometric differences. More than one option can be used at a time.
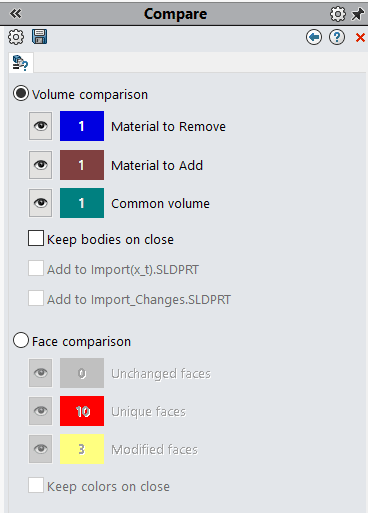
Volume Comparison:
Material to Remove: 1
Material to Add: 1
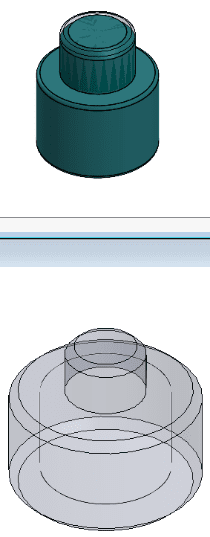
Common Volume: 1
Alternatively, using the face comparison option allows Hide/Show for unchanged, unique, and/or modified faces between the two models.
Face Comparison:
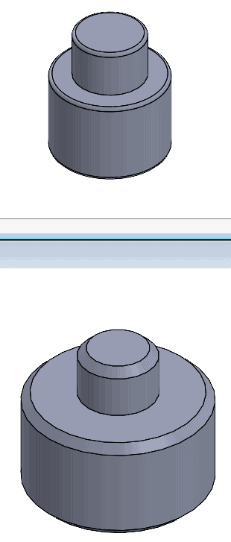
Unchanged Faces: 0
Unique Faces: 10
Modified Faces: 3
Selecting the Options/Settings Icon at the top of the Compare Task Pane allows you to change the applied colors for each graphic option. Additionally, linear units, decimal places, rounding, and angular units can be specified for a Results Report along with position and angle tolerances.
Selecting the Save Icon at the top of the Compare Task Pane will prompt you to choose a save location and file name. The saved report will generate geometric data for: Face and Volume Comparison, Mass Properties, Model Check, and Modified Faces, as well as Jpeg’s of Model Views.
The Compare Geometry tool can be taken a step further by incorporating the geometric changes into the Reference/In-Work file; saving you time and effort to make any necessary changes. If this feature is desired, select ‘Keep bodies on close’ and then specify which of the two files you would like those geometric changes to be applied to.
Once you close the Compare tool in the Task Pane (provided the ‘Keep bodies on close’ option is selected, the comparison data will be saved to the intended file as a separate Solid Body and represented as its own line item in the Feature Manager Design Tree. Expand the ‘Compare Volume’ folder in the Design Tree and each subsequent folder to reveal the new Solid Body. These additional Solid Bodies are also represented in the Top-Level Solid Body Folder higher up in the Design Tree.
If additional bodies are added to the model, the geometric volumes can be merged by using the Intersect or Combine tools.
Lastly, the Compare Geometry tools allows for the comparison of Bill of Material (BOM) tables. This can be performed between two SOLIDWORKS assemblies or drawing documents associated to the selected files. This utility locates all BOM tables in the documents. Excel-based BOM comparison is not supported.
SOLIDWORKS Compare Utility also supports Documents, Features, and 3D PMI. For additional information on Comparing Drawing Documents, please see this blog: https://www.cati.com/blog/solidworks-utilities-compare-drawings/
Additional information can be found on the SOLIDWORKS Help site: https://help.solidworks.com/2022/english/solidworks/sldworks/c_compare_overview.htm
Gabriel Rodriguez
Application Engineer I
Computer Aided Technology