SOLIDWORKS Visualize Professional: Using Physics Simulation
With the release of SOLIDWORKS Visualize 2019 comes the great new feature allowing you to run Physics Simulations on your models which includes having your models fall and collide with each other just as they would in the real world.
Tech Tip: To be able to access the functionality of the new Physics Simulation, you will need a license of SOLIDWORKS Visualize Professional.
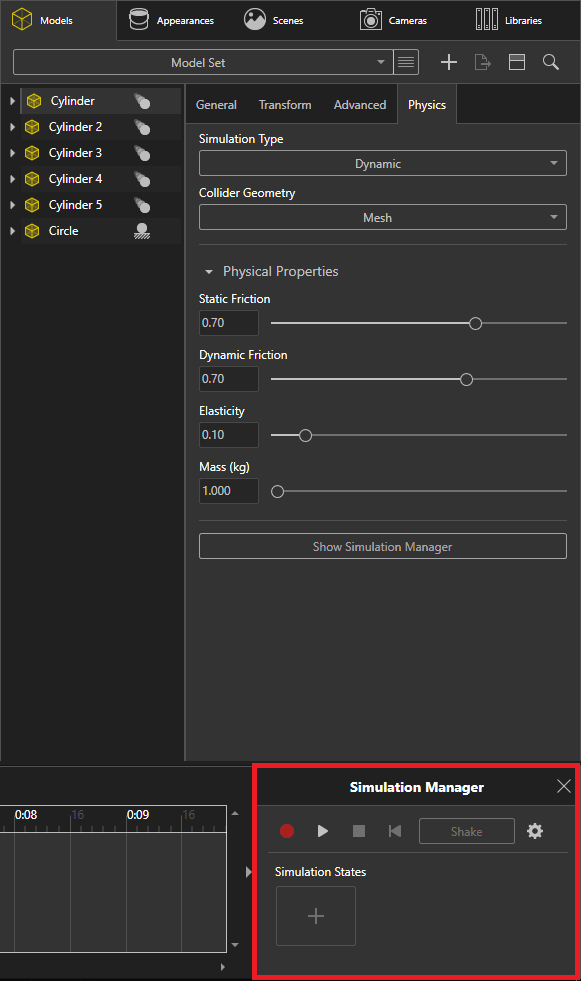
The first step in running your Physics Simulations will be to set up how each model or solid will be treated. You will be able to access these settings in the Model Tab in Visualize. You can select the Model, Part or Group in the Model Tab and then select the appropriate Physics setting on the Physics Tab for that selection.
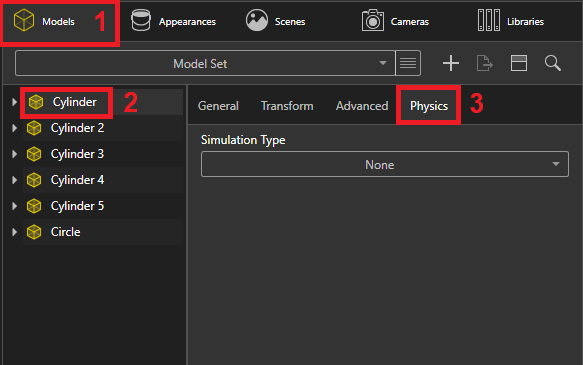
Under the drop-down list for Simulation Type you will find the following selections:
None: The object will not be included in the Simulation.
Static: The object cannot move but can be collided with.
Dynamic: The object can move and its motion is determined by the Simulation.
Vehicle: The object represents a vehicle.
Tech Tip: The Vehicle Simulation requires additional setup but will allow you to recreate real-world car physics and even allow you to control your vehicle in Visualize with a controller for photo-realistic driving footage.
In this scenario, I have built a simple column tower using Visualize Models to simulate the new Shake feature in Simulation.
For this Simulation, I will set each Cylinder to the Simulation Type “Dynamic” to allow them to move and collide with their environment. I also created a Ground Plane that I will set to the Simulation Type “Static” as it can be collided with but will not move.
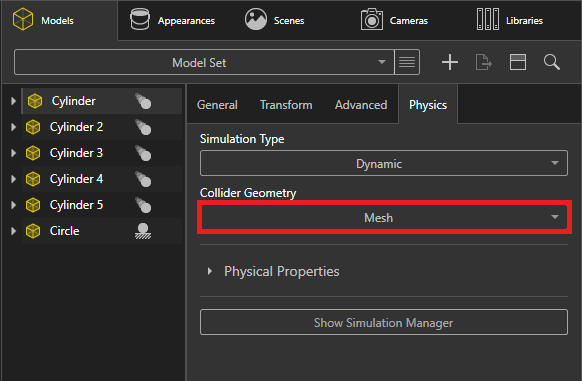
When choosing “Dynamic” or “Static” Simulation Types, you have the additional option to set the Collider Geometry. Your options are:
Bounding Box: Provides less accurate but faster Simulation results.
Mesh: Provides more accurate but slower Simulation results.
I have set each of my columns to the “Mesh” Collider Geometry as this is very simple geometry and won’t add too much time to my Simulation. If you have irregular shapes, the “Mesh” option will capture the exact collisions of your geometry. The option you choose will depend on the complexity of your geometry and how accurate you want your Simulation to be.
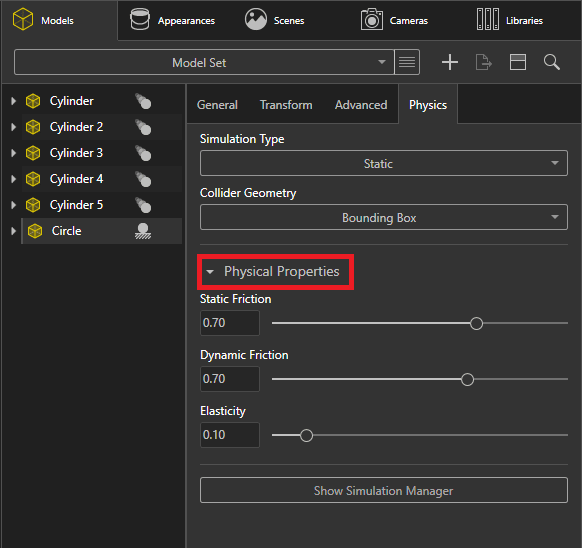
Tech Tip: Expand the Physical Properties dialog to access additional controls including the ability to change the Friction and Elasticity settings.
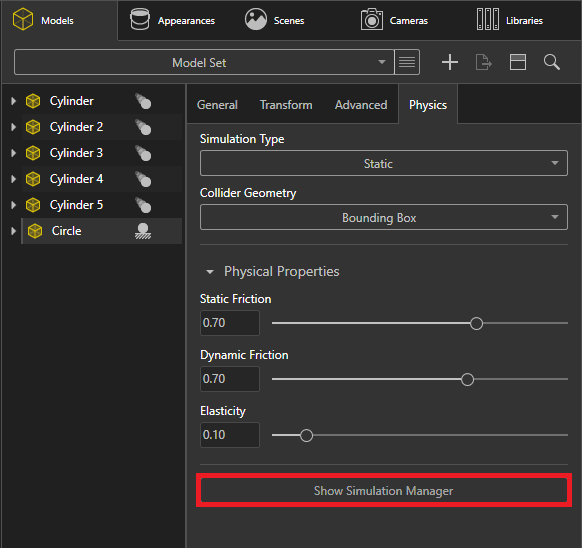
Once your Simulation settings are completed you can then Show the Simulation Manager by selecting it from the Physics Tab.
The Simulation Manager will appear in the bottom right in your Visualize Timeline.
Tech Tip: You can hide and show the Timeline quickly by pressing the “T” key.
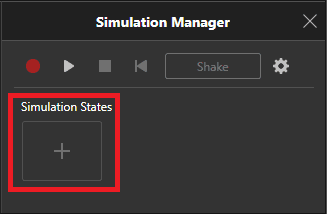
In the Simulation Manager you can:

Record Physics: This will create an animation in the Timeline that you can playback and render to video.
Toggle Physics: This will allow you to Play and Pause the Physics Simulation.
Stop Physics: This will Stop the Physics Simulation and return the models to their starting position.
Reset Physics: This will reset the models to their starting position but continue the Simulation.
Shake: With the Simulation Toggled On, Press and Hold the Shake button to jitter or add an earthquake effect to the scene.
Properties: The gear icon will allow you to change the gravity effects on your scene.
Tech Tip: Use the Shake option in short bursts to give your Models a little more randomness in their placement to add realism to your scene.
Here is an example of using the Shake option on the columns that I have setup in this scenario.
Lastly, you can add Simulation States by pressing the Plus icon in the middle of the Simulation State box to take a snapshot of the Model positions at that moment and save them to go back to later to resume your Simulation or change your Simulation effects.
Tech Tip: Use the gravity effects on your Models and have them fall in your scene in a natural way to help capture realism and greatly reduce the time it takes to position the Models yourself.
I hope this helps you get started using the Physics Simulation in Visualize Pro and Happy Rendering!
Jordan Puentes, Elite AE
Application Engineer
Computer Aided Technology, LLC