Taking Advantage of the Command Manager: Forgotten Tools and The Reasons to Use Them Part 3
Good day, and welcome to the third and final installment of the “Forgotten Tools and Reasons to Use Them” series. Today we’re going to look at the user interface, and see how we can configure it to maximize efficiency when using SOLIDWORKS.
SOLIDWORKS provides a myriad of ways to customize the interface. As a matter of fact, you can even save your custom settings in a matter of seconds. For right now we’ll focus on the command manager, and shortcut tool bars.
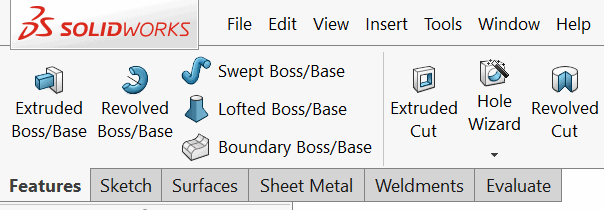
Along the top of your screen to find an array of tabs. These tabs make up the command manager, and contain several feature sets that you’ll use on a regular basis. Each tab hosts features pertaining to specific modeling functions. For sheet metal and thin walled parts there’s the “Sheet Metal” tab. For Organic shapes and surfaces, there’s the “Surface” tab.
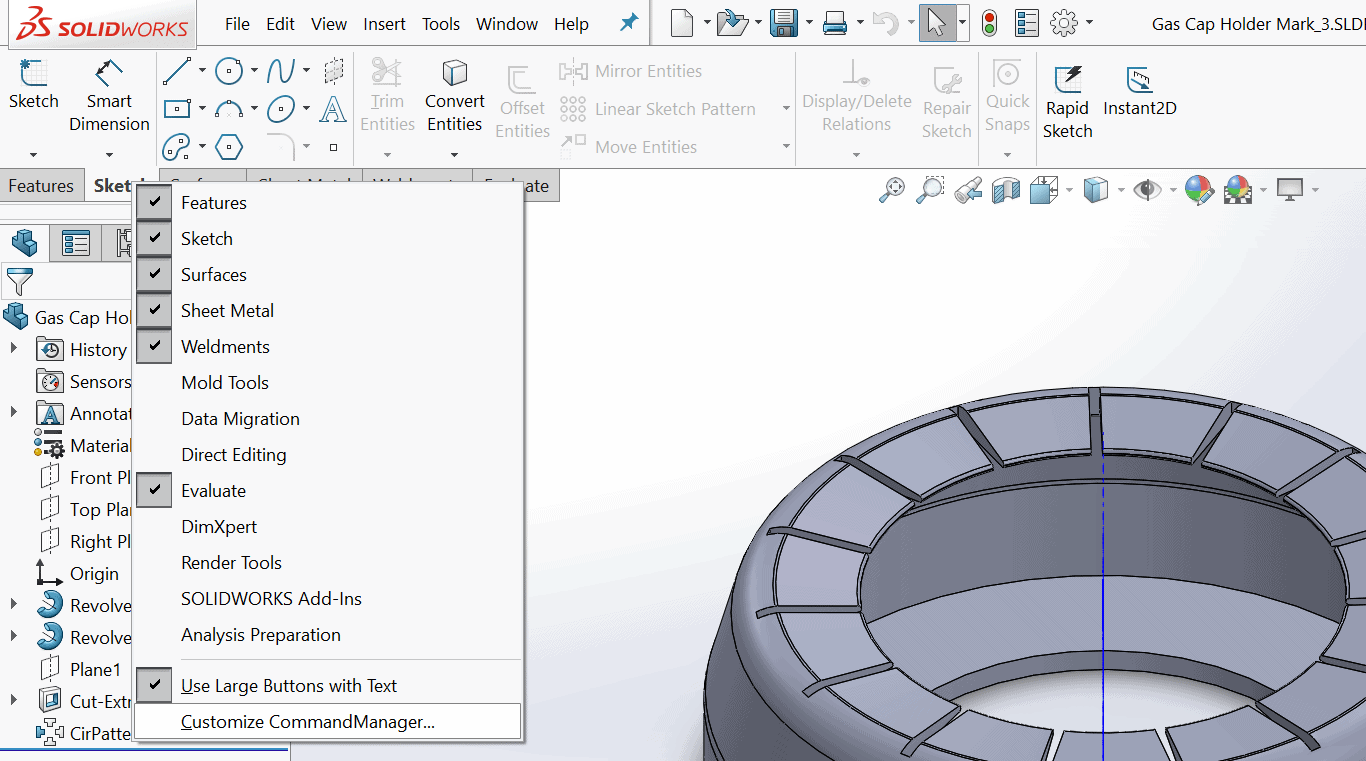
I can hide these individual tabs easily right clicking on anyone of them and selecting the specific tab that I want to hide, and repeating the process to show the tab. I can also customize the content using the command manager. The command manager can be found by right clicking on any one of the feature tabs, and selecting “Customize Command Manager”.
From the “Customize” dialogue there are several different tabs to customize. The dialogue allows the user to deeply customize their interface to look exactly the way they need it to. Let’s click on the second tab for example. The second tab is for “Shortcut Bars”. Shortcut Bars are floating palettes that can be tied to a hotkey allowing users quick access to their tools and commands. When I click on the “Shortcut Bars” tab, I’m shown a “Toolbar” pulldown menu to select the toolbar category desired. Once selected, the buttons list shows me all the commands of the toolbar I’ve selected. Any of these buttons can be added to my shortcut bar. I’m also shown a sample of a shortcut bar for the “Part Space” to the right with the ability to switch shortcut bar formats by choosing the icons listed.
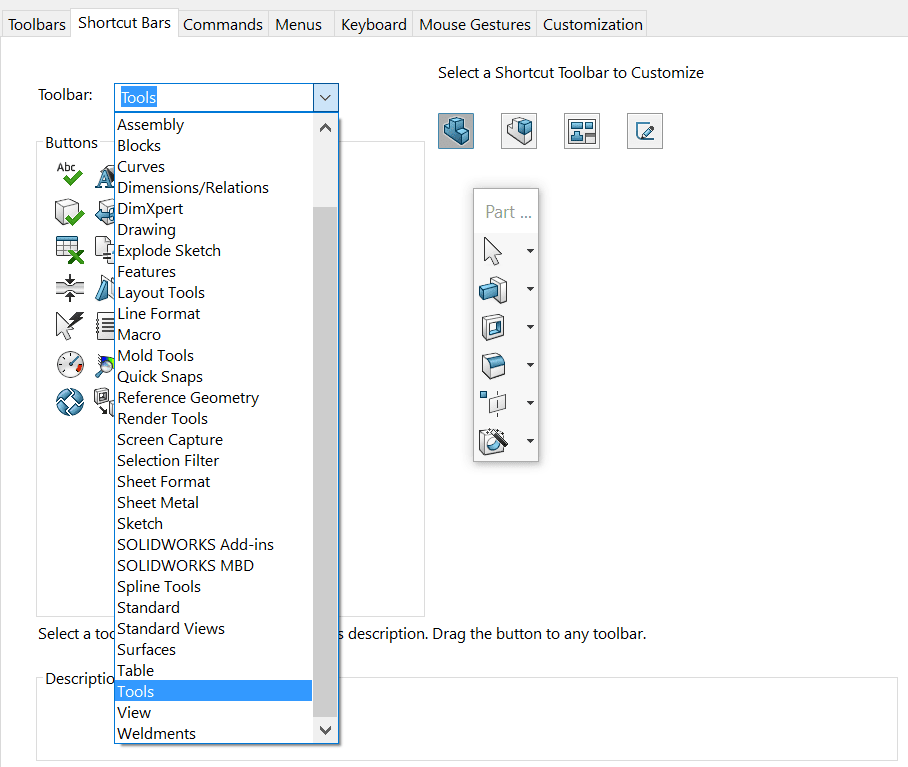
The shortcut bars have separate default arrangements for the Part Space, Assembly Space, Drawing Space, and Sketch space. Adding or removing items from these shortcut menus is simply a matter of clicking and dragging. If I click and hold a button from the “Buttons” list and drag it to the shortcut bar selected to be shown, I can attach that button to the list of commands in the shortcut bar.
For instance, I know that the “Measure Tool” is a tool that I use often, so I’d like to add it to my shortcut bar for the part space. Inversely, if you click and drag one of the buttons from the toolbar, I get a red “x” icon showing that if I release this icon the button will be removed from the shortcut bar.

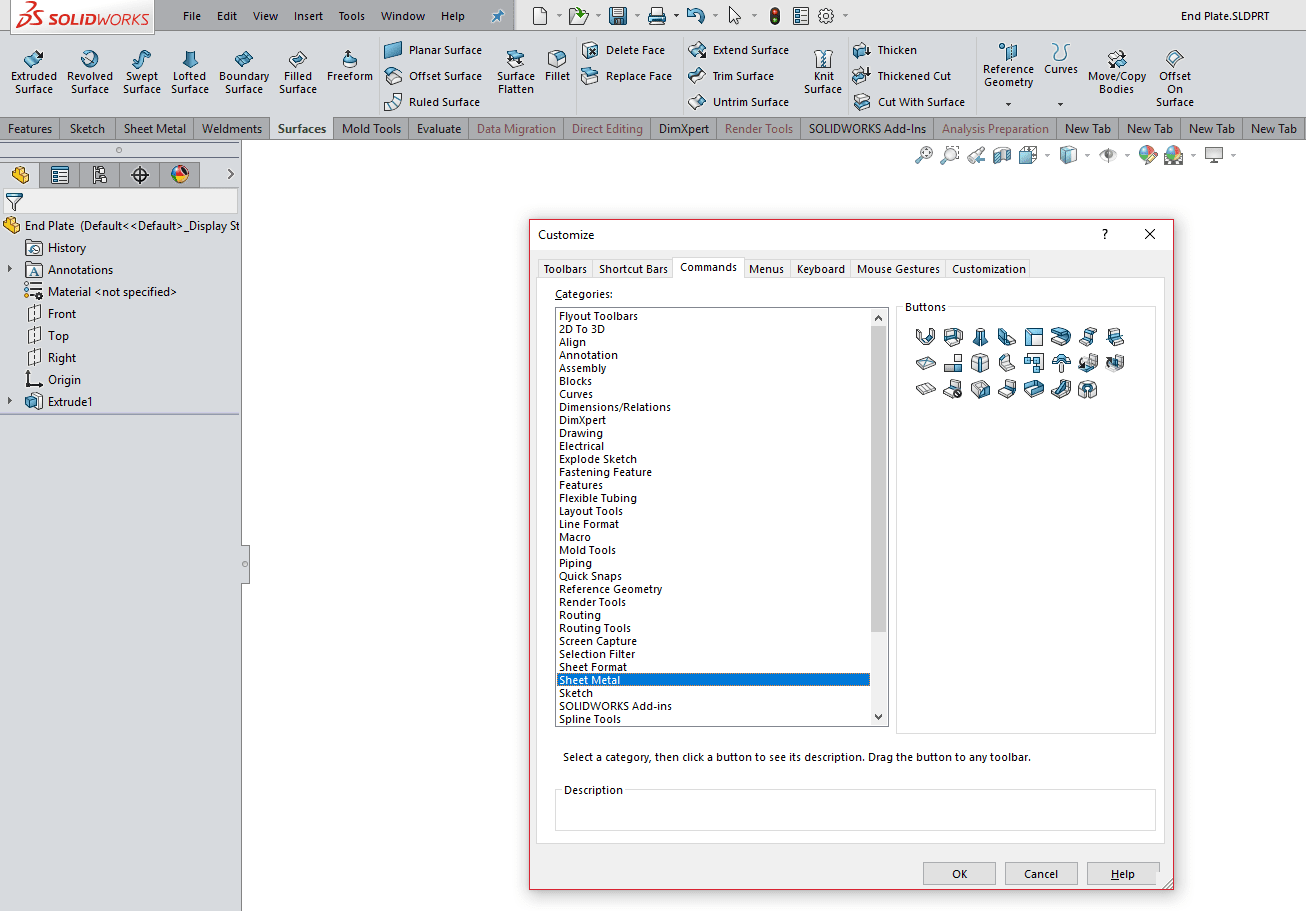
The “Commands” tab allows me to customize the command manager by clicking and dragging what features and commands I want to have visible on each command tab. Once again, by first choosing the category that contains the features or commands you wish to place, and then clicking and dragging from the button list. This same tab allows me to remove or create new tabs for the command manager also by clicking and dragging.
The “Customize” dialogue can be used to configure Toolbars, Commands, Keyboards, Gestures, and much more. SOLIDWORKS continuity with this level of customization shows how dedicated how committed they are with helping the user work more efficiently than ever. This wraps up the Forgotten Tool and Reasons to Use Them” series. I hope the brief views we’ve had of these tools influence users to not only use them more often, but also motivates users like you to explore the many tool sets SOLIDWORKS has in more detail.