Teaching Kids How to Fling Stuff! With SOLIDWORKS and Trebuchets. Part Three: It Works
To fill you in on what has happened so far. In blog one of this series “Teaching Kids How to Fling Stuff! With SOLIDWORKS and Trebuchets” we looked at what a trebuchet is and why I got involved in such a cool project. The second blog of this series “Teaching Kids How to Fling Stuff! With SOLIDWORKS and Trebuchets. Part Two the Design” we discussed the design process including the use of SOLIDWORKS and Simulation. In this final installment I wanted to give you a feel for the work put into the build and the excitement the cub scouts had when the trebuchet launched the first projectile.
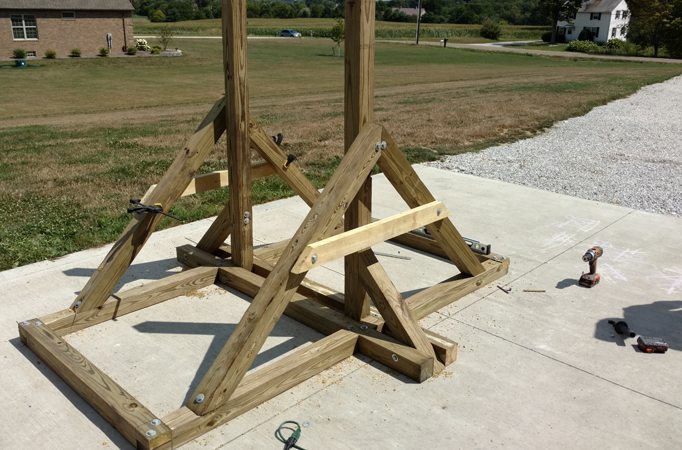
Early on in the design we discussed making the trebuchet a “kit” so that the cub scouts could safely put it together. This meant the power tools were left to the big kids, and that we would have to build the trebuchet, and then take it back apart. The fame went together quickly, and the dado cuts were the hardest part. Basic tools including a table saw, miter saw, and cordless drills were all we used to create the frame and counter weight. The frame and counter weight were constructed with 4″x4″ and 2″x4″ lumber. 2.5″x0.5″ and 5″x0.5″ lag screws were used to hold the frame together. We used standard deck screws to assemble the counterweight basket.
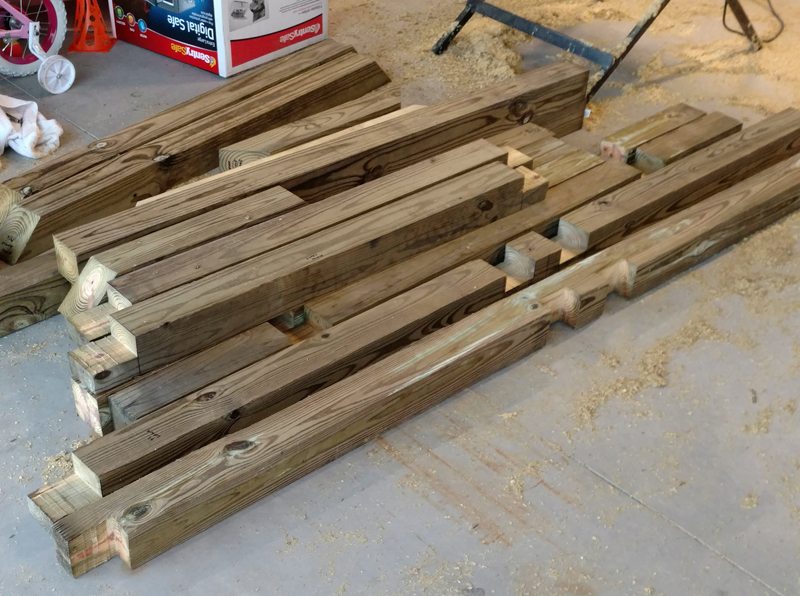
2″ schedule 40 pipe was used for the main arm axle and counter weight pivot point. At the place of purchase the pipes were complimentary cut and tapped for us. This was a huge help. We used threaded pipe caps to hold the axles in place. The majority of the lumber was donated to the cub scouts by the local Home Depot, Lowes, and Ace hardware stores.
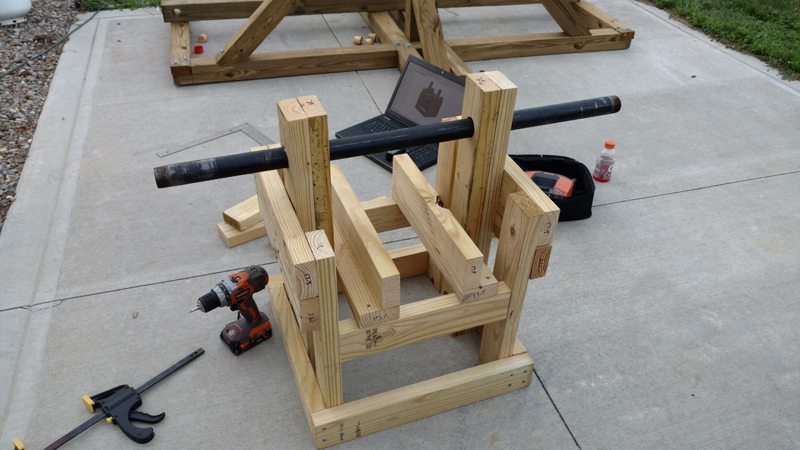
The fame assembled quickly once all the wood was cut. You will see the laptop in the background with SOLIDWORKS open. We used no 2D Drawings for this as it was easy enough to interrogate the 3D model for dimensions and fitment.
Once the trebuchet was almost fully assembled we moved onto the topic I have yet to discuss in this blog series. The sling. Yep, we ignored this when building it and I ignored telling you about the design of the sling for a reason. Mainly it is the most variable part of the design. Ultimately we ran across a couple of references that state the unfolded sling length should be equal to the length of the arm. Meaning we would use an 8′ sling. This extends the projectiles length beyond the end of the arm by 4′ creating a 9.5′ lever distance. The sling was constructed from 0.5″ cotton clothes line and a pillowcase. Pillowcase was cut down to size and pockets along the side were sewn so the cord could pass through allowing us to vary the sling length. The length of the sling and the pocket size greatly impact the trajectory of the projectile. We found out that the pocket should optimally wrap around no more than 60% of the projectile.
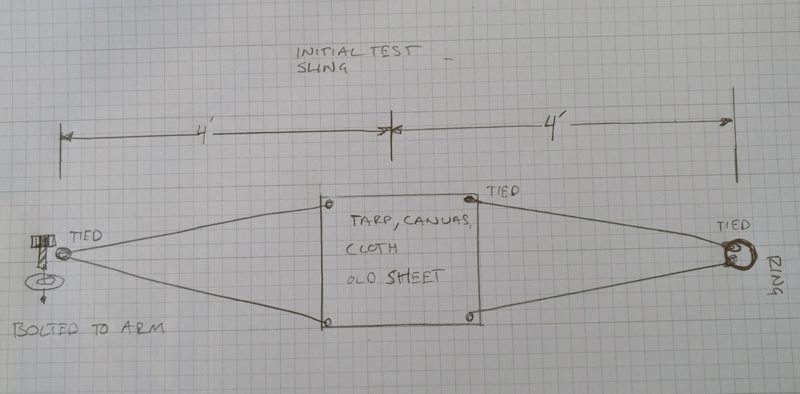
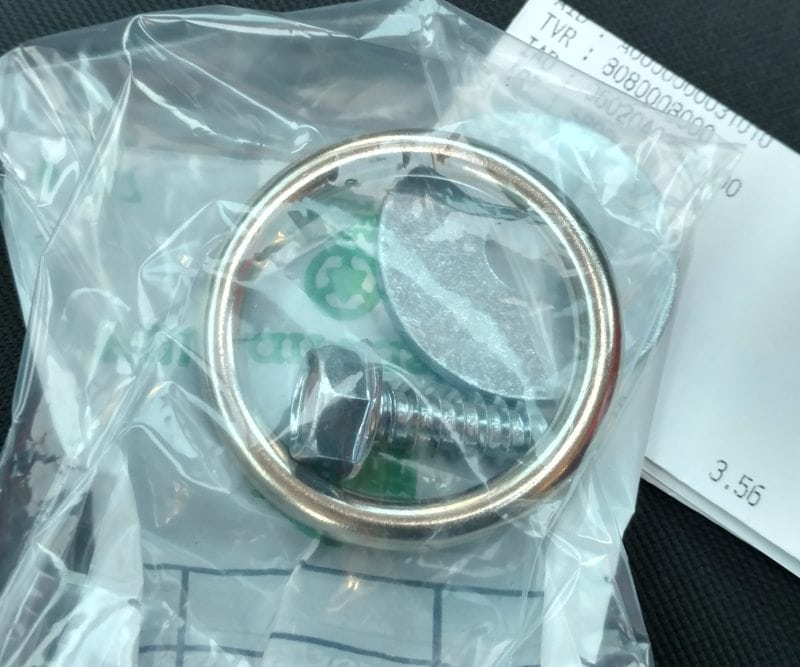
The sling rope is wrapped around the ring at one end and bolted to the end of the arm at the other. A pin at the end of the arm holds the ring until the sling and arm are in an orientation that it slips off and opens the sling. This releases the projectile on its way.
After a short presentation about engineering and design the cub scouts had a great time assembling the trebuchet. Because I was helping I did not take any of my own photos and haven’t gotten any of the build photos from the parents yet. After a good amount of Safety Safety and more Safety rules we let the kids go at it. The scouts incrementally increased the weight 50lbs at a time and we discussed how this affected the thrown object. They had a blast! Literally. Check out the video below. This is an 8lb medicine ball that was thrown around 30 yards. Later in the day water was added to the sand in the counter weight basket. More weight equals more distance. With some sling tweaks the medicine ball was thrown an amazing 60 some yards. Also check out how closely the Motion Study I showed the cub scouts and the real video match up.
We used a random number generator and had the kids guess to see who pulled the firing pin. I hope this blog series and project inspired you to use SOLIDWORKS not just for your everyday job but to teach kids how cool engineering is.