The Transporter Project: Design to Manufacturing Series (Part 6)
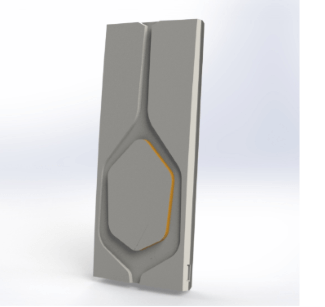 Early on in our Design to Manufacturing series, we revealed some design concepts for our headset/cellphone stand that our Application Engineers were working on. The seven designs up for consideration were designed around portability and adjustability yet were creative and functional. We were able to narrow the final design down to two. In part four we saw how the Holster Project came together, in this blog we’re going to take a look at the Transporter.
Part 1 | Part 2 | Part 3 | Part 4 | Part 5
To take a design from conception to production often takes several steps and requires the finesse to retain the original design from the conceptual designer all the while ensuring that it is a functional and robust enough model.
 In the case of the Transporter, let’s take a look at the design process and how I was able to adapt the original design to withstand the load of the phone and headset along with enough room to house the electronic components.
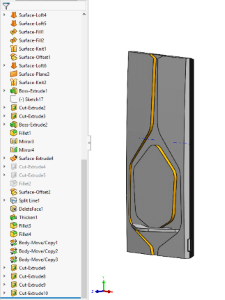
When you jump into someone else’s design, it takes a hot minute to calibrate yourself to where you are. I like to take the rollback bar and run through the entire sequence ultimately deciding what I can and cannot use. My conceptual designer for the Transporter really had the end goal in mind. Even though he used extensive surfacing to create the model, he knit it well enough to create a watertight model that I am able to build into.
Once I got myself situated, the first step was to find a solution as to how the model stands up. I had two choices: a top hinge or a bottom each coming with its additional options.
Whether top or bottom, I need to work my way through the various options. A living hinge would be excellent but certain consequences occur with that. Since we’re using 3D printing in our design process, I needed to consider the material properties that may wear out on a living hinge over time. By having a pin hinge, I don’t have to worry about wear as much and still end up with a comparable rigidity.
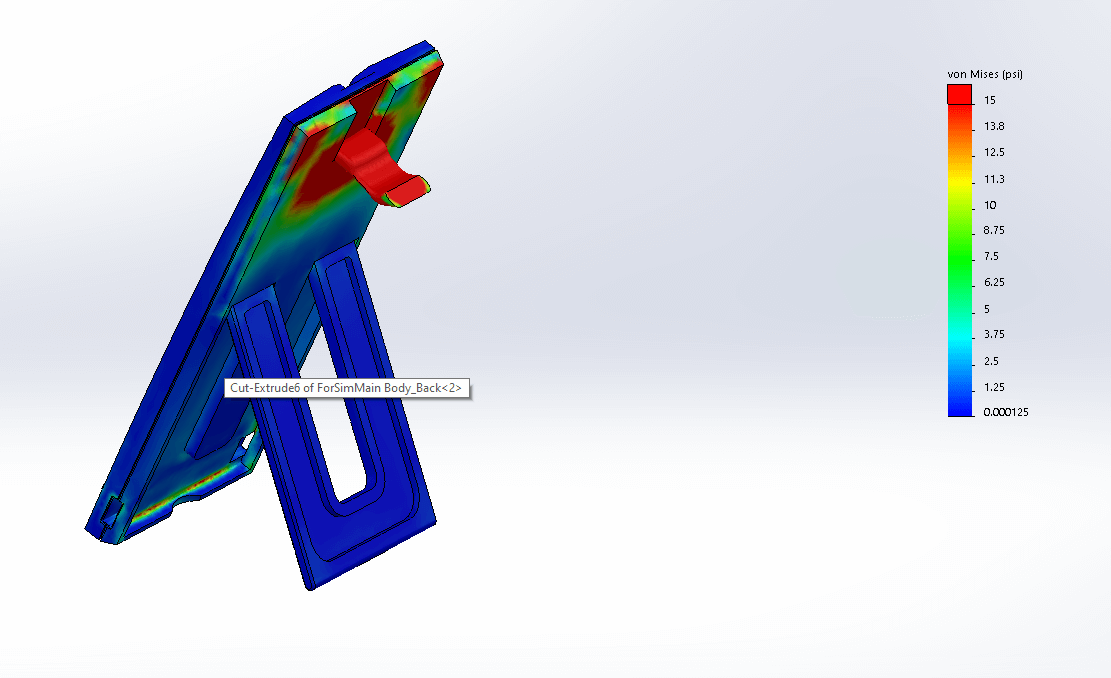
To ensure my final design will be able to withstand the loads we are putting it through, I asked SOLIDWORKS Simulation Expert, Drew Buchanan, to run it under various loads to test its capability. Giving the high end of loads for both the phone and the headset, the carrier had minor stresses that fit within our requirements.
My final task was to 3D print a prototype. (Why is prototyping important? Find out here). My first build exposed a few oversights on my part. For instance, there was no way to pull the kickstand out, the pinholes were too tight of tolerance so it didn’t fit, and I didn’t have the parts printed in place requiring me to use a hammer and chisel to get an initial check of the hinges.
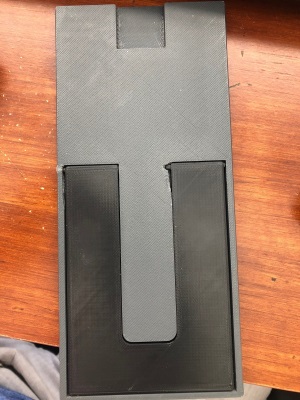
My second print addressed these issues and I was able to have a fully functioning prototype. While it performed as I expected it to, I did discover another adjustment in its ability to hold the headset: with the legs fully extended, it was too short to hold them. My third and final print provided the exact same requirements we were hoping to achieve and with all the functionality as expected.
In the next blog in our Design to Manufacturing Series, we’ll showcase how SOLIDWORKS Electrical played a major role in the design process.
Want to see our final design in person? Join us at one of our SOLIDWORKS 2020 Design to Manufacturing Events.
Related Articles
Is it Time to Give Your SOLIDWORKS Skills a Tune-Up?
Speed Up Selections with these SOLIDWORKS Speed Tips
Newly Announced SQL Server Updates for SOLIDWORKS Customers
About the Author
 David Janicki is an Application Engineer based out of our office in Grand Rapids, MI. He is a proud graduate of Western Michigan University, where he received his Bachelors in Engineering Management. Prior to joining Fisher Unitech in November 2015, David worked in various industries from Automotive and Sheet Metal to Electronic RFID’s. A large portion of his background is in the Continuous Improvement industry and still continues to be his passion, helping customers use the software more effectively both on a user and company level.