Tips for New SOLIDWORKS Users Part 2: Keep Your Sketches Simple
Welcome back to our series of tips for new SOLIDWORKS users. As I mentioned in my last blog, I started teaching SOLIDWORKS CAD software to both new and experienced students in 2001. This blog series covers three great tips I’ve learned over the years to help new SOLIDWORKS users get started off on the right foot:
- Always start your sketches the same way – and know when you are in sketch mode
- Keep your sketches simple
- Fully define, every time
My last blog covered the first tip. Today, we will move into the second: Keep your sketches simple.
Whether you are a brand new user or someone who has been working with SOLIDWORKS for 20 years, this guideline should always be remembered and followed: Keep your sketches simple! I have seen and worked on many cases where the engineer has tried to include far too much information in a single sketch. For today’s example, we will be looking over the sketches used to create this 3D printed part:
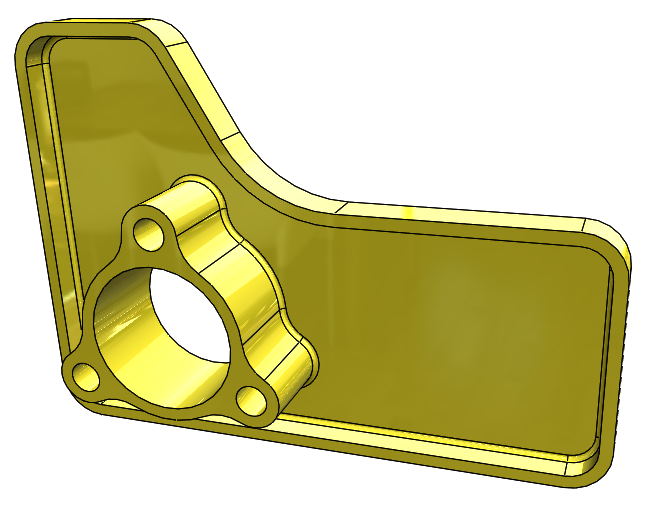
Figure 1: An example of a 3D printed part
Let’s start by taking a look at a “bad” technique for starting this model. The first sketch created could look something like this:
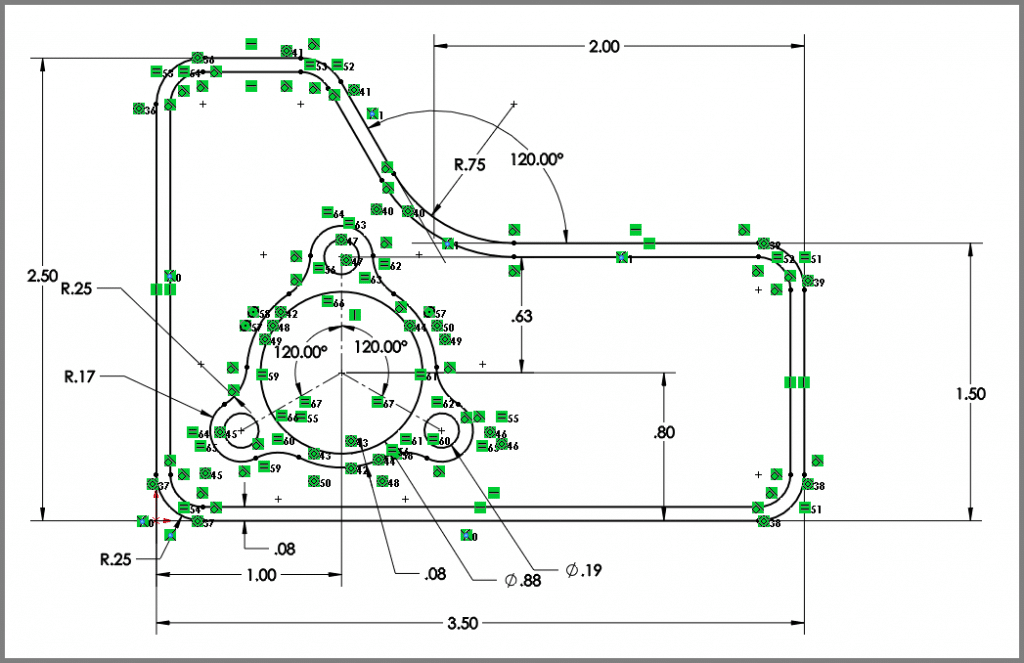
Figure 2: A sketch with too much information included
In the image above, we can see an example of a sketch with way too much information included in a single sketch. There are 18 dimensions and over 80 sketch relationships. When the user created this first sketch, they tried to include every possible detail of the design. The challenge this user will inevitably run into will occur when the user needs to make a change to the design. With this level of complexity, the most likely result will be that changing a dimension or deleting geometry will create a scenario that is very confusing. Let’s say the inexperienced user accidently clicks “co-radial” when they were trying to add a “concentric” relationship. The result might look something like this:
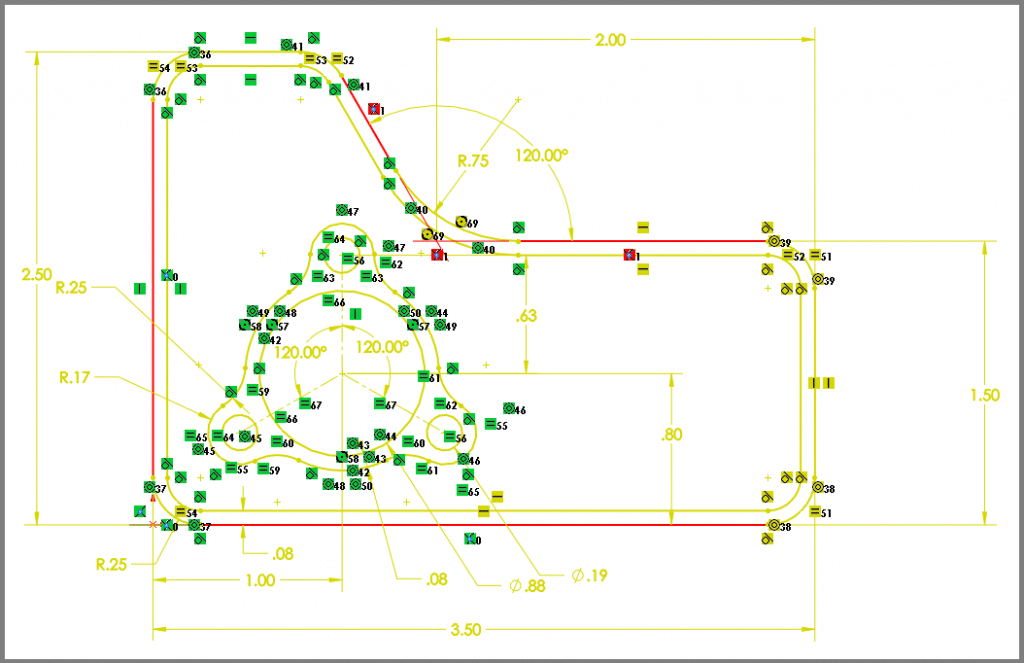
Figure 3: A complex sketch with errors after accidentally adding a co-radial relationship
Now what? Where is the problem? The change and the confusing results may result in the user picking through 100 relationships and dimensions to determine where the problem is. This would be a very frustrating and time-consuming process, and it’s a direct consequence of putting too many entities, dimensions and relationships into a single sketch.
As we said at the start of the tech tip, the real lesson here is to keep your sketches simple.
A better approach
Now that we have examined a less than optimal approach let’s take a look at how you could create this model using simple sketches with the goal of making each sketch much easier to manage.
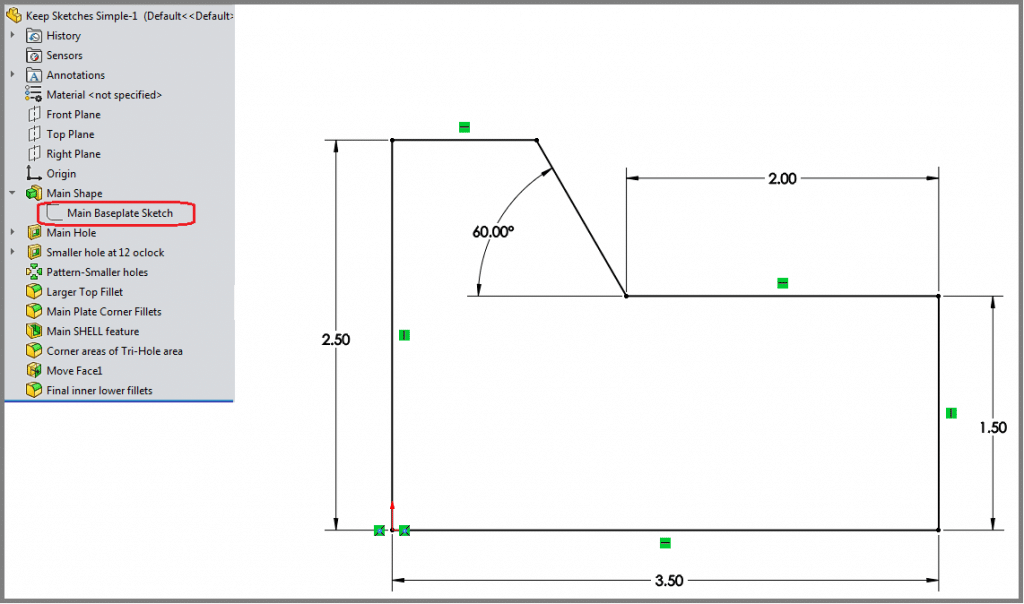
Figure 4: First sketch using simple sketches
As you can see in figure 4, the best way to start this model would be a simple sketch capturing the overall dimensions. Notice the use of sharp corners (not fillets), and the omission of any hole features. This eliminates the need for tangency relationships (in the case of fillets) and allows you to independently suppress and unsuppress any hole features, as they will be included in a separate step later in the design. This sketch has a total of 11 dimensions and relationships, which will make it much easier to troubleshoot if you run into a sketch error.
Now that you have created this first sketch let’s extrude the feature and move on to the second sketch.
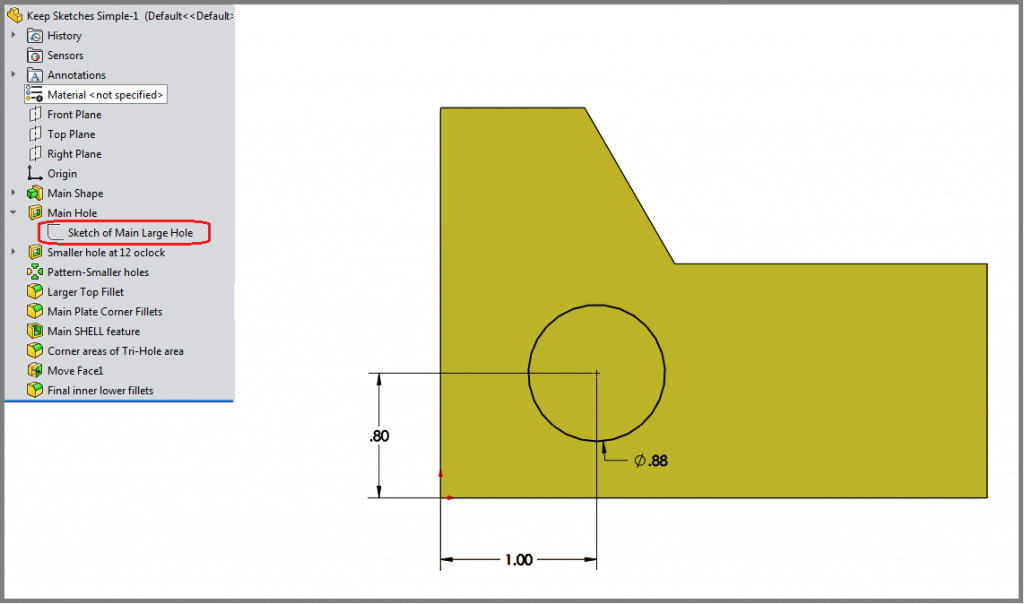
Figure 5: Second sketch using simple sketches
The second sketch you create will contain the information for the main hole. This sketch is very simple and only has 3 dimensions and zero sketch relationships. Note that in a sketch like this your best bet is to separate the larger hole and the smaller holes into separate sketches. This will make each sketch simpler and will allow for an easy to create pattern of the smaller hole.
Once you finish this sketch we can cut extrude it through the model and move on to the next sketch.
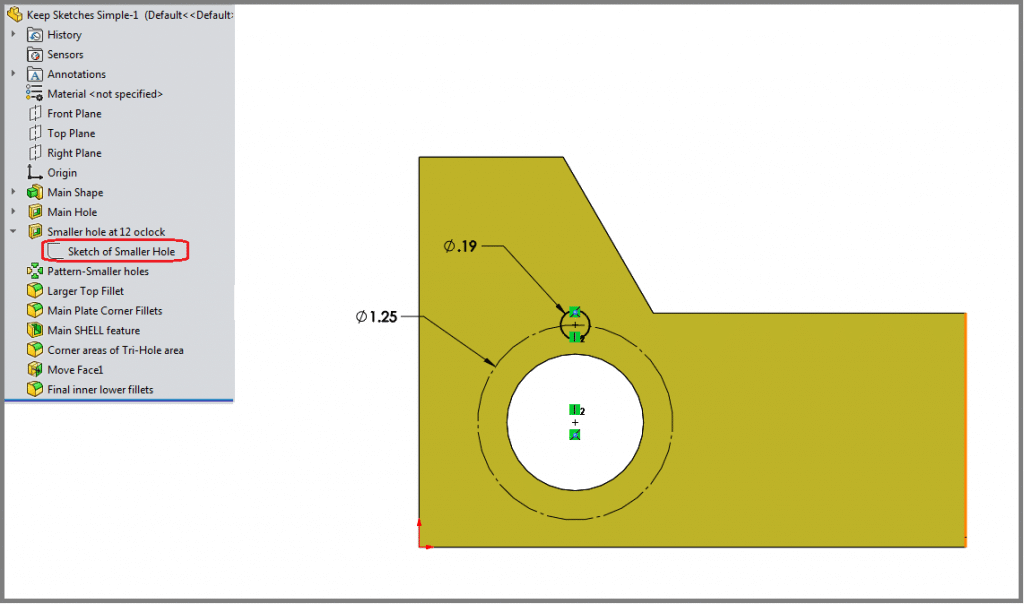
Figure 6: Third sketch using simple sketches
The next sketch I would encourage you to work on in this model would be the sketch representing the smaller hole. Again you can see that the sketch is very simple and consists of only four total dimensions and relationships. You will also notice that in a scenario where you will be using three holes, you will usually should create one single hole and then do a feature pattern. Again we are thinking about the total number of sketch relationships required, and trying to keep this number as low as possible.
The remaining features in the model can be created without creating any additional sketches.
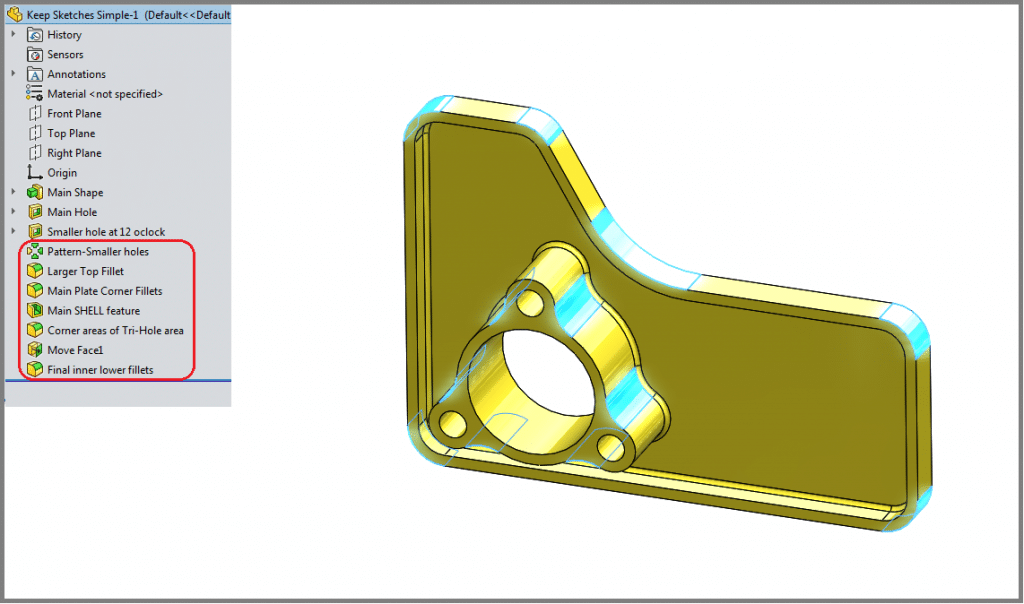
Figure 7: Remaining features in the model
For these remaining features, you are able to work off of and reference your existing features. This is particularly important when it comes to fillets. When adding fillets to a sketch you often get four additional sketch relationships (Tangent, Tangent, Radius, and Intersection). So anytime you can create a fillet using the fillet feature command instead of a sketch fillet, you should do so. This will decrease the number of relationships in the sketch.
Speaking of the number of relationships in the sketch, you will notice something pretty cool happened with this model. When you create the complex sketch to capture all of the model data, you end up with a sketch with a total of 100 relationships and dimensions. But when you break up the model into three simple sketches and take advantage of feature commands (such as fillet, pattern and shell), you end up with a total of 11+3+4 = 18 total sketch relationships and dimensions. I think you’ll agree that this will be much easier geometry to work with and troubleshoot.
When it comes to creating new models in SOLIDWORKS, remember this great tip: Keep your sketches simple. By limiting the total number of relationships and dimensions in a single sketch, you will make your sketches easier to work with and troubleshoot, so that you can get your projects complete and out the door as quickly as possible.
Be sure to come back for our next post where Toby will review the third great tip for users who are just getting started in the SOLIDWORKS software.
Related Articles:
- – Tips for New SOLIDWORKS Users Part 1: Sketch Mode
- – Tips for New SOLIDWORKS Users Part 3: Fully Define, Everytime