SOLIDWORKS: Transform Tips in Composer
Transform Tips in SOLIDWORKS Composer
SOLIDWORKS Composer has some very easy to use tools to create exploded views; the Translate and Rotate tools on the Transform tab come to mind. There are others, but those two are the main ones used and what I’d like to talk about.

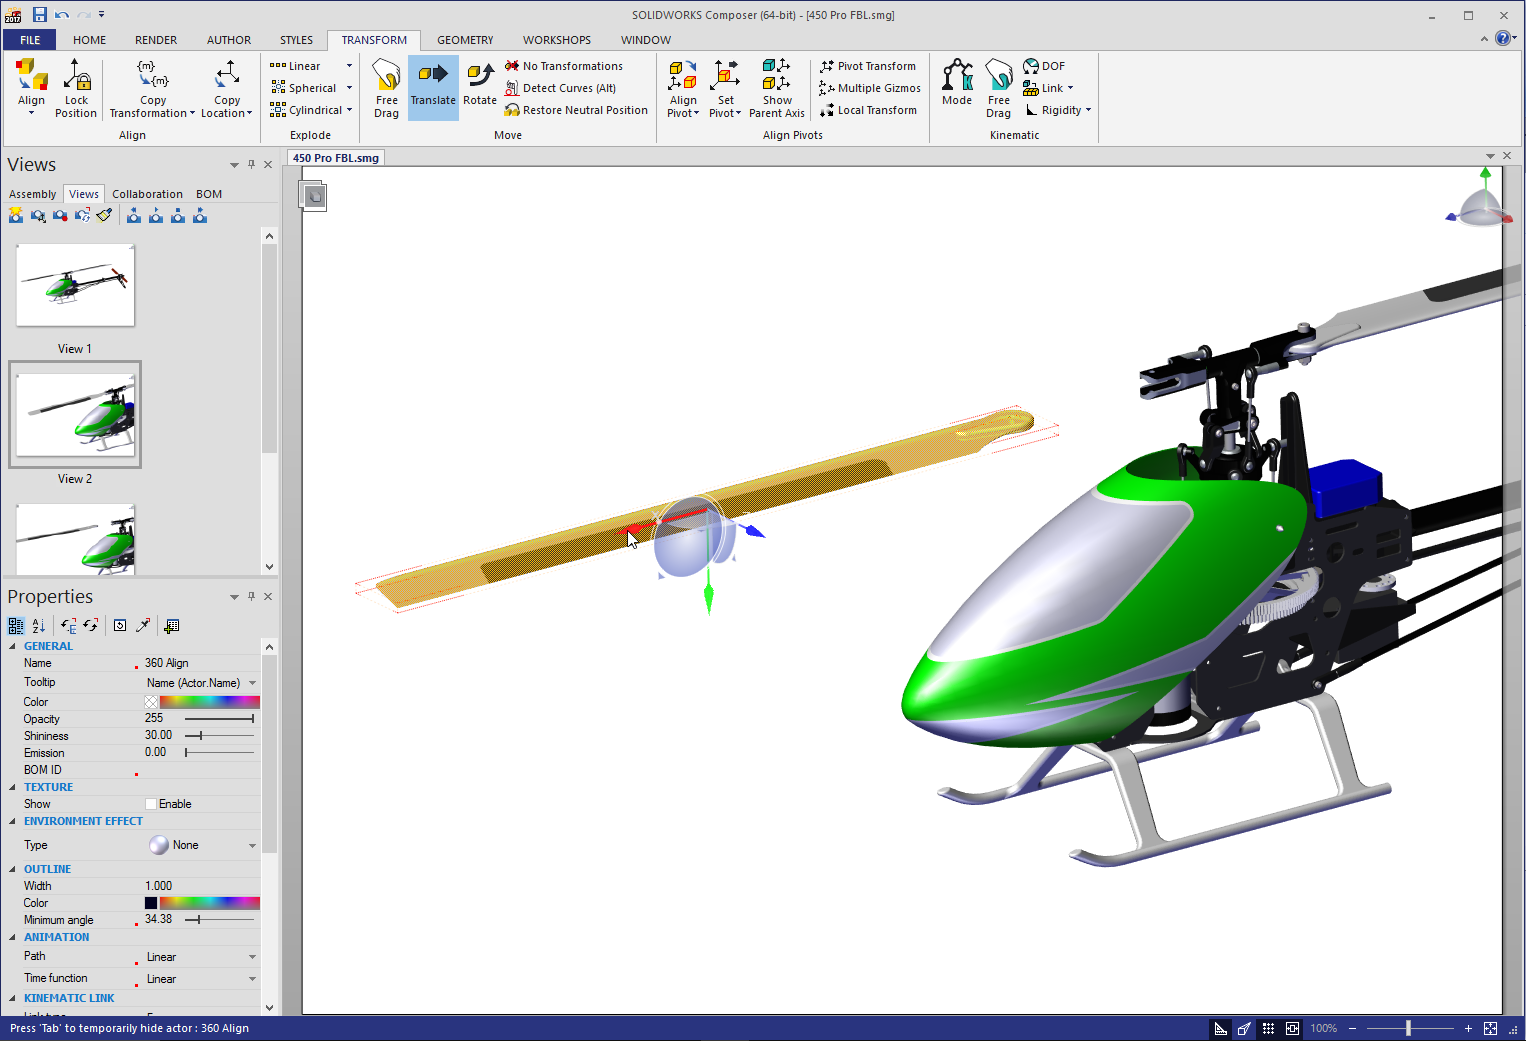
In this example, I’m beginning to capture views to document the disassembly of the rotor head of this RC helicopter. You can see that when I select an actor (that’s what models are called in Composer), and then select the Translate command, a Gizmo (the triad) is made visible. The Gizmo is at the center of the bounding box of the actor and its orientation is defined by the XYZ directions from the SOLIDWORKS model. This is where the actor will translate and rotate from.
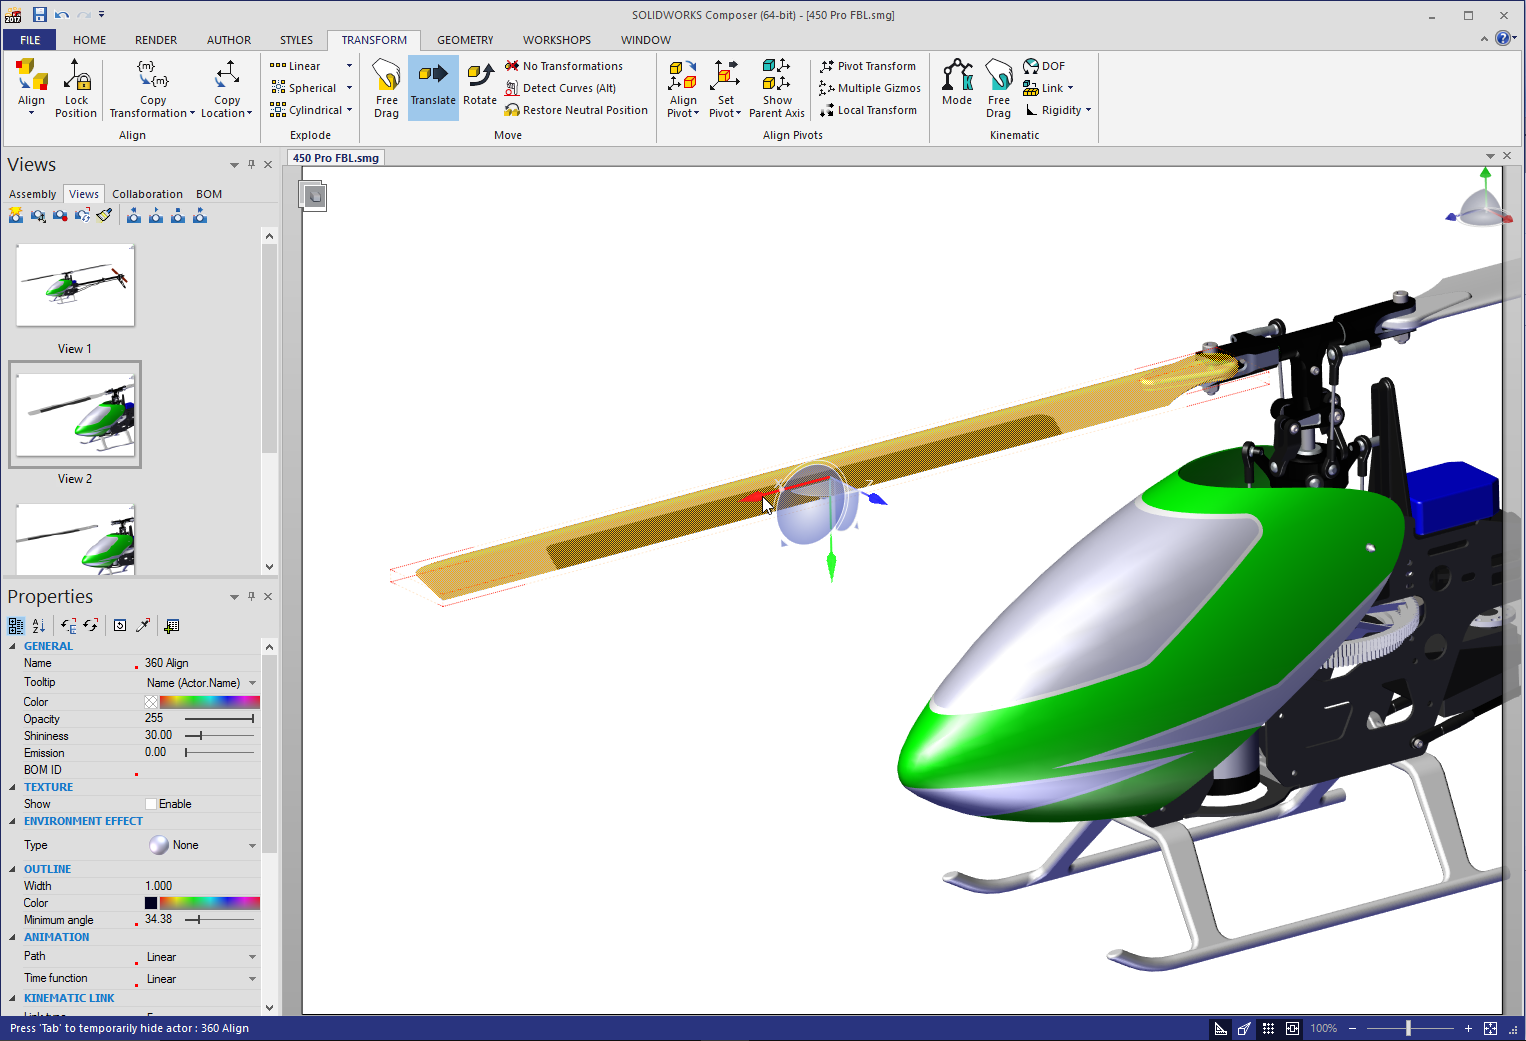
Position the actor by grabbing the X, Y or Z arrow on the Gizmo, they are quite easy to use. The default orientation of the Gizmo works most of the time, you simply click and drag to position the actor and then go to the next.
What if the Gizmo isn’t where you need it or you need to move an actor relative to another? Let’s look at an example using Rotate, but this works for all move and explode commands on the Transform tab. When I select Rotate and one of the link actors, as expected, the Gizmo is at the center.
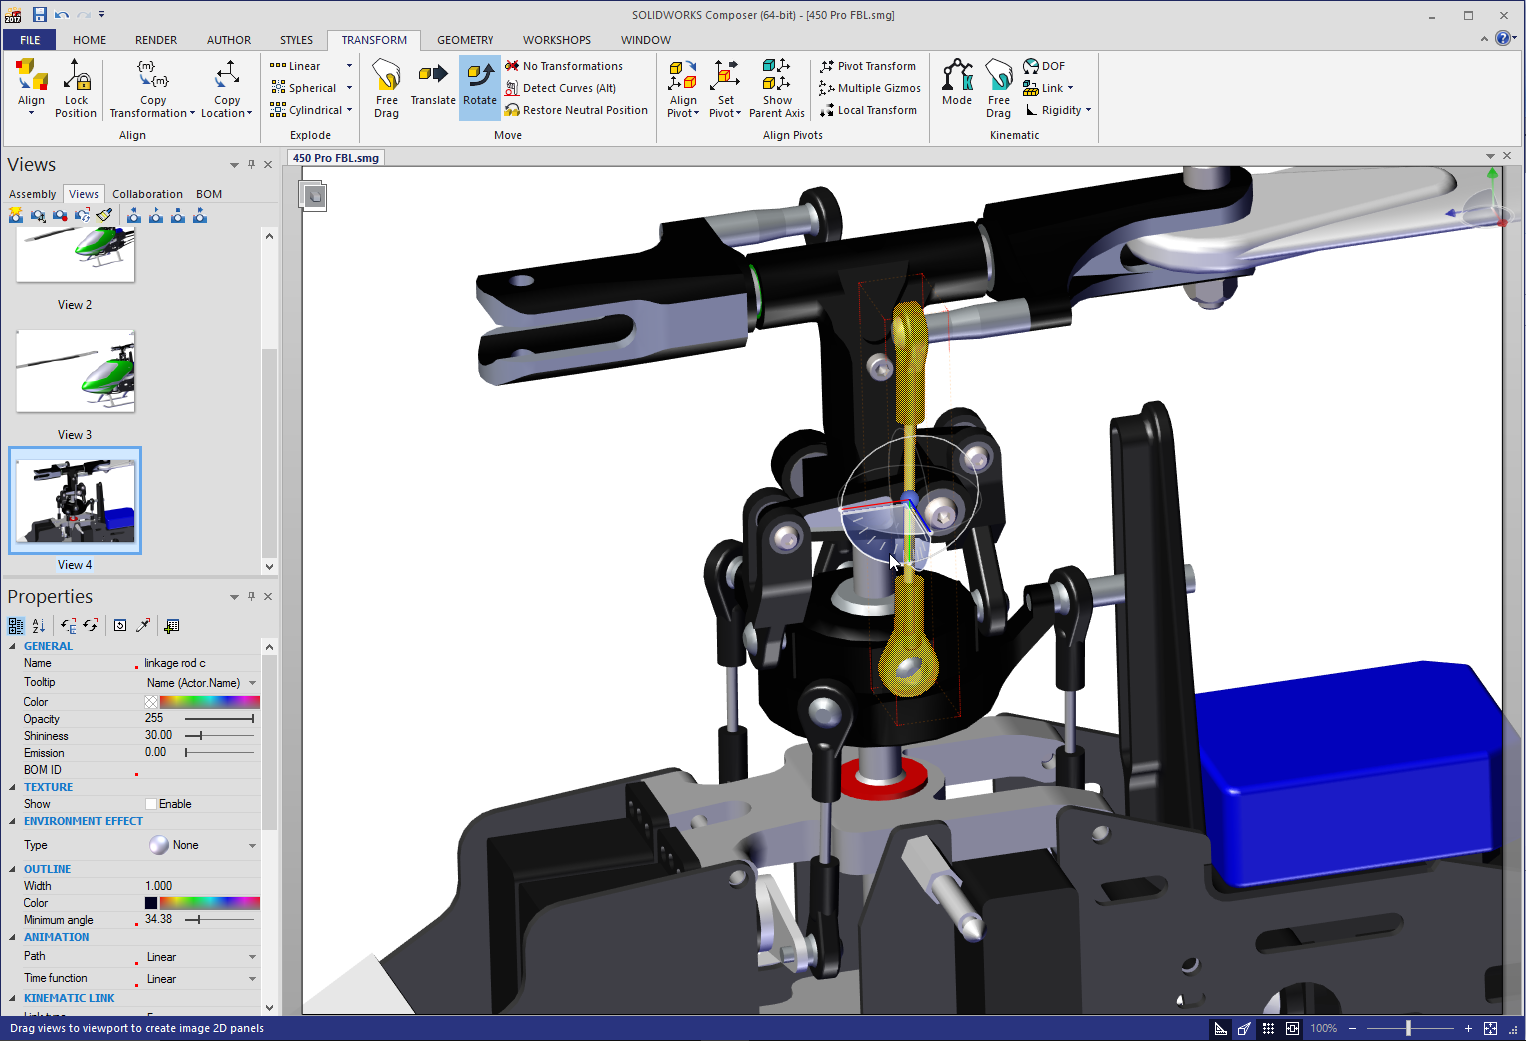
If I rotate the actor with the current Gizmo orientation, the actor will rotate about its center. It gets the job done but it isn’t that realistic. I’d like the link to rotate about the bottom ball just like it would in the real world.
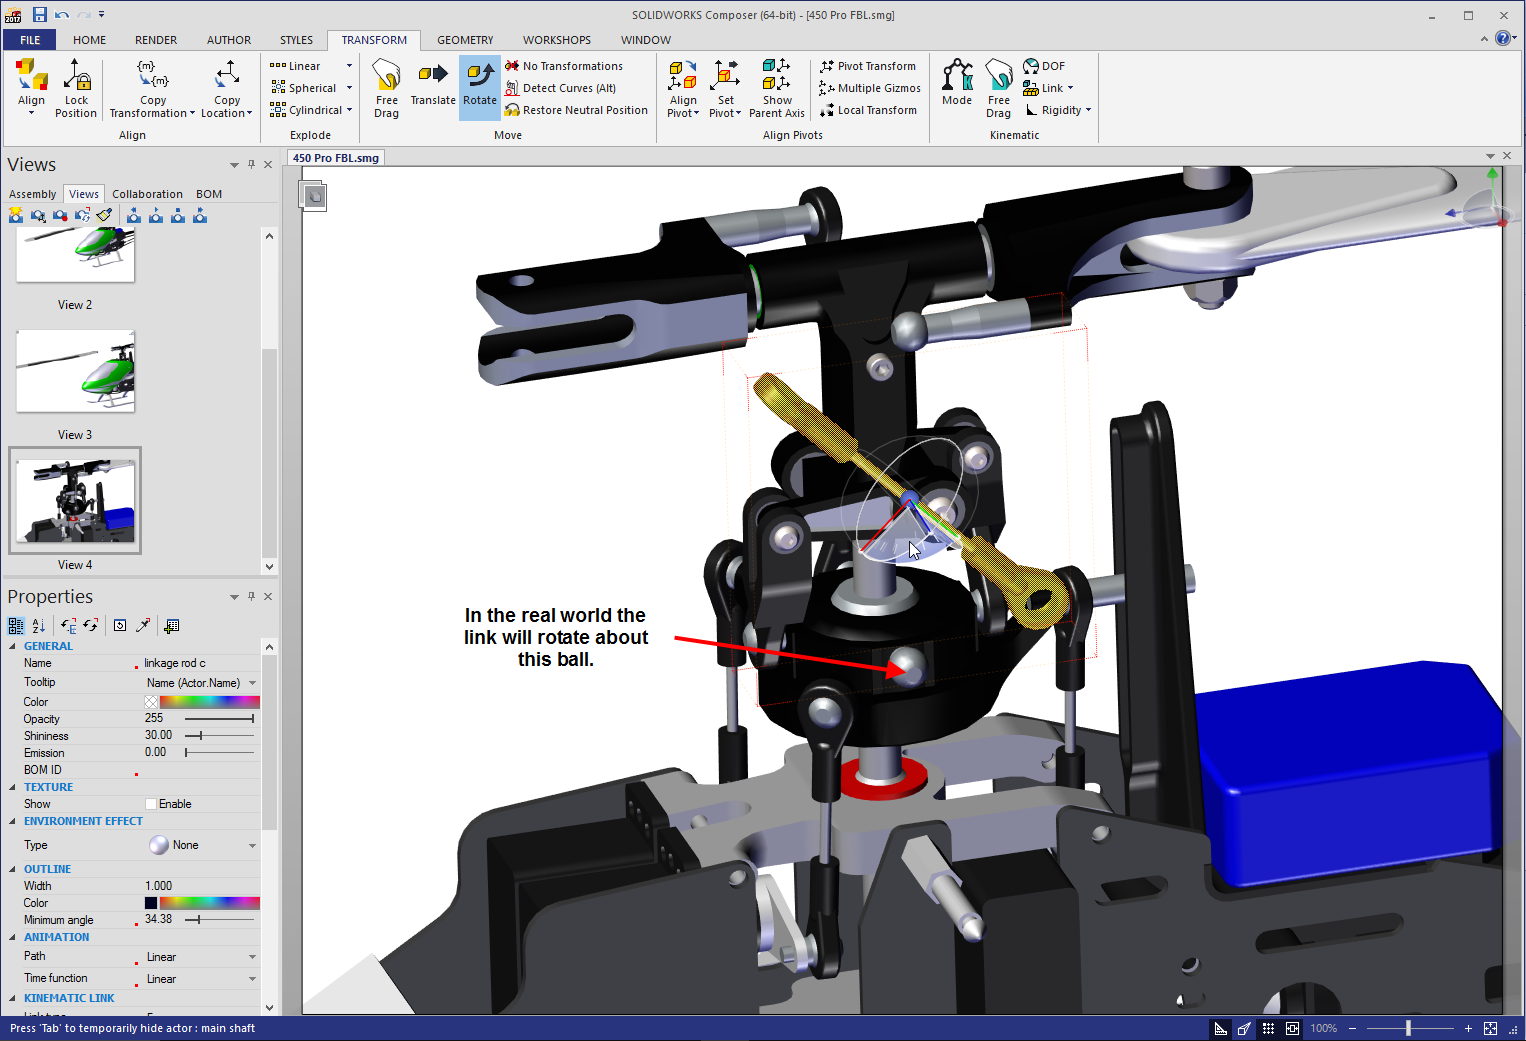
One way to accomplish this is to use Curve Detection, activated by the ALT key. Select the desired actor and then Rotate (or reverse the selection order; it’s up to you) and when you see the Gizmo, hold down ALT. As you move the mouse around, you’ll see red highlighting indicating Curve Detection is on. If you select a linear edge, the rotation is about that edge. If you select circular edge, the rotation is about the center axis of that edge. Look closely below and you’ll see a small red axis in the center of the red circle in the image.
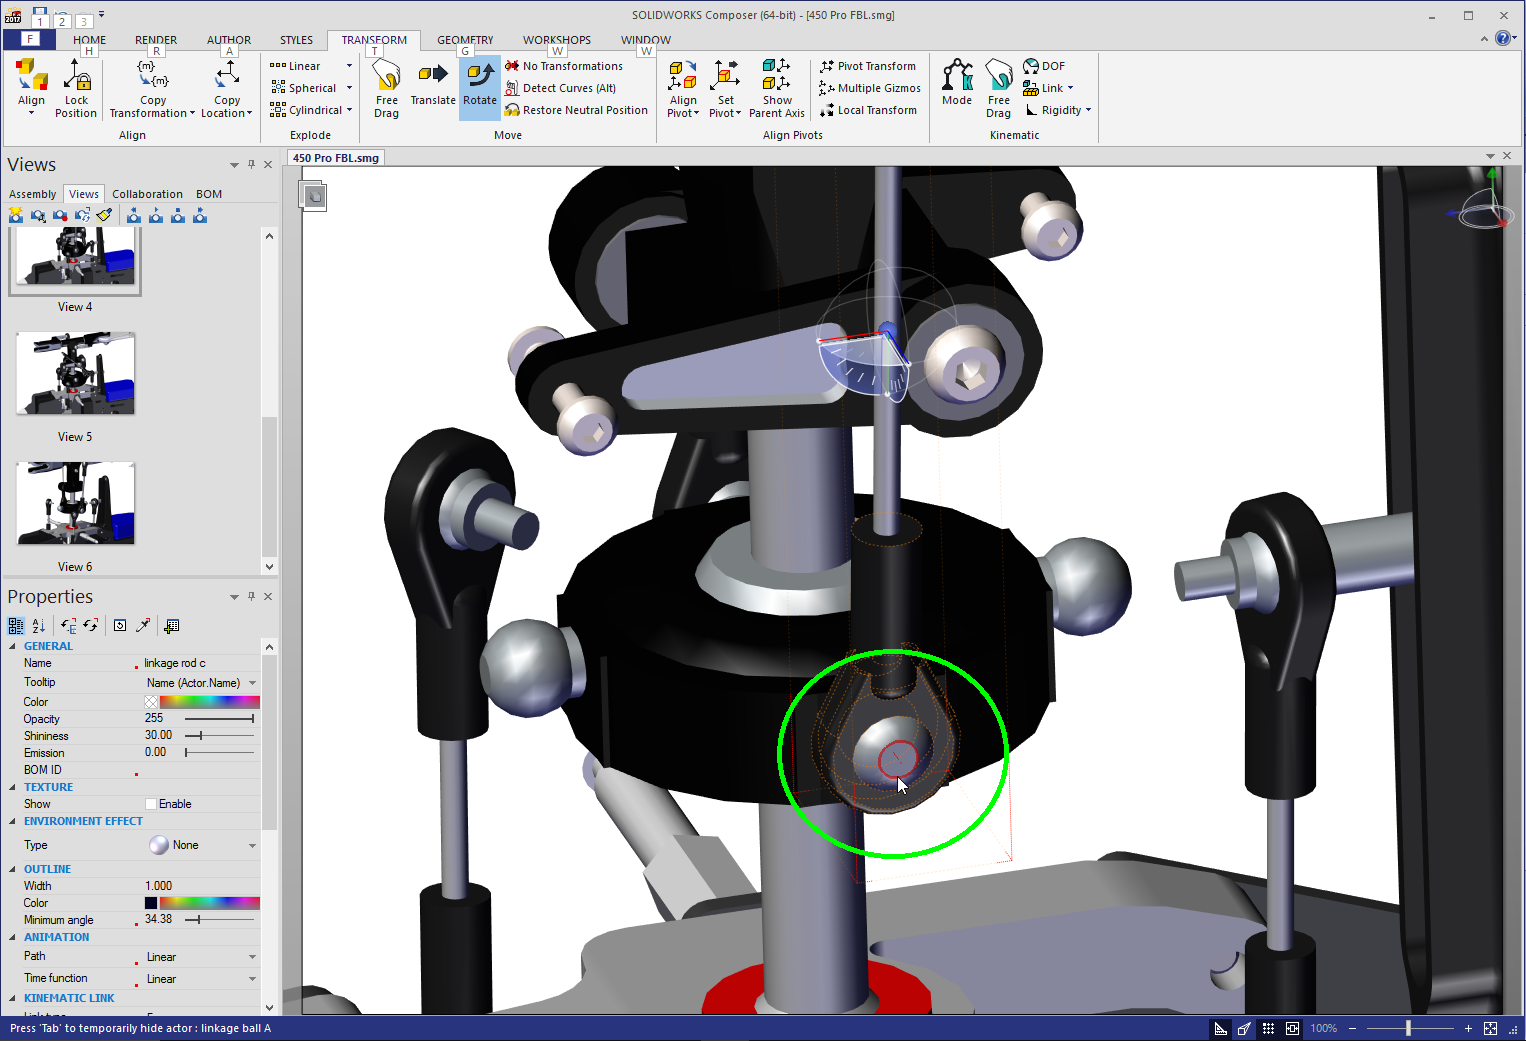
Clicking on that red circle will redefine the rotation axis and the link will rotate about the centerline of the ball. You’ll notice the Gizmo is now located on that selection and oriented with respect to that axis.
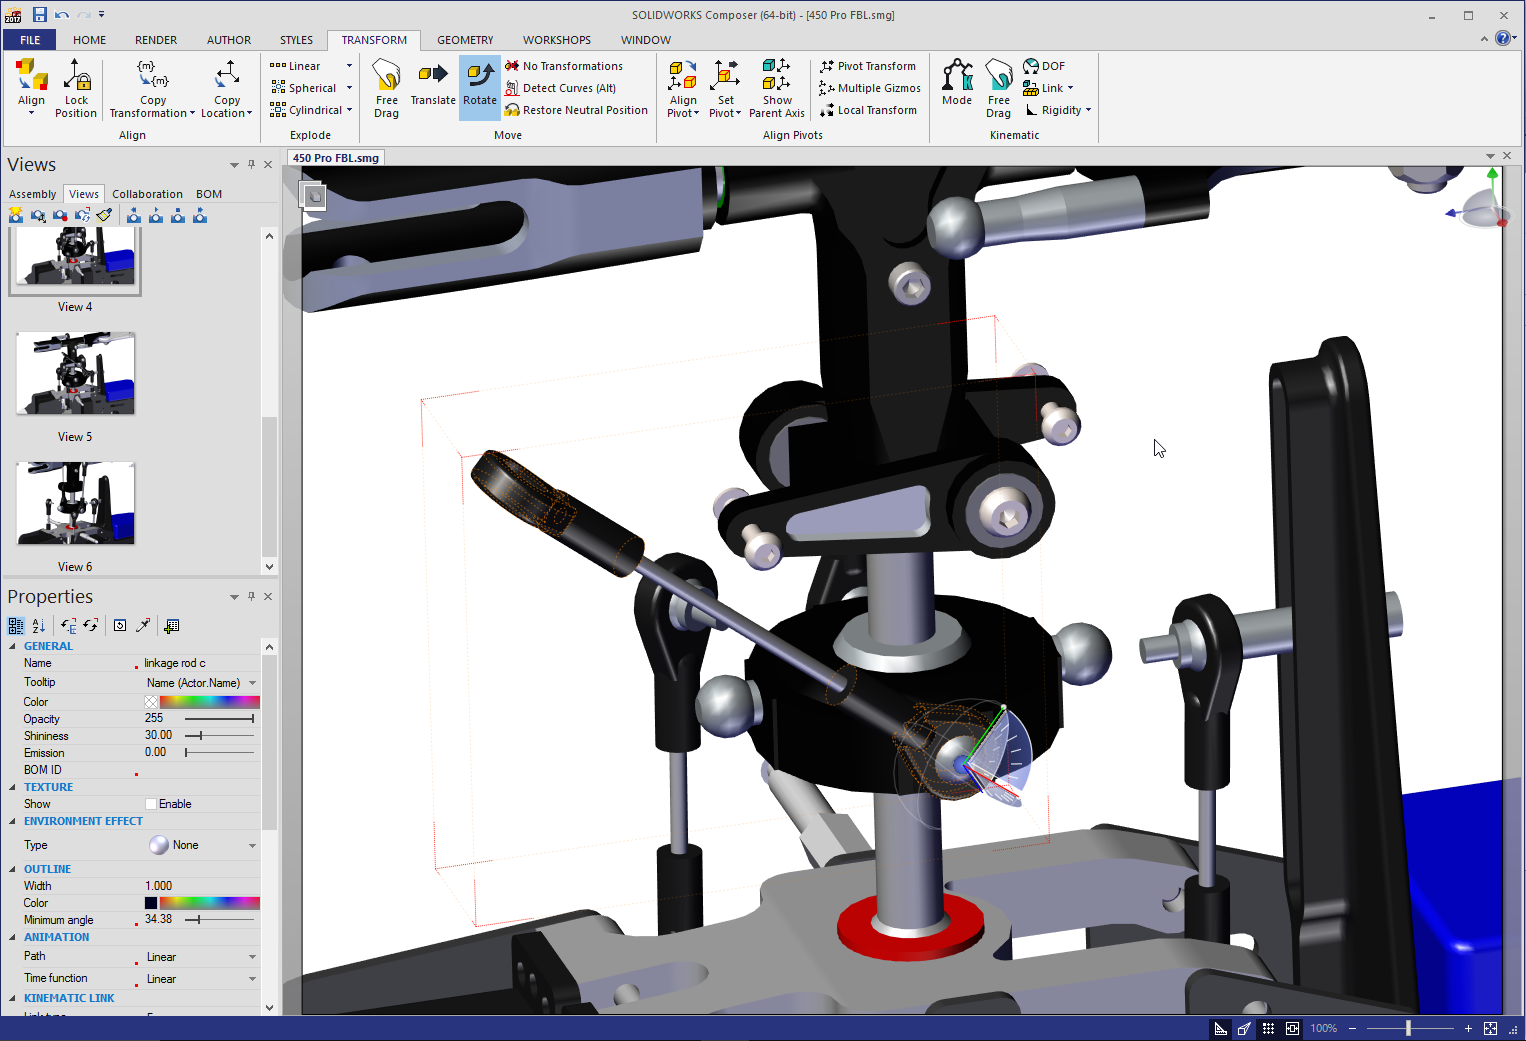
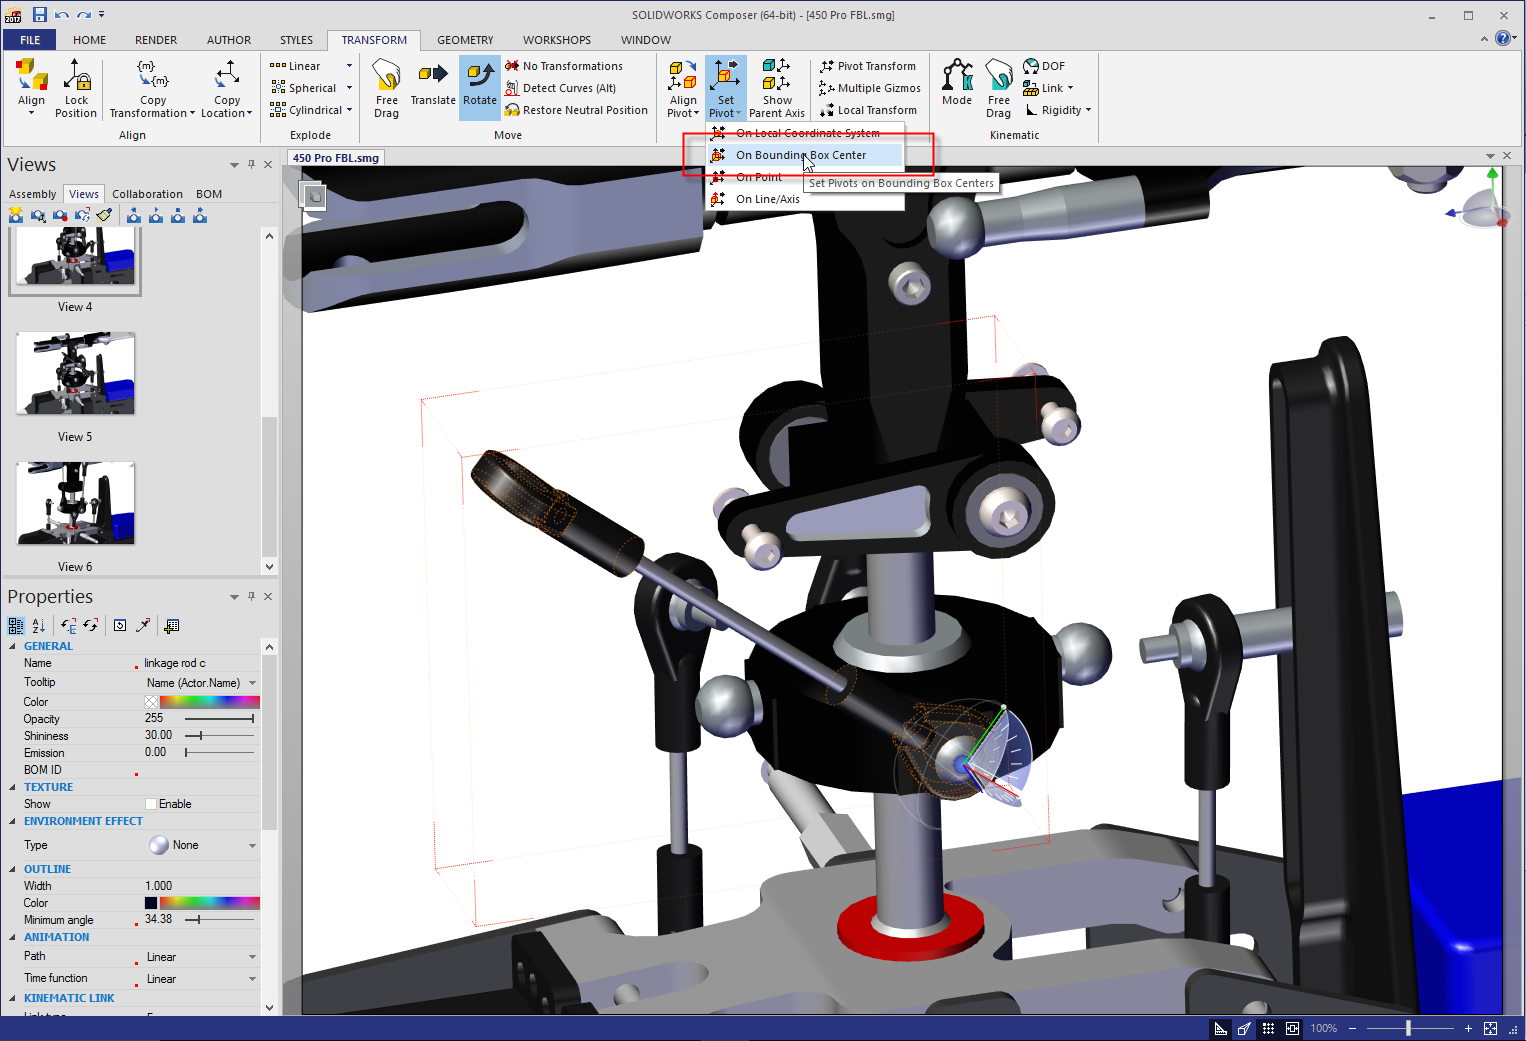
This will be the new default location for the Gizmo for all transforms for this actor. If you need to place the Gizmo back at the center of the actor; select Rotate, the actor and then Set Pivot, On Bounding Box Center. You’ll see other options here, feel free to experiment and see what they do. Other very useful commands are under the Align Pivot fly out menu to define the Gizmo’s orientation.
Don’t be surprised if it takes a few attempts to get the selections right so the actor moves the way you need it. It takes some practice to get the subtleties of Curve Detection down, once you do there is almost no limitation on how actors can be moved in Composer.
Kris Dubuque
Field Services Technical Manager
Computer Aided Technology