Understanding Mass Participation Factor Results in Frequency Studies
When conducting a frequency or linear dynamics study in SOLIDWORKS Simulation, a highly recommended, best-practice post processing technique is to investigate both the Effective Mass Participation Factor (EMPF) and the Cumulative Effective Mass Participation Factor (CEMPF) of the output mode shapes. This linear dynamic analysis recommendation was duly noted by my colleague Bill Reuss.
SOLIDWORKS Simulation help defines EMPF as follows:
“The effective mass participation factor represents the percentage of the system mass that participates in a particular mode. It provides a measure of the energy contained within each resonant mode. A mode with a large EMPF is usually a significant contributor to the dynamic response of a system.”
(It is important to note that the calculations are referring to the Effective Mass of the system, not the true mass.)
The CEMPF is a measure of how the EMPF builds up as additional modes are included in the analysis. In general, the number of modes considered must contribute to a CEMPF of at least 80% of the system mass in the direction of excitation.
When investigating EMPF, occasionally the user will come across a mode shape with zero or null EMPF in all three directions (X, Y and Z). This can lead to some head-scratching, especially if the mode shape shows significant excitation in one of the directions that is reporting a null EMPF.
Let’s look at a very simple example to investigate when this might happen and why this is the case. Consider a straight beam with a 100mm x 50mm rectangular cross section as shown below.
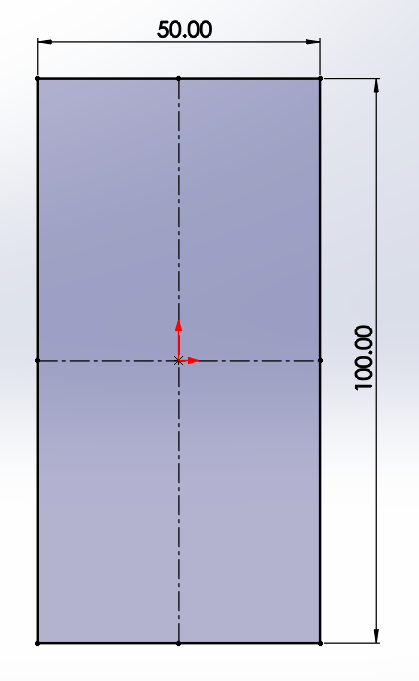
The beam is made from plain carbon steel, is 1000mm long and has a fixed constraint on each of its two ends.
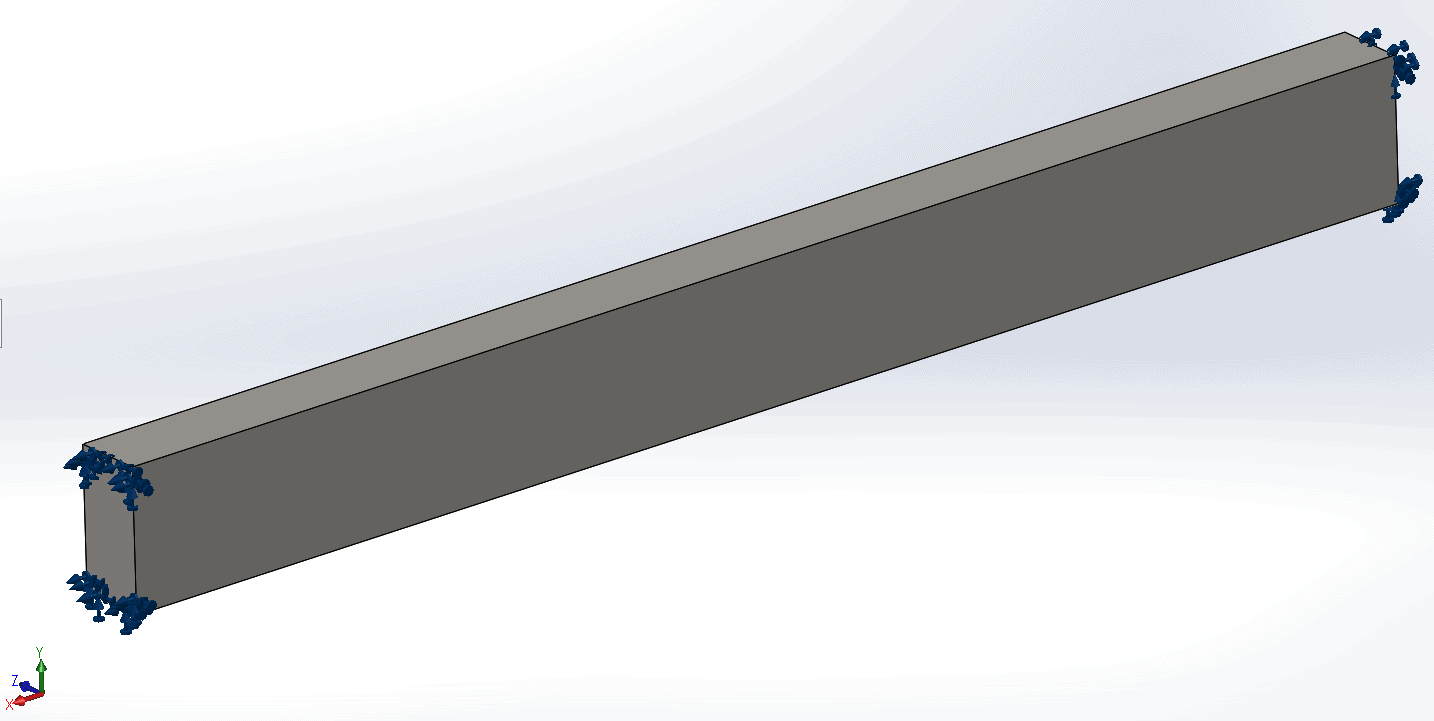
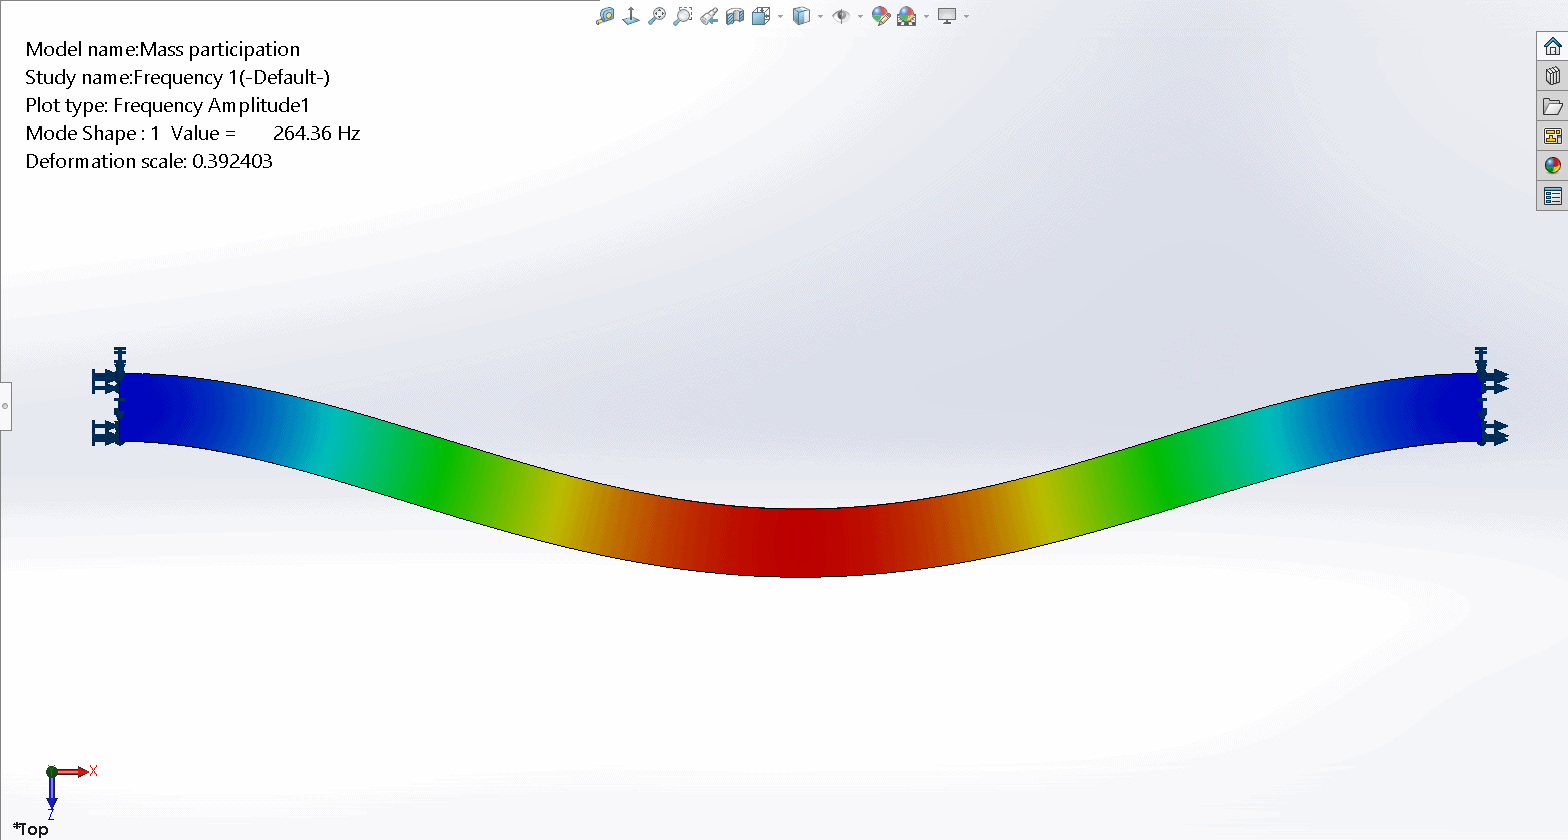
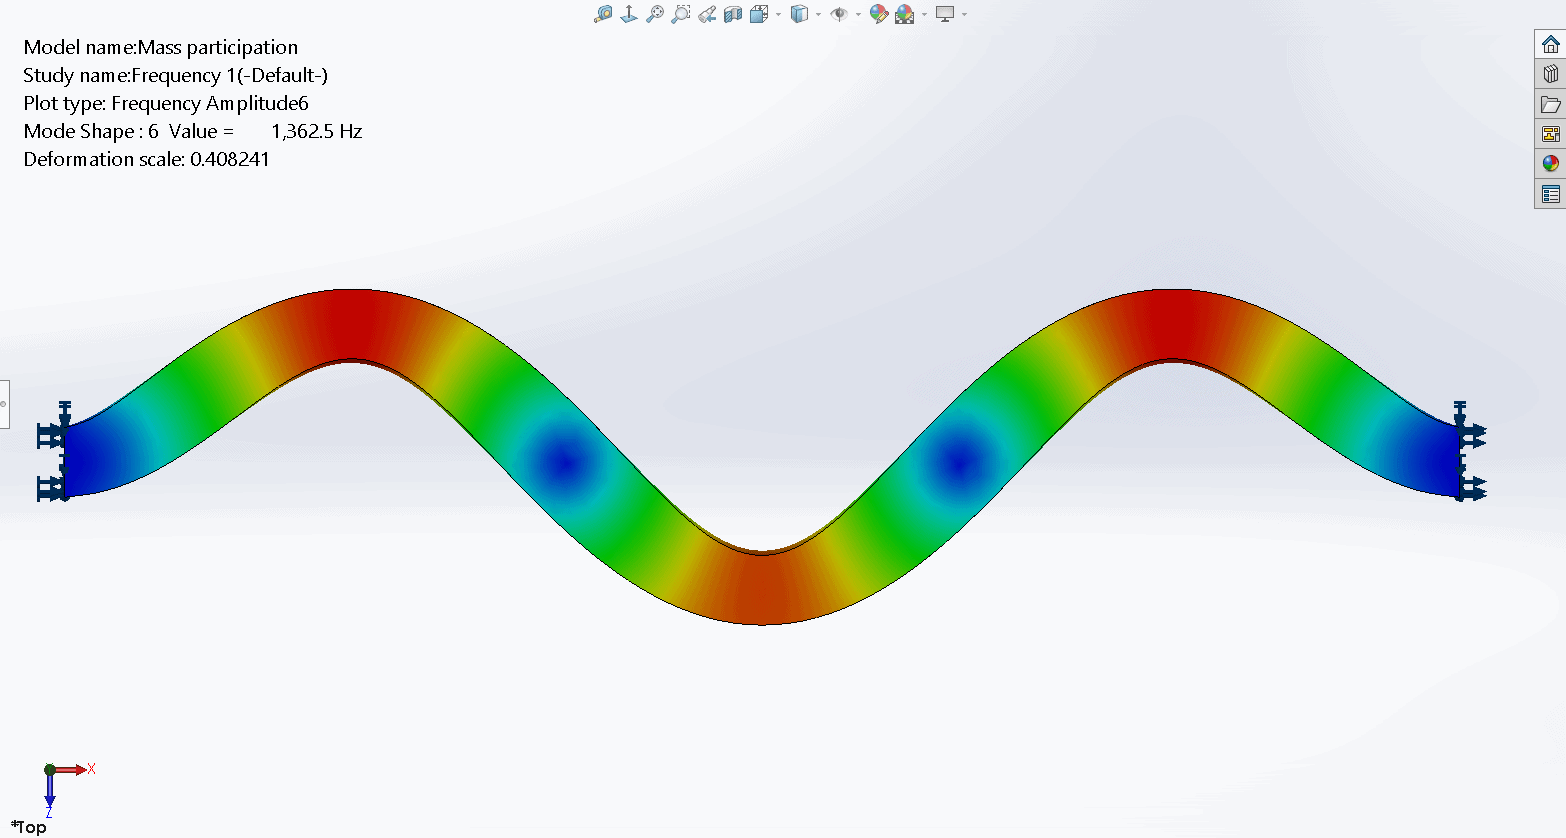
We create a frequency study in SOLIDWORKS Simulation, mesh the model with default mesh settings and ask the solver to calculate the first 6 natural frequencies. The natural frequencies and the first six mode shapes are shown below. Recall that in a frequency analysis, when we plot the mode shapes, the magnitude of the deformation is meaningless; it’s only the shape of the mode that tells us how the system will vibrate.
The first mode shape is a half wave with movement in the global Z direction.
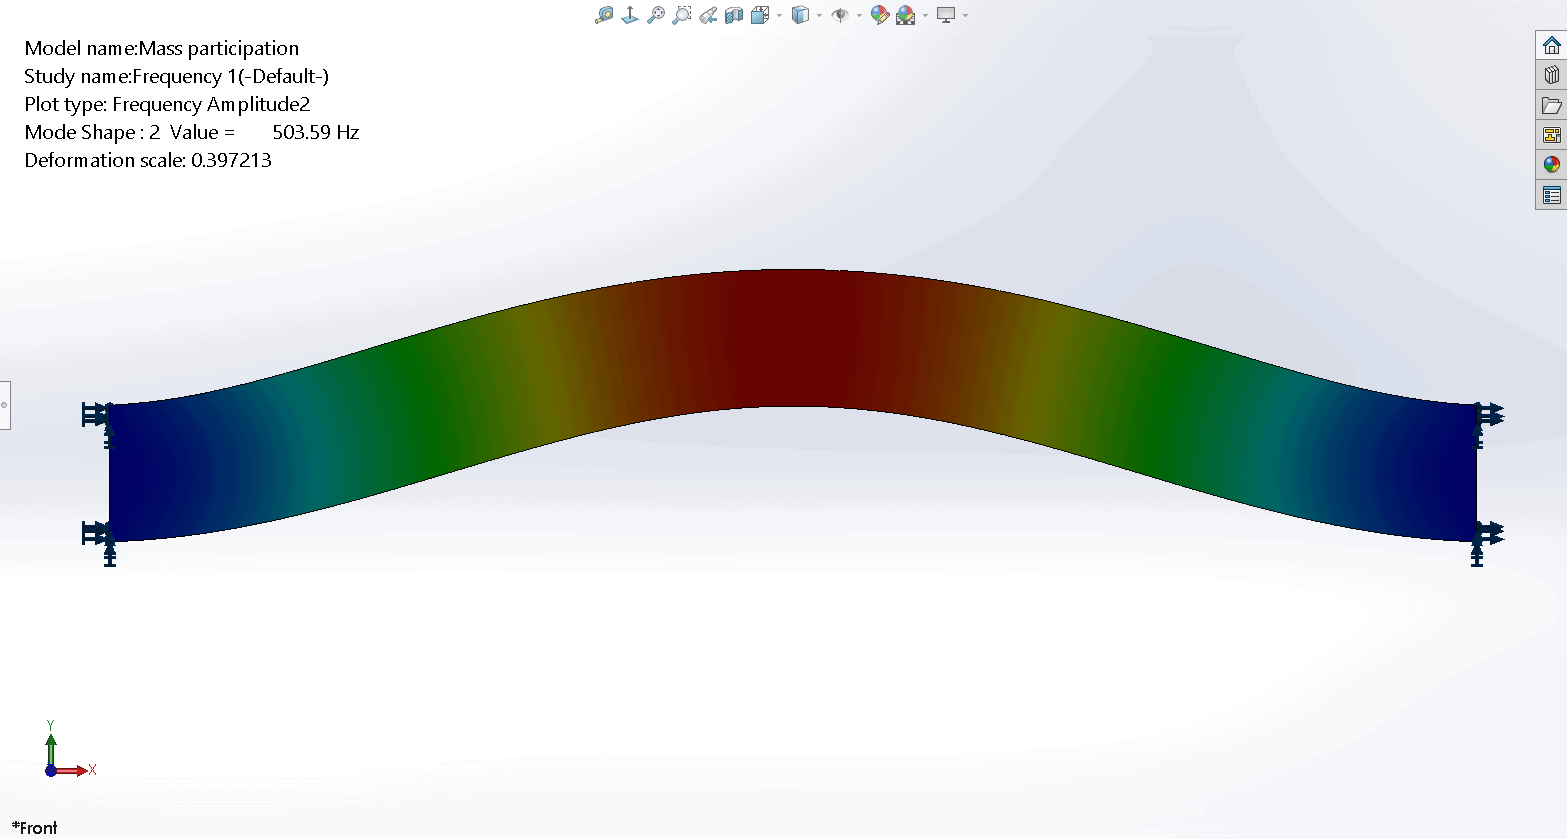
The second mode shape is a half wave with movement in the global Y direction.
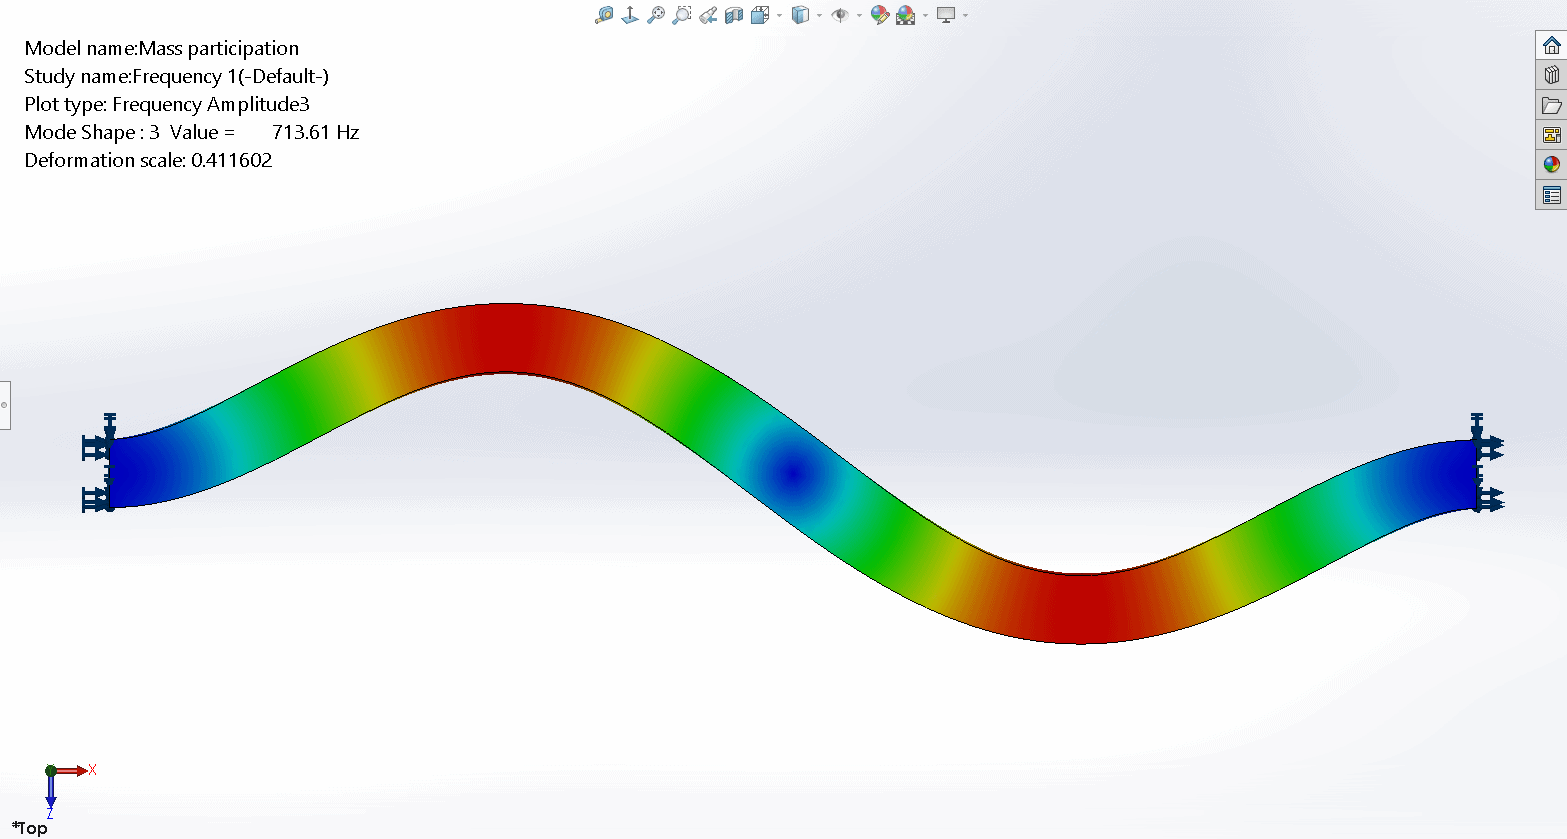
The third mode shape is a full wave with movement in the global Z direction.
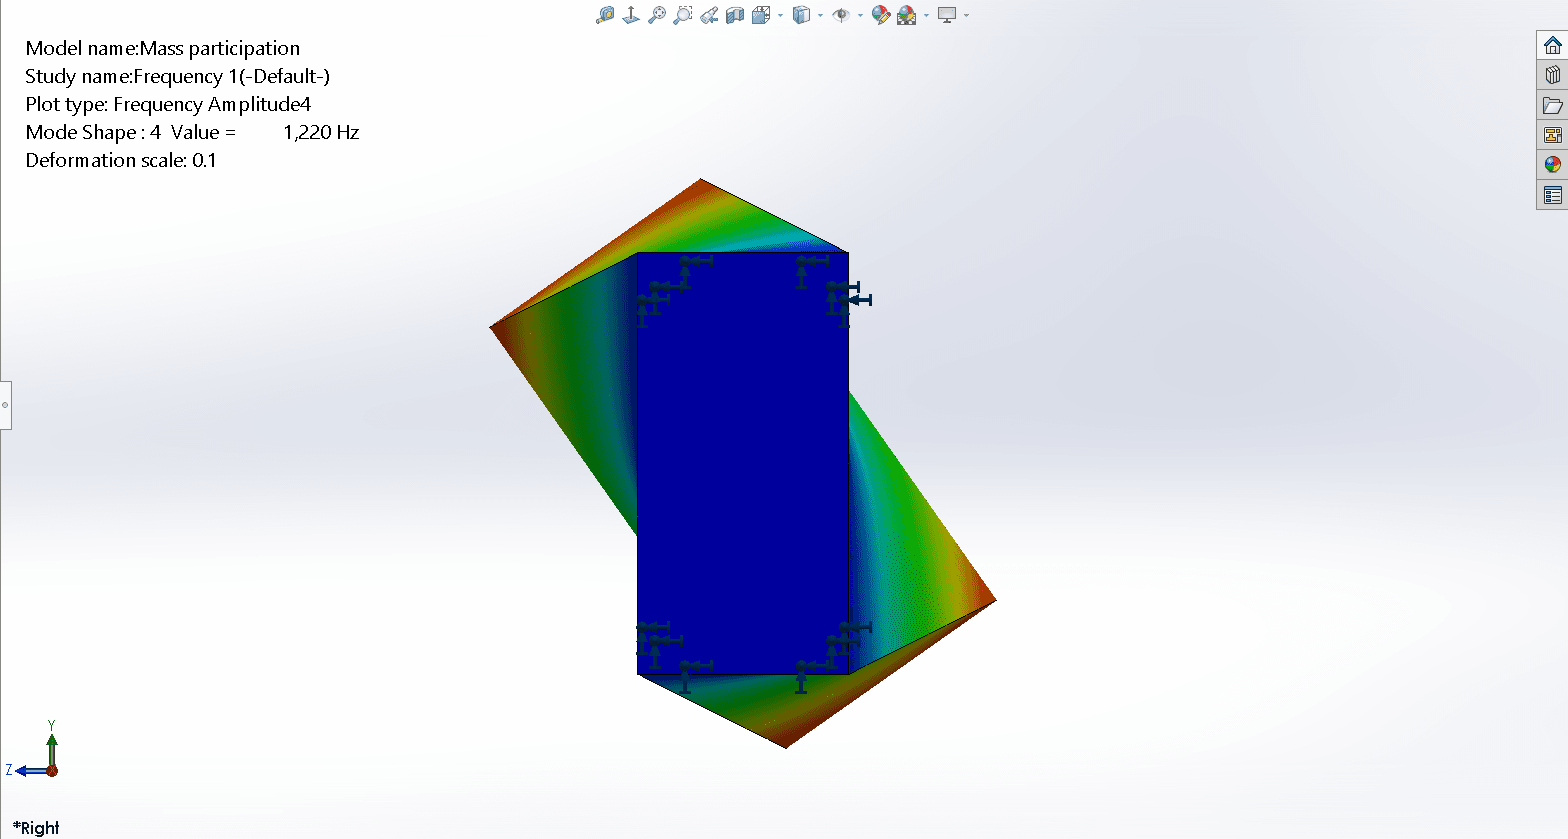
The fourth mode shape is a twisting mode about the beam’s longitudinal axis.
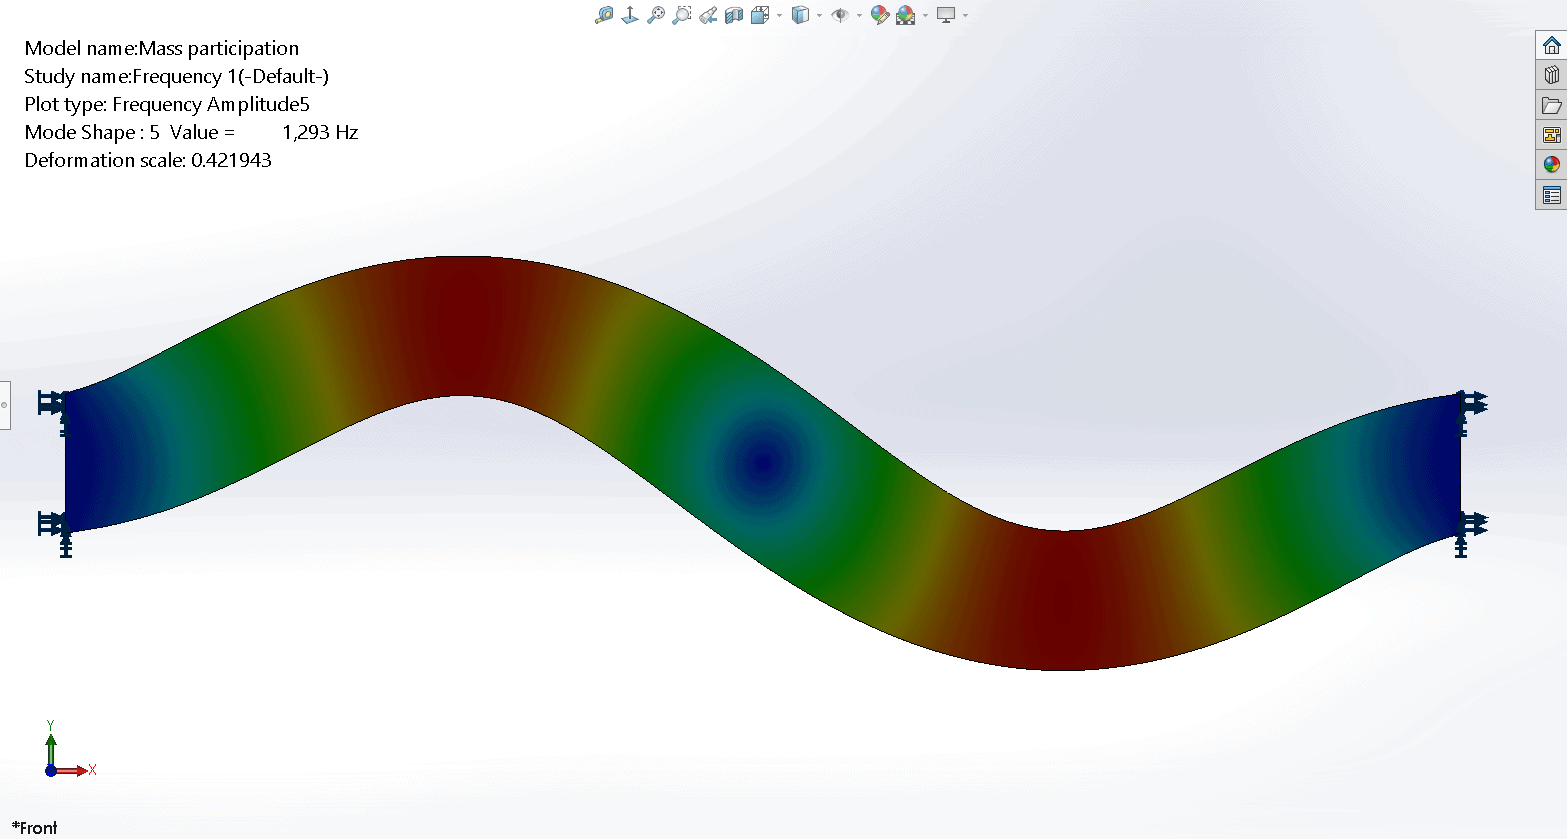
The fifth mode shape is a full wave with movement in the global Y direction.
The sixth mode shape is 1.5 waves with movement in the global Z direction.
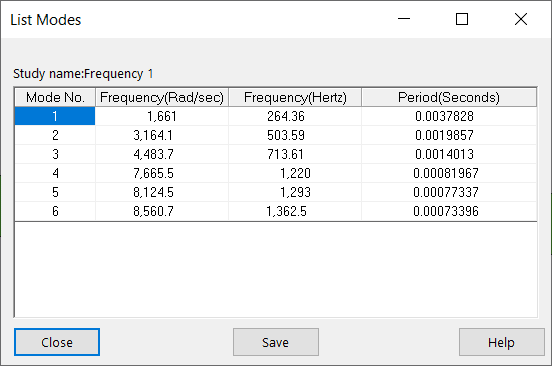
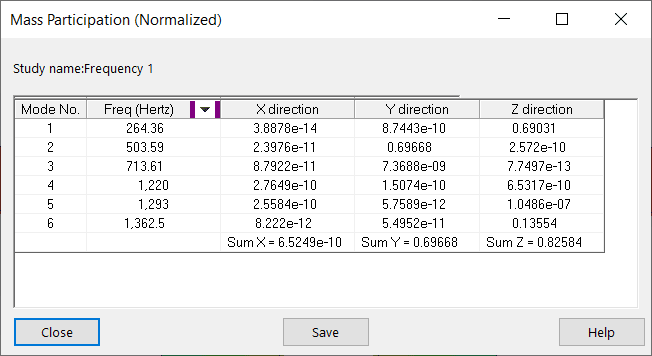
The EMPF output for the first 6 modes is shown below, in tabulated form.
The EMPF output for the first 6 modes is shown below, in graphical form.
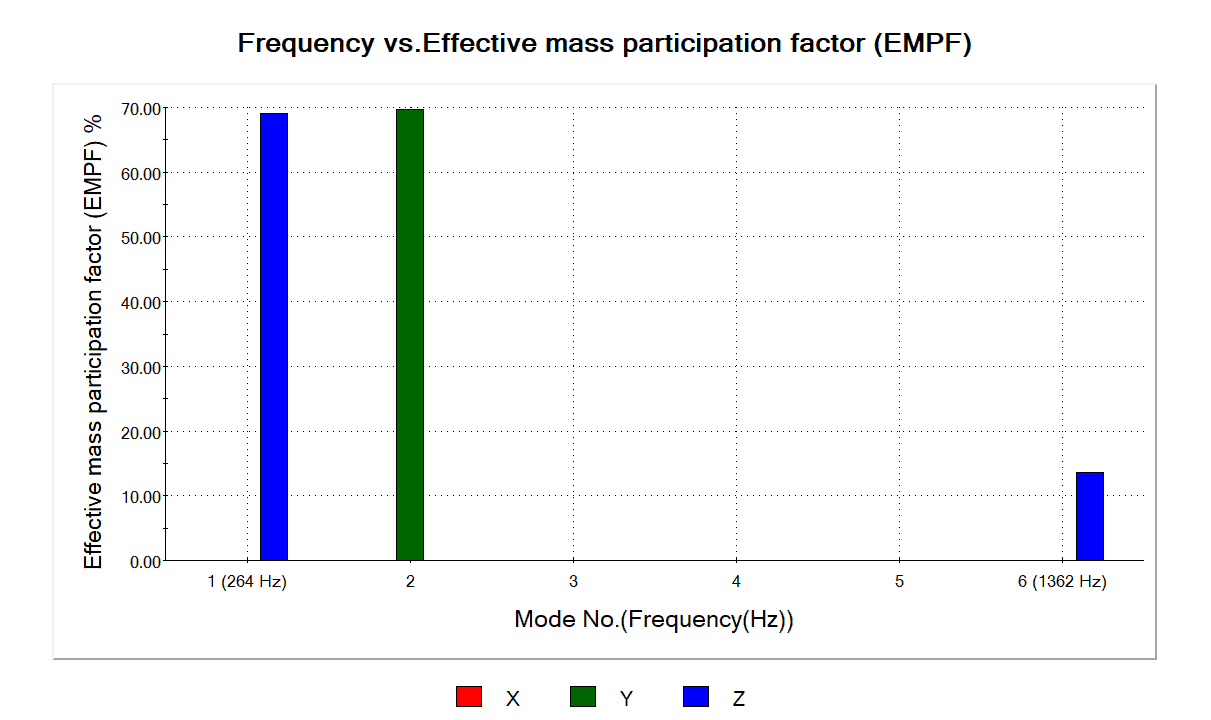
The EMPF output for mode shape one makes intuitive sense. The motion is all in the global Z direction, so we expect zero EMPF in the X and Y directions, and a relatively large number for EMPF in the Z direction. In this case 69.0% of the system’s mass is participating in this mode shape in the Z direction.
The EMPF output for mode shape two also makes intuitive sense. The motion is all in the global Y direction, so we expect zero EMPF in the X and Z directions, and a relatively large number for EMPF in the Y direction. In this case 69.7% of the system’s mass is participating in this mode shape in the Y direction.
However, something seems odd with the EMPF for mode shapes 3, 4 and 5 where we’re getting zero EMPF for all 3 directions.
For example, with mode shape 3 (the full wave), the motion is all in the global Z direction. We might expect zero EMPF in the X and Y directions, and a relatively large number for EMPF in the Z direction. But the EMPF in Z is also zero. Why is this the case?
Similarly, with mode shape 5 (also a full wave), the motion is all in the global Y direction. We might expect zero EMPF in the X and Z directions, and a relatively large number for EMPF in the Y direction. But the EMPF in Y is also zero. Why is this the case?
The reason is that the EMPF you get for each mode and each direction is a reflection of how the center of gravity of the structure gets excited by that mode.
Mode shapes 3, 4 and 5 are symmetric modes. For a symmetric mode, the CG experiences no movement in the direction of symmetry. So as a percentage of EFFECTIVE mass participating in the mode, the solution will show zero.
For example, in mode shape 3 the movement in the negative Z direction to the left of the inflection point in the center of the beam is cancelled out by the movement in the positive Z direction to the right of the inflection point, resulting in zero movement of the CG. Therefore, the EMPF for that mode is null and the results are correct. We can observe similar behavior with mode shapes 4 and 5.
I hope this article has provided some useful insight into effective mass participation factors for various modes and the reason why null EMPF are common even for modes that display significant movement in a certain direction. I hope that users will now interrogate both the shape and the EMPF of each mode shape to gain further insight and understanding into the structural response.
Now go design some innovative products with the help of the comprehensive analysis tools available in SOLIDWORKS Simulation.
Alon Finkelstein
Simulation Product Specialist
Computer Aided Technology, Inc.
Interested in Learning More About SOLIDWORKS Simulation?
CATI offers a variety of introductory and advanced training courses that are available both in-person and online to fit around your busy schedule. Schedule your training today!
View All SOLIDWORKS Simulation Training >>