Why Use a Tool Body for a Swept Cut in SOLIDWORKS?
Have you ever wondered what benefit a 3D Swept-Cut provides? Have you ever been in need for a helical cut, but the resulting geometry isn’t quite what you expected? Let’s take a look at that third option for the Swept-Cut Command to potentially address these issues and possibly many more.
SOLIDWORKS offers a third profile option for the Swept Cut feature. In addition to the standard Sweep options, Sketch Profile and Circular Profile, shared with the Swept Boss/Base feature. A Tool Body or Solid Profile can be used to sweep a separate Solid Body along a path. This yields different resulting geometry and may be more applicable to your project.
Take for instance, a Drill Bit. Material is removed from a piece of bar stock along a helical path. Typically, a two-dimensional profile sketch sweeps along the helical path removing the material in the process. This results in a planar face at the end of the path; assuming the path stops short of the bar stock.
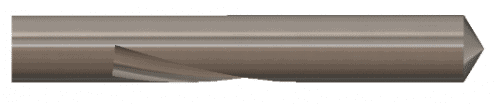
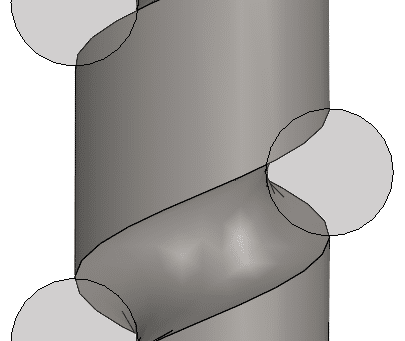
In this instance, using a Solid Profile may be the better option as the end surface would be tapered instead of flat, allowing waste material to smoothly escape the channel rather than building up, rendering the bit less effective.

In addition to the difference in geometry where the path completes, the amount of material being removed along the path increases as well. The Solid Profile option for the Swept Cut feature allows for advanced resulting geometry and we will analyze the difference by taking a deep dive into the design of a Bottle Auger.
The Bottle Auger works just the same as a Drill Bit. I’ve created a helical path, same diameter as the bar stock, where material will be removed as the profile sweeps the path. I’ve used the Top Plane to sketch my profile for the sweep. This plane cuts through the middle of the Auger and is also the start point of the helix.
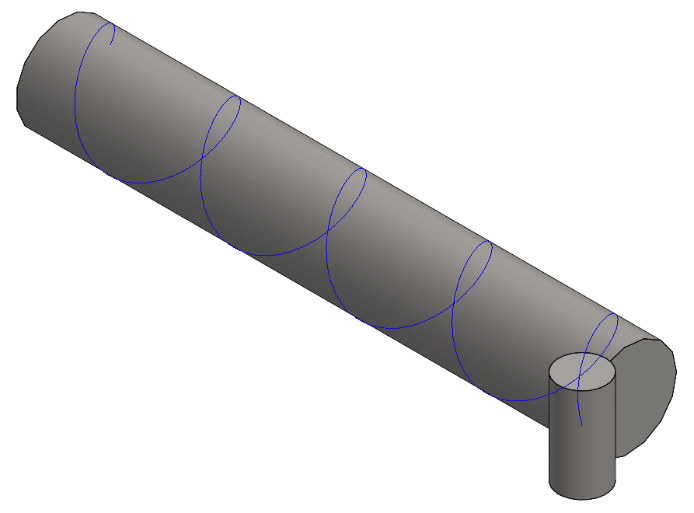
The first Swept Cut example I want to talk about is the 2D sketched circle used in the Cut-Sweep01 feature. The Sketch Profile is joined with the helix by a Pierce Relation. The Pierce Relation will ensure that the profile sketch maintains a fully-defined status as it follows the path from start to finish. The profile plane, Top Plane, is offset a certain angle to the path. This offset is defined by the initial pitch of the helix. As a profile sweeps along a path, SOLIDWORKS interpolates the geometric data between each intermediate section. The initial offset angle of the profile plane will carry throughout the path. Here, the sketched circle used for the bottle extrusion has a diameter of 1.5-inches. This sketch, used to create the Bottle Body, remains constant in this study.

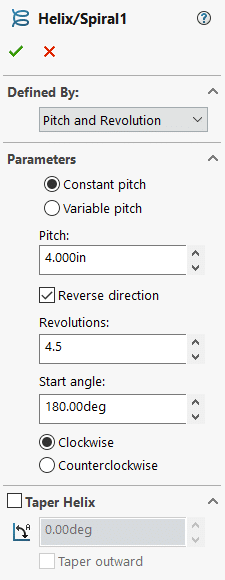
I’ve set the Helix to have a 4-inch pitch and travel 4.5 revolutions. To keep all things constant, I’ve trimmed the bar stock one half revolution at each end so that we can compare apples to apples with each cut when analyzing any overlapping interference.
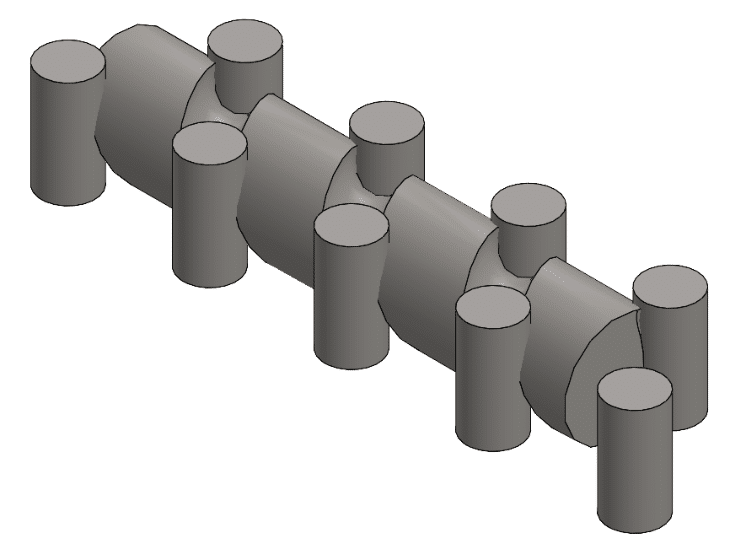
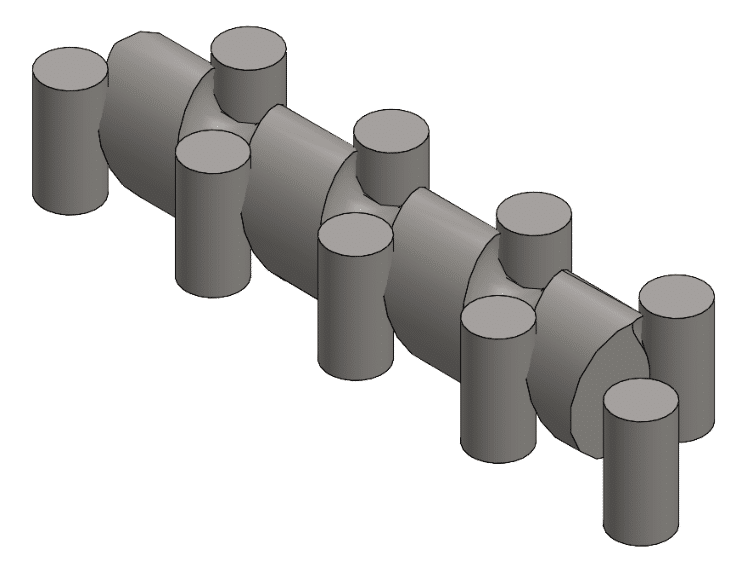
Focusing on the Top Plane section, the 2D circle will never have interference with the auger at that plane. However, we want to focus on the extrusion in both directions from the Top Plane and where the Bottle Body overlaps the Auger. To illustrate this in an upcoming image, additional instances of the Bottle Body have been patterned and set to transparent in some images to see the portion of the cut Auger that overlap at each portion.
AISI 1020 Steel Material has been applied to have a basis for Mass Properties shown below. Here is our initial mass of the auger before any cuts are made. Initial interference between all Bottle instances and the Auger is 10.55 in3.

Cut-Sweep01 has been applied below. As expected, there is much overlap, both above and below the Top Plane section of the Auger. Should a Bottle with the same diameter need to physically slide along this rotating Auger, it wouldn’t line up within the channel correctly.

Cut-Sweep01 used a 2D Profile, a circle, with an overall Area of 1.766 in2 resulting in 8 total interference sections, each about 0.229 in3 for a total of 1.604 in3 of interference. The Surface Area of overlapping contact on the auger before the cut at any given point is roughly 4.870 in2.
Before comparing our first cut results to a Swept-Cut using a Tool Body, let’s first use an alternative approach to the 2D Sketch Profile. This second scenario will provide better results than the first by removing more material from the bar stock resulting is reduced interference.
Our second cut will use a sketch plane perpendicular to the helical path. Rather than using the same Circular profile, I want to simulate the bottles surface and it sweeps along the path in its perpendicular orientation. To do this, I’ve created a Reference Plane perpendicular to the path and coincident with the initial vertex of the helix that I will use as my new sketch plane.

If I were to perform a Convert Entities operation of the initial circle sketch onto the new Reference Plane, then the geometric area of the resulting ellipse would shrink. Instead, after creating a new 2D Sketch on this Reference Plane, I used the Intersection Curve command to generate a 3D Sketch of the outer region of the bottle body where it intersects the Reference Plane. This creates a larger geometric area of the resulting ellipse to then use as our Sketch Profile for the Swept-Cut. The resulting cut is shown below.


Cut-Sweep02 also used a 2D Profile, an ellipse, with an overall Area of 1.919 in2 resulting in 8 total interference sections, each about 0.079 in3 for a total of 0.552 in3 of interference. Cut-Sweep02 provides better results than Cut-Sweep01 with a 66% reduction in material.
Finally, let’s see just how much our Tool Body Swept-Cut can improve on the previous results.
Our Bottle Body works well for this application because I am abiding by the guidelines for a Solid Profile. A Solid Profile used for a Cut-Sweep must be convex in shape and it must be its own Solid Body; un-merged with the main body. It also must consist of either a cylindrical extruded feature, like we have here, or a revolved feature using analytical geometry only. This means lines and arcs are fair game, but splines cannot be used.
The Solid Profile sweeps along the helical path removing any part of the main body that it contacts along the way, thus removing more material as we are no longer dealing with a 2D Sketch. The result is a larger channel with little to no interference above and below the initial 2D Plane at any given intermediate section.
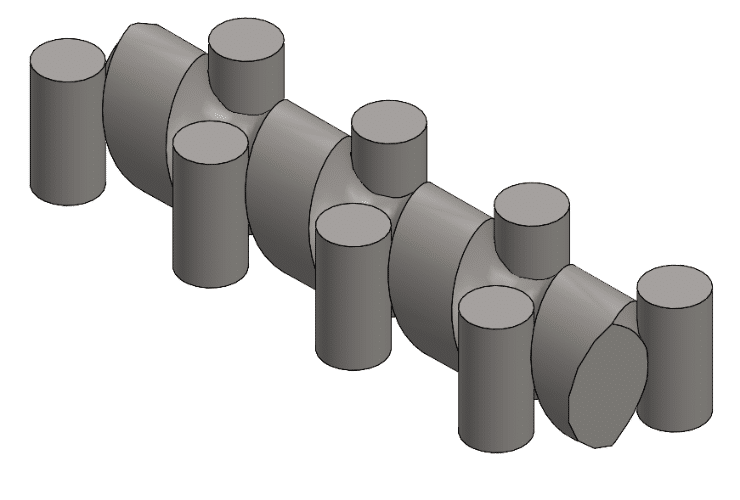


Cut-Sweep03 used a 3D Profile, a cylinder, with an overall Surface Area of 17.671 in2 (cylindrical surface only) resulting in 15 total interference sections, each about 0.002 in3 for a total of 0.027 in3 of interference. Cut-Sweep03 provides better results than Cut-Sweep02 with a 96% reduction in material and better results than Cut-Sweep01 with a 99% reduction in material. Additional refinements can be made in the Options section of the Cut-Sweep Property Manager. Previous tests with a different helical pitch provided no interferences.
I hope this helps to better explain the geometric differences between a 2D cut and a 3D cut when using the Swept-Cut Command in SOLIDWORKS. Happy modeling!
Gabriel Rodriguez
Application Engineer I
Computer Aided Technology