SOLIDWORKS 2014: Sketch Features (Part 1/4)
These are a few of my favorite things… in SolidWorks 2014
(Part 1 of 4: Sketch Tool Improvements)
I hope you were able to attend Fisher Unitech’s Design Excellence Forum, which included an introduction to many of the new features SolidWorks 2014 has to offer; but if not (or if you just want a refresher), I would like to welcome you to Part 1 of my favorite SolidWorks 2014 features. I hope you find something that catches your eye and gets you pumped to upgrade to SolidWorks 2014! For the first part of this series, I want to introduce some of my favorite new features when dealing with sketch tools.
Introducing Automatic Sketch Scale:
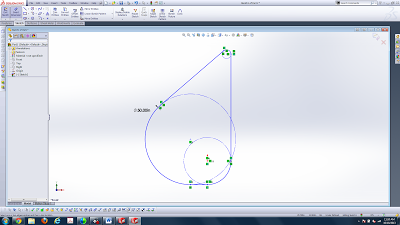
Most of us know the frustration of drawing a sketch, adding your first dimension, and having your entities blow off the screen or go crazy and lose your original sketch layout.
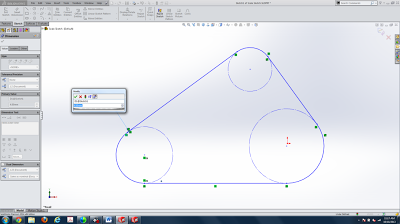
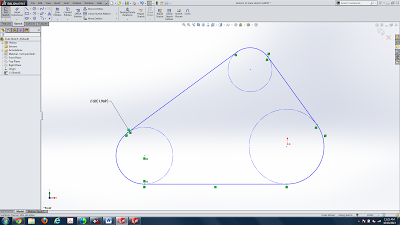
In this scenario, I drew a sketch where I wasn’t paying attention and made my entities way too small. When I go to dimension, you can see that the diameter is only 4′; as I add my new dimension of 50′ diameter, my sketch gets all messed up and now I have to waste the time to fix it. I know – frustrating!
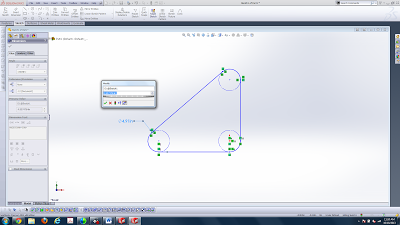
Now in SolidWorks 2014,
when I change the dimension to 50′, the whole sketch automatically scales accordingly, allowing me to just keep going without any hassle. I don’t know about you, but I really think this is a great improvement! The really cool thing here is that it is instantaneous – you won’t even see it happen!
And for SolidWorks’ next trick…
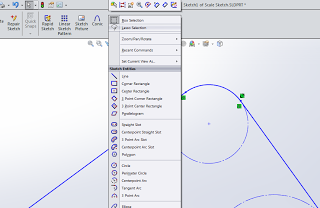
New Lasso selection tool:
How would you like to be able to do a multiple-entity selection without being restricted to using a box selection or holding Ctrl? Well now you have it with the Lasso Selection tool. Just a right-click in your sketch and you can switch from a box selection to the Lasso (Up at the top of the commands).
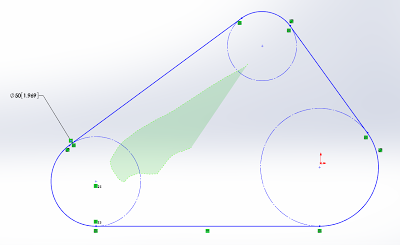 |
| Figure 1 |
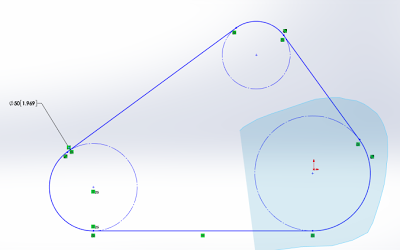 |
| Figure 2 |
I hope you enjoy this next one!
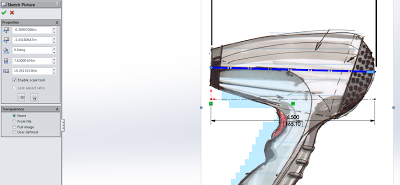
Sketch Picture Scale Tool:

Now in the Sketch Picture Properties you can select Enable Scale Tool.

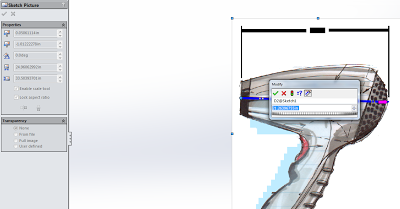
Now all I have to do is move the endpoints of the blue line shown in the second image and a dialog box appears allowing me to scale and even rotate the picture accordingly.
And last, but not least in this first series (and I think you will REALLY like this one).
Presenting…
Replace Sketch Entity:
Ladies and gentlemen, it is finally here! The Replace Entity command lets you replace one sketch entity with another without breaking downstream references (unless the downstream reference requires the same type of geometry, such as mates).
For example, if you replace a line with a spline, downstream features that reference faces created by that spline will rebuild successfully. When you delete one sketch entity and replace it, you often need to create a new set of references. If you use the Replace Entity command instead, the new entity inherits references from the old one and you don’t need to recreate them.
During the replacement, you can also change inherited references and add new ones. You can replace only one entity at a time.
1. In sketch mode, click Replace Entity (Sketch toolbar) or Tools > Sketch Tools > Replace.
2. In the graphics area, select the sketch entity to be replaced. The PropertyManager displays the entity name.
3. In the PropertyManager, select Make Construction or Delete. Make Construction converts the entity to a construction entity. Delete removes the entity.
4. In the graphics area, select the sketch entity to replace.
5. Click OK.
I hope you enjoyed the first in the series and look for the Part 2 coming soon!
For more training and tutorials on the many 3D CAD Modeling solutions in the SolidWorks family of products and add-ons, register for an upcoming Event or look into our SOLIDWORKS training.
Related Articles