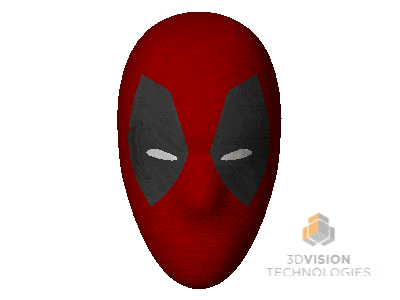
Deadpool’s Minor Surface Flaws – Part 3 – THE FINAL SHOWDOWN (ISH?)
Continuation from Deadpool’s Minor Surface Flaws – Part 2
Will this be the end? Will we ever finish this Deadpool mask? Was Deadpool as amazing as we anticipated? Yes on all accounts! I last left you with a finished mask, but a crease right in the center of the mask that made Deadpool look more like Two Face. But never fear, I have the power to fix the problem. And with great power comes great irresponsibility. So let’s throw caution to the wind, ignore conventional wisdom, and see if we can make some awful puns along the way!
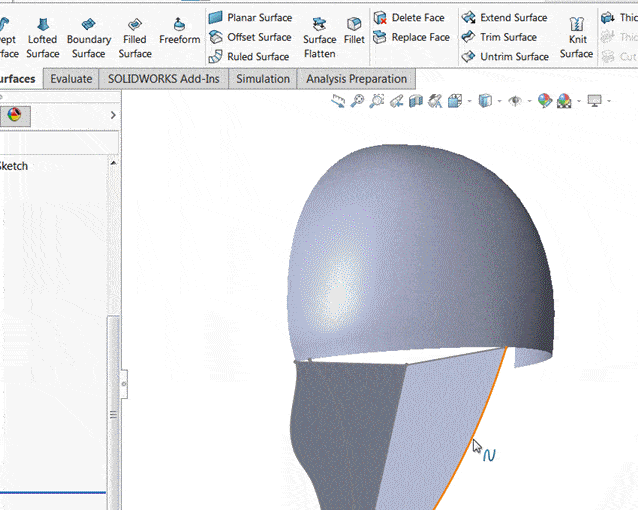
From Part 1 and Part 2 we were able to get a full solid model, but the problem was our filled surface technique. While it was effective, it wasn’t elegant. We need to have some tangency at our centerline to get a nice smooth curve. How can we do this you might ask? We’ll I’d ask you, did Deadpool rule? Awful pun? You betcha! We can use a Ruled Surface! If I create two ruled surfaces (Surface > Ruled Surface) I have sacrificial surfaces where I can create tangencies.
To start, I’ll create a sacrificial surfaces I can rule from by creating some filled surfaces. Sacrifices from the surface to rule, that sounds more Jones than Wilson, onward Indy!!!

Then I’ll create some ruled surfaces from each of those filled surfaces. Now I have what I really need.
Now I’m ready to use these surfaces to get my nice tangent filled surface. To do that I’ll use a filled surface, select tangency as my edge setting, and grab my 3D nose constraint curve.
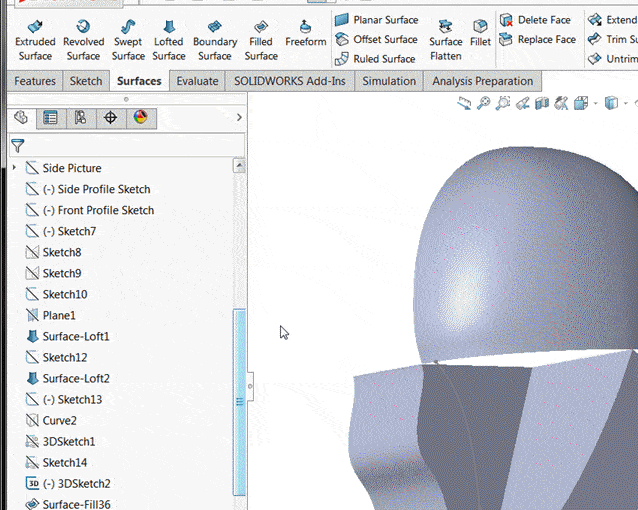
Now I play an epic training montage and do the same thing for my other surfaces as I work my way to the back of the mask to make a sweet smooth melon. Montage complete. Our face is nice and round now.
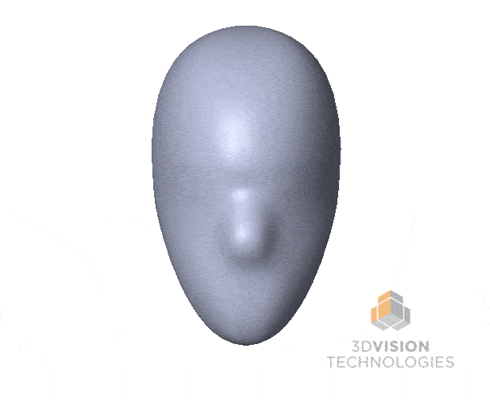
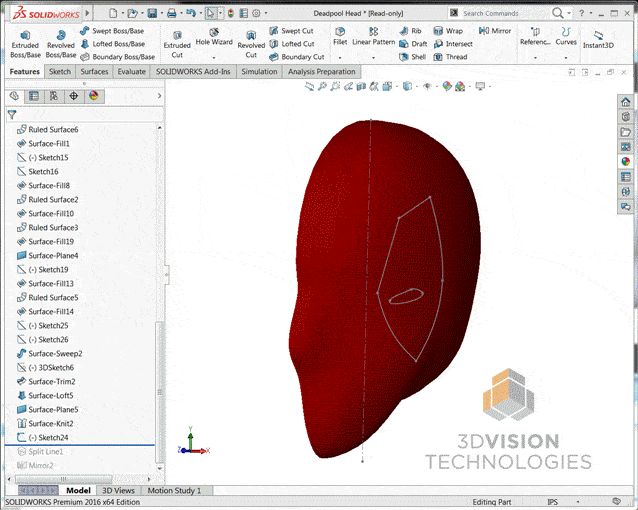
To finish this mask up I’m going to show how to add the eyes. Oh what’s that you ask? How did I get the nub on the back of his mask? We’re just going to move right past that and leave a plot hole. If readers start demanding it, I’ll be forced to write another blog.
AS I WAS SAYING, to add the eyes I’m going to use my original Front picture to create a new sketch on the Front Plane. Then I can use a Split Line (Insert > Curves > Split Line) to subdivide my face into multiple faces so I can apply different appearances to my different faces on my face. That’s too many uses of face…
And THAT my friend is how you create a Deadpool mask model in SOLIDWORKS that much like Deadpool himself, has only some minor surface flaws.
Deadpool’s Minor Surface Flaws – Part 1
Deadpool’s Minor Surface Flaws – Part 2
Deadpool’s Minor Surface Flaws – Part 3 – THE FINAL SHOWDOWN (ISH?)
If you have any questions or comments please share down below.
Brandon Nelms
Application Engineer
Computer Aided Technology, Inc