3D Scanning Do’s and Don'ts Part 1
Creaform scanners are incredibly powerful tools. They can let you capture hundreds of thousands of points on the surface of a part every second all the while maintaining up to 30-micron accuracy. Sounds like it would be a complex and difficult process to be able to do, but as it turns out it is actually very easy and user friendly.
In order to keep the process of 3D scanning going smooth there are a few things to keep in mind. The first thing to recognize about certain Creaform 3D scanners is that they are optical based. Meaning they capture all of their measurements from simply looking at the part. The scanner projects out a light pattern and reads what the part looks like on the surface. Because of this, it is important to remember that different colors and different reflectiveness’ of parts will affect how the 3D scanner views each part. With that in mind, the 3D scanner has a slider adjustment to change the shutter speed when acquiring readings. The easiest kind of surface to scan would be matte gray colored, as this is a very easy surface color for the scanner to see the light pattern on. As part’s surfaces get shinier or the amount of colors increases this will change what shutter speed you need to use. But fear not, this is a very easy thing to change without having to consult a chart of different reflectance.
There is an option in the VXScan 3D scanning software that easily adjusts this setting automatically and shows you what the scanner is seeing. When we click the ‘Scanner Configuration’ option we get the window in figure 1 below.
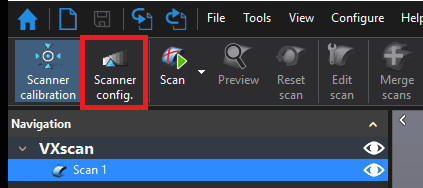
Location of the Scanner ‘Configuration’ button.
What we are seeing in the resulting window is the 3D scanner’s projection area and the readings it is getting back.
- Grey indicates the shutter speed is under exposed.
- Yellow indicates the shutter speed is properly exposed for optimal measurement readings
- Red indicates the shutter speed is over exposed.
- Note: This can lead to collecting extra noise in the scan that would need to be cleaned up later.
The view of the Scanner Configuration window will change depending on the 3D scanner used. For example, the GO!SCAN 50 will be a square, because it collects a squares of data while scanning. The HandySCAN 700 will have two sets of seven lines to represent the red laser lines it projects to collect data. You can also make Presets if you have a specific type of part that you scan routinely.
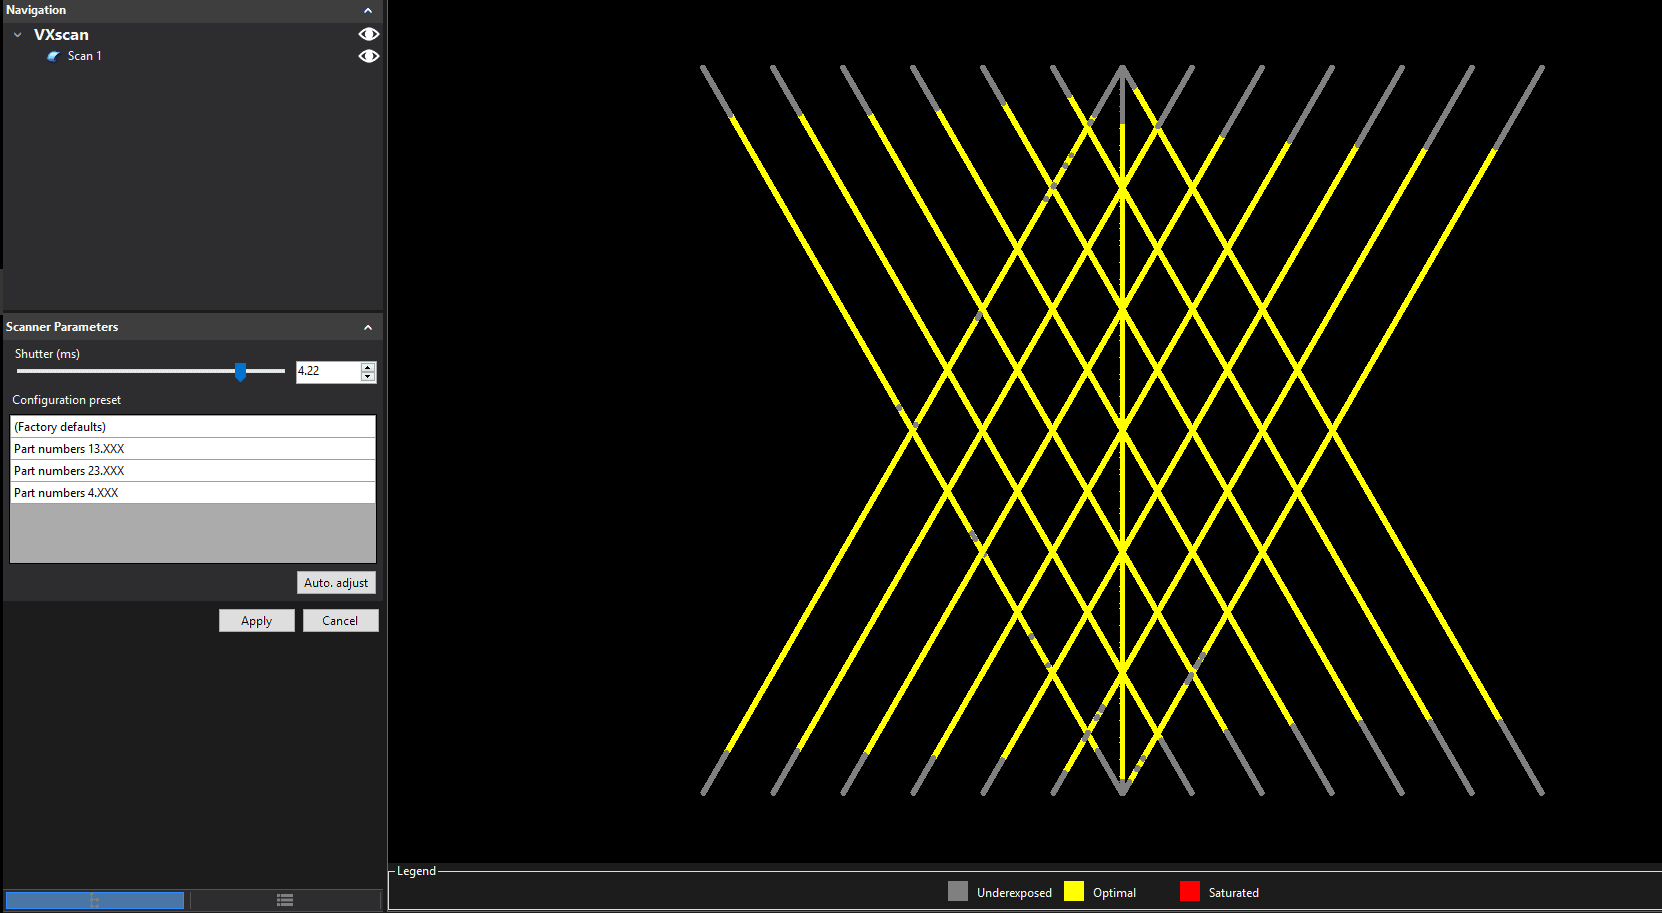
Figure 1: HandySCAN 700 Scanner Configuration View
We can also adjust the shutter speed manually to see how the colors change in the Scanner Configuration window. Manually setting the shutter speed for smaller parts ensures you don’t accidentally scan the background around the part. However, it is sometimes much easier to point our scanner at the part and hit the Automatic Adjustment button. This button will change the shutter speed around for us and pick the most optimal setting. The automatic shutter speed option works best if you are scanning a part that is larger than the active scanning area. Figure 2 below is an example for properly setting the shutter speed for a smaller part. In this example the part is in the middle of the active scanning area. You can see that the shutter speed is properly exposed in the center of the scanning area, and under exposed for the data around the edges.
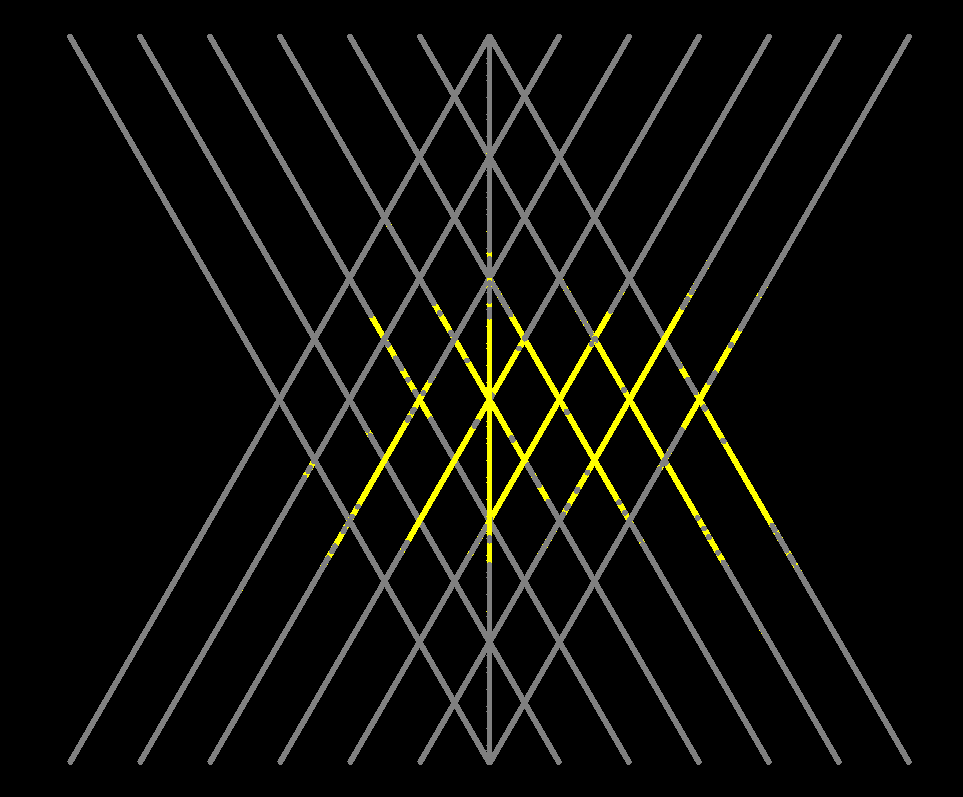
Figure 2: Proper Scanner Configuration for a smaller part in the middle of the active scanning area.
Each 3D scanner has different abilities and limitations when trying to collect data from harder-to-scan objects. For example, the GO!SCAN would have a very hard time scanning a shiny, chrome rim, but the more powerful MetraSCAN will be able to scan the same part easily.
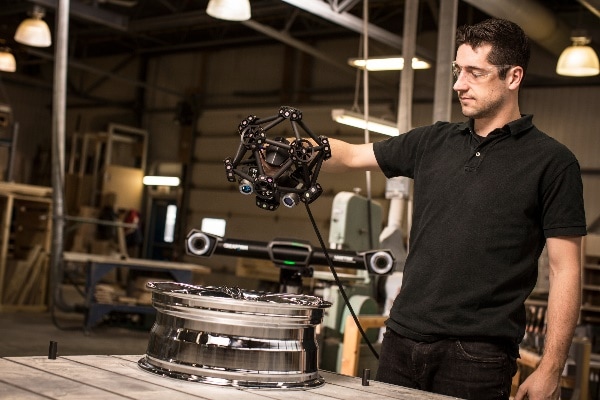
MetraSCAN
For any and all other questions regarding Creaform 3D Scanners, contact Computer Aided Technology to get in contact with one of our local 3D scanning experts!
Tim Crennen
Applications Engineer, 3D Printing and 3D Scanning