Automatically Find Contact Sets in SOLIDWORKS Simulation
If you are doing more with Finite Element Analysis (FEA) than just analyzing single, continuous volume parts, you need to pay attention to the contact conditions in your Finite Element Model. For SOLIDWORKS Simulation users working with assemblies, a frequent complaint I hear is how much time it can take to set up all the necessary contact conditions. For a Finite Element Model to mimic reality, proper contacts are essential. While I will not disagree that getting everything set up correctly can take time, there is at least one method to speed up the process with contact conditions. The speedy method is to utilize the automatically find contact sets option when defining contacts.
When setting up Finite Element Models for multibody parts and assemblies, you need to account for how those individual components interact. In SOLIDWORKS Simulation, there are three levels of contact conditions – Global, Component, and Local – with several contact types available for each level. As one of my Simulation counterparts, Matt Sherak, recently penned in his article Understanding Contact Hierarchy in SOLIDWORKS Simulation, “contacts are crucial to the performance of assemblies”. I couldn’t agree more! Let’s look at how to spend less time setting up contact conditions within SOLIDWORKS Simulation.
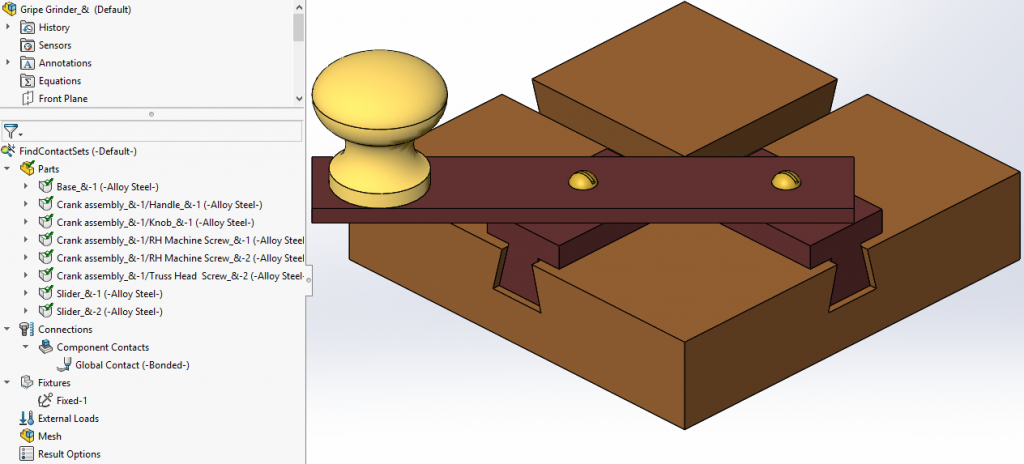
The Gripe Grinder assembly is used in the beginning SOLIDWORKS training course to illustrate creating an assembly. I like this model because it can also show how using the “Automatically Find Contact Sets” will speed up creating contact conditions in Finite Element Analysis. If you look at the picture, you’ll see there is already a Global Contact (Bonded) defined for the assembly. By default, this global contact condition applies to all the face-to-face coincident conditions in the CAD model. To know where SOLIDWORKS Simulation will apply the Global Contact condition, use ‘Interference Detection’ with the ‘Treat coincidence as interference’ option on.
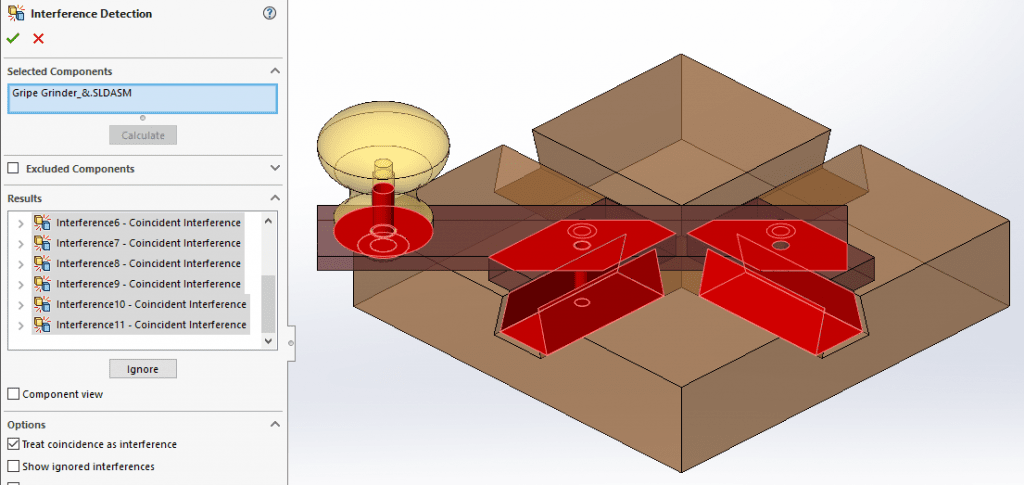
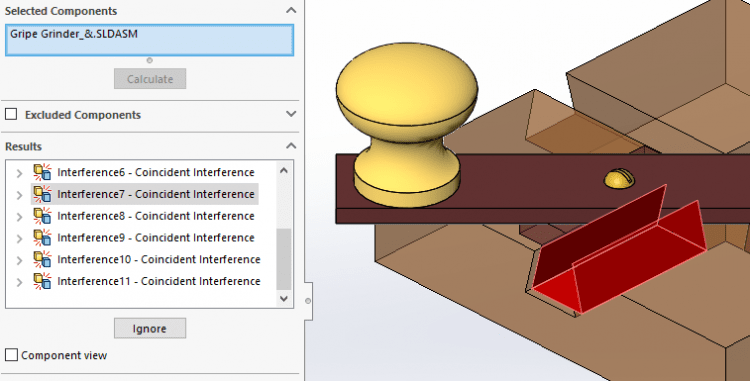
In total, there are eleven ‘interfering’ locations identified, with some components having multiple faces in initial contact.
With this as our starting point for defining contacts, the most common next step is to create an exploded view of the assembly. This makes face selection for contact conditions easier, especially since the contact conditions are set up in face pairs or sets. Personally, I don’t mind creating the exploded view as it helps with familiarization of the assembly. Quite often, though, we have deadlines to meet and creating the exploded view takes precious time that we don’t have. Focusing on speed, here is how to utilize ‘Automatically find contact sets’.
The first step is to right-click on the Connections folder within the SOLIDWORKS Simulation feature tree, then select the option “Contact Set“. If we were doing this manually, we would start by selecting the geometric entities belonging to set 1 and set 2 for each contact pair. Our interest is speed, so the next step is to check the radio button for ‘Automatically find contact sets’.
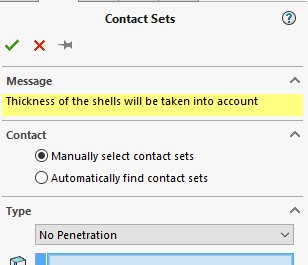
The Property Manager includes several sections that aid in contact set creation. Since we started with several components already face-to-face coincident, we’ll leave the “Options” section specified with ‘Touching faces’. Under the “Components” section, you can now choose the entire assembly from the Fly-out Feature Manager Design Tree or select individual components from the same location or from the graphics window. For illustration purposes, I’ve chosen the Gripe Grinder Base and one of the two Slider components. Then click on the ‘Find contact sets’ button to begin the next steps of the process.
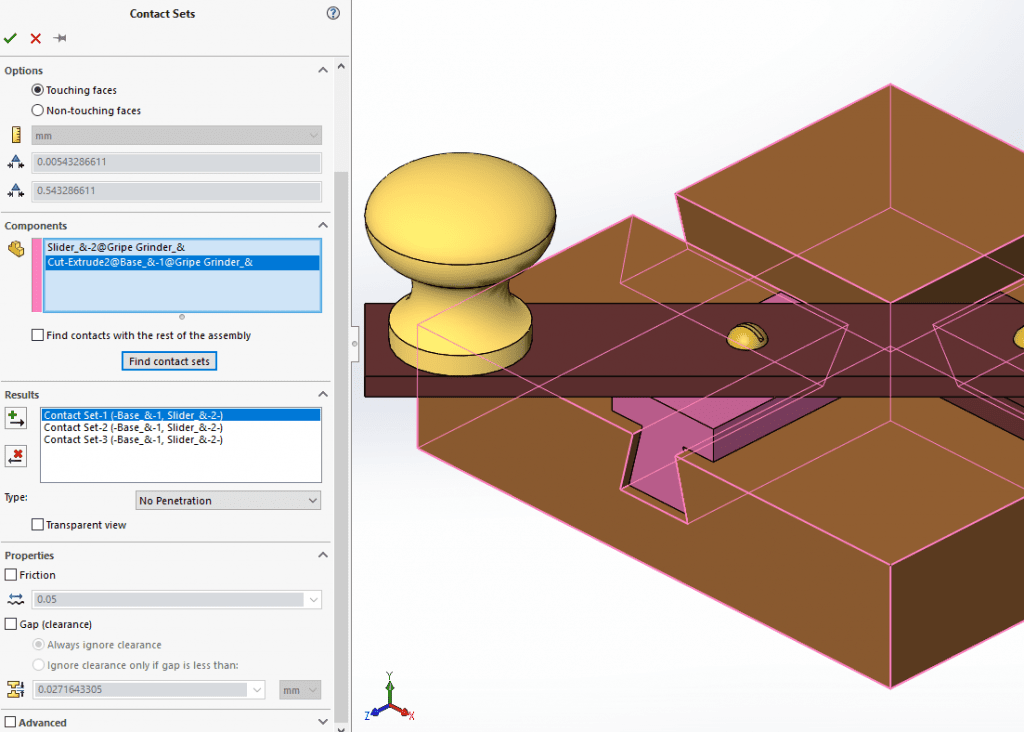
The “Results” section shows that three contacting faces were found between the two components. You can left-click on each to better visualize which face pairs belong to which contact set. We want to override the default bonded contact condition for these three face pairs with a No Penetration contact condition. The next steps would be to choose to apply friction, if applicable, and any advanced contact options for the more advanced SOLIDWORKS Simulation user. Once all the options for these three contacts are specified, the contact condition needs to be added to the SOLIDWORKS Simulation study. The key here is to click on the ‘Create contact sets’ button after all of the options are chosen. This can be done by individually selecting and adding the set or multi-selecting (shift or control) the contacts and adding them to the study.

After clicking the ‘Create contact sets’ button, we can see that these three new contacts were added to our FEA study.

We would, of course, need to continue this process for all the other components in the assembly that have contact conditions different than what is assigned globally. Taking advantage of the Automatically Find Contact Sets within SOLIDWORKS Simulation can save you time with your next assembly analysis project. You don’t need to create an exploded view to make face selection easier. There are also several options within this command to help focus in on the component contact conditions that you need to change. Now that you’re armed with more knowledge regarding contact conditions in SOLIDWORKS Simulation, I hope you start to take advantage of them. Now go make your products better with SOLIDWORKS Simulation!
Bill Reuss
Product Specialist, Simulation
Computer Aided Technology, Inc