SOLIDWORKS Tips for Large Assemblies That Are Slow to Work With
 In my SOLIDWORKS Large Assemblies blog series, I’ve talked about how large assemblies can be slow to open, slow to work with, and slow to save. Earlier in the series, we opened the assembly with a bunch of older version files and I was opening it from a network and it took seven minutes and thirty seconds to open. I went through the assembly and moved all the files to a location where they were getting the fastest possible data connection, opened all the files in a resolved state and made sure we had read/write access, we looked for any files with an unusually large file size and shrank those files, we resolved any errors in the assembly, sub-assemblies, and part files, and then we saved the assembly and all parts in the current version of SOLIDWORKS. After that, we closed the assembly and we toggled on the option to load components lightweight. I ended up cutting the total time down to just about twenty seconds just by following the steps talked about in previous blogs.
This is really useful information for cutting down the amount of time it takes to open an assembly and this is also going to apply to the amount of time it takes to save as well because we’ll no longer be fighting when we go to save the assembly by saving it as an older version or saving it with only read access to the files, or saving it across the network. So while it took twelve minutes and thirty seconds to save this assembly the first time when we were fighting some of those battles, what we find now is we can open the assembly, we can take one of the files, move it so the assembly is changed, we can save the assembly and it takes only about 6 seconds to save the assembly and move on with our work.
These are significant savings and times that you too can achieve just by following some of the steps that we covered earlier in this blog series. But now we’re ready to move on and talk about an assembly that is slow to work with.
Dealing with lag in your SOLIDWORKS Large Assembly
When we’re talking about an assembly that is slow to work with, what we’re talking about is it being laggy when we change from one window to another. Maybe SOLIDWORKS locks up or goes to a white screen. Lag can also occur when you add mates, when editing a part and going back to an edit assembly mode and everything just locks up, or just general lag when trying to rotate, zoom in and our, or even just holding your mouse over your assembly.
You can address this issue by adjusting some settings in the SOLIDWORKS software. So let’s get into it and start looking at some settings in SOLIDWORKS.
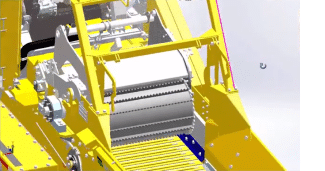
As you can see in the video example below I have my assembly open in SOLIDWORKS 2018, and the settings I’m going to show you apply to SOLIDWORKS 2015 and beyond and even some earlier versions of the software.
So we’re going to start out with the heads up toolbar and then look through some of the actual options in the software. From the heads up toolbar, we’re going to go to the view pull-down menu for view display style and we’re going to say no perspective, no ambient conclusion, no real view graphics, no shadows, and shades – basically, we’re turning everything off here.
You’re going to see that what we’re trying to do here is decrease the amount of information the graphics card has to process. The flyout menu under the eyeball can hide everything in newer versions (in older versions this is done by going to View > Hide/Show > Hide All Types to turn everything off.)
However, if you do need certain things to be on, just try to limit it to what you currently need. This will give you better performance because we’re going to have less information that we’re overloading our graphics card with.
Next we’re going to look at the background which as long as you have a static image you’ll be fine, you don’t want anything that is dynamically changing, so you don’t want an environment that rotates around.
Also from the heads up toolbar is we can change the display style to shaded with edges removed. This is going to give you the best performance from your assemblies as far as display style goes compared to shaded with edges shown or wireframe or hidden lines visible or hidden lines removed. The best display that is least taxing on your graphics card is going to be shaded with edges not shown.
Dynamic Highlighting
Dynamic highlighting can be really useful because it lets you tell where your mouse is before you actually click anything, but it can be also very taxing on the graphics card.
Go to Options > Display and then uncheck “Dynamic highlight from graphics view. Now when you put your mouse over a face they’ll no longer have a border. Similarly, you can go to System Options > Feature Manager > and uncheck the option for Dynamic highlight so when I take my mouse through the feature tree I don’t dynamically highlight the border of the part that my mouse is hovering over.
Again, you’re going to have to decide what the balance is here between getting the best possible performance and the convenience of having that dynamic highlight.
Transparency Display options
In the video below you can see that when I rotate my model there is a transparent shield in the front section. It looks nice, but it’s also taxing on your graphics card. If you go into System Options > Performance > uncheck High quality for dynamic view mode. After hitting okay, you’ll see that any shields will become more subtle (almost like a dotted pattern) and then when you let go it returns to its true transparency.
You can turn that option to kick in when you go to System Options > Performance > uncheck high quality for normal view mode.
Speaking of transparency, when you edit a part in SOLIDWORKS, SOLIDWORKS is going to make all of our other parts transparent (the default mode) but now that we have a low quality transparency on and we no longer have edges showing it makes it really difficult to see where the other parts are. It’s a lot more taxing on your graphics card when all the other parts go transparent if my transparency slider was maybe a little bit thicker or if I had edges and shaded mode turned on, this is going to be very taxing on your graphics card to generate all of these edges whenever you go into edit part mode.
So what we’re going to do is we’re going to adjust an option that affects a way parts display when we’re editing a part in the context of the assembly. To do that we go to Options > Display > Force assembly transparency (change to opaque assembly.) Now when you go to edit that part in the context of the assembly, the other parts are no longer going to go transparent they’ll instead remain opaque. However, now it’s hard for me to tell which part I’m editing so I’m going to make one other change. Go to Options > Colors > Use specified colors when editing parts in assemblies. Under Color scheme settings, scroll down to Assembly, Edit Part and then to choose the color that I’m editing I’m going to hit edit and I’m going to choose the very first color (mauve) and then for the parts you’re not editing scroll down to Assembly, Non-Edit Parts, click edit, and I’m going to choose yellow then hit OK.
So now when you click a part and go into Edit Part Mode, I’m now going to use the specified colors for editing parts so I’m no longer kicking into transparency mode which will give you a much better performance when going from Edit Part Mode into Edit Assembly Mode.
You may have noticed sometimes when you rotate an assembly that it goes blocky when you zoom in and out. What causes that? This is known as level of detail, which is found in the performance setting of your options. Go to Options > Performance > Level of detail (slide over to less faster) hit OK. Now when I rotate my assembly again you’ll see that see that some of the parts are going to be more blocky. Not only is this intended behavior, but this is also an indicator that you’re starting to overload your graphics card. Learn more about this setting in the video below.
Another tip we can perform in these settings for dynamic view changes to help with your graphics card is to go to the view options and consider turning off the dynamic view Transitions. If we turn this option off and go to front view, top view, or side view we are saving our graphics card the processing power required to animate the changing of those views. If we combine this with the ability of what we call a new named view this is a great time saver for your graphics card.
So at this point you may be asking yourself “hey, is there a list of all these settings” and the answer to that question is actually tied into what is called “Large Assembly Mode”. Large Assembly is an option or mode that can be enabled automatically when you open an assembly with a certain number of components.
If you go to System Options > Assemblies > there’s a checkbox for “Use Large Assembly Mode to improve performance when the assembly contains more than this number of components” (500), Large Assembly Mode will automatically kick on.
Large Assembly Mode can also be toggled on and off by going to the Tools pulldown menu > Large Assembly Mode then down in the status bar you’ll see that Large Assembly Mode has been kicked on.
If I go into some of the settings and examine some of these options that I talked about earlier such as Performance, you’ll notice that High quality for normal view mode and High quality for dynamic view mode have been greyed out, we can’t select those. We see this again if we go to Display, we can no longer select Dynamic highlight from graphics view. The reason for this is because I’m now in Large Assembly Mode.
In the video below, I explain where you can find that list.
I hope you found this tip helpful, for more tips on how to make your slow SOLIDWORKS large assemblies faster to open, work with, and save be sure to reference this checklist and read the related articles below.
Related Article
Slow SOLIDWORKS Load Time? Check This Setting
2 SOLIDWORKS Tips for Working with Large Assemblies
Why You Should Use the Automatically Load Components Lightweight Option in SOLIDWORKS
SOLIDWORKS Tip: Image Quality Properties when Saving JPG/TIFF
About the Author
 Toby Schnaars began using the SOLIDWORKS Software on the ’98 plus release, in October of 1998. He began working for Prism Engineering (now Fisher Unitech) as an instructor and tech support engineer in 2001. He has fielded over 10,000 tech support cases and been the head instructor for over 200 SOLIDWORKS training classes. Toby is a regular presenter at users groups, technical summits, and SOLIDWORKS world. In 2003, in Orlando, FL, Toby won first place in SOLIDWORKS MODEL MANIA a modeling contest based on speed and accuracy. Toby hosts a free monthly webinar called “Toby’s Tech Talk” where you can tune in and get more tips and tricks on the SOLIDWORKS software.