How Do I Complete a Nonlinear Analysis in SOLIDWORKS Simulation?
How do I complete a nonlinear study in SOLIDWORKS Simulation Premium? Every study in SOLIDWORKS Simulation follows the same six general steps. You can read more about these steps here: Six Steps To Your Simulation Study. Nonlinear studies are no different, there are just a few extra bells and whistles to watch out for.
Let’s cover the basics. Nonlinear studies are appropriate whenever the structural stiffness of the model or the model’s boundary conditions change throughout the simulation. Some common reasons to switch to a nonlinear solver are below:
- Nonlinear Materials– Elastomers, plastics, or composites qualify here; also, materials that will exceed yield stress during the simulation.
- Large Deformations– If the model is going to have large deformations, the stiffness will not be constant, and must be calculated with a large displacement solution.
- Time-dependent Loading– If loads or forces acting on the model realign, or change magnitude/direction during the calculation, they must be calculated with nonlinear analysis. This includes large amounts of sliding contact.
Watch out for shock or impact loads, these are sometimes best handled with linear dynamics, which will be covered in a future blog.
The problem I would like to solve involves a plastic latching mechanism, pictured below:
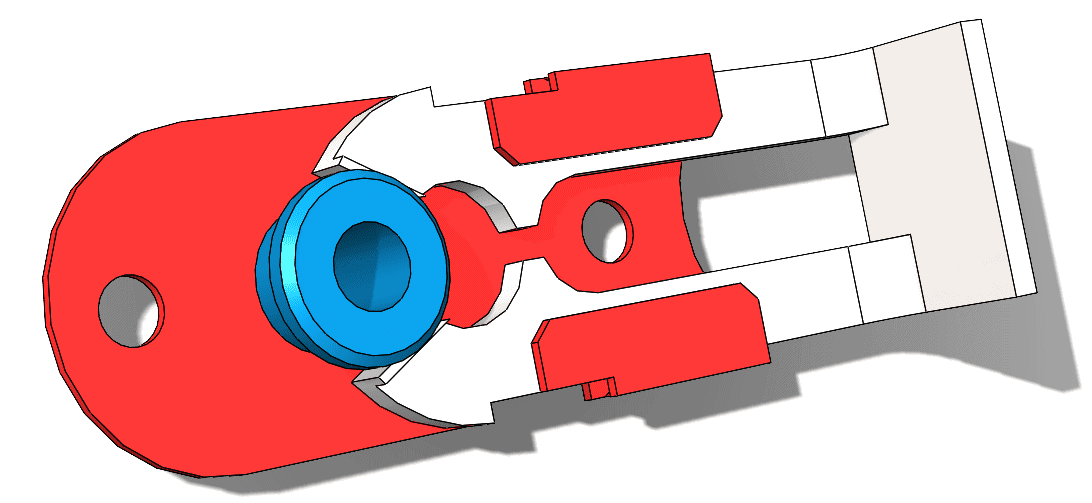
I expect to have some plastic deformation as well as sliding contact, so a nonlinear study is appropriate.
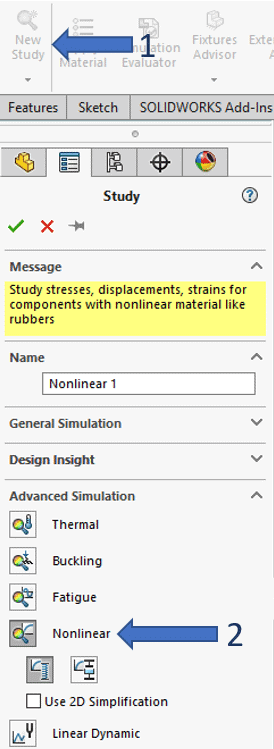
Starting a nonlinear analysis is the same as the other study types.
Once created, we can go into the study properties to set up the “Stepping Options” of the nonlinear solver.

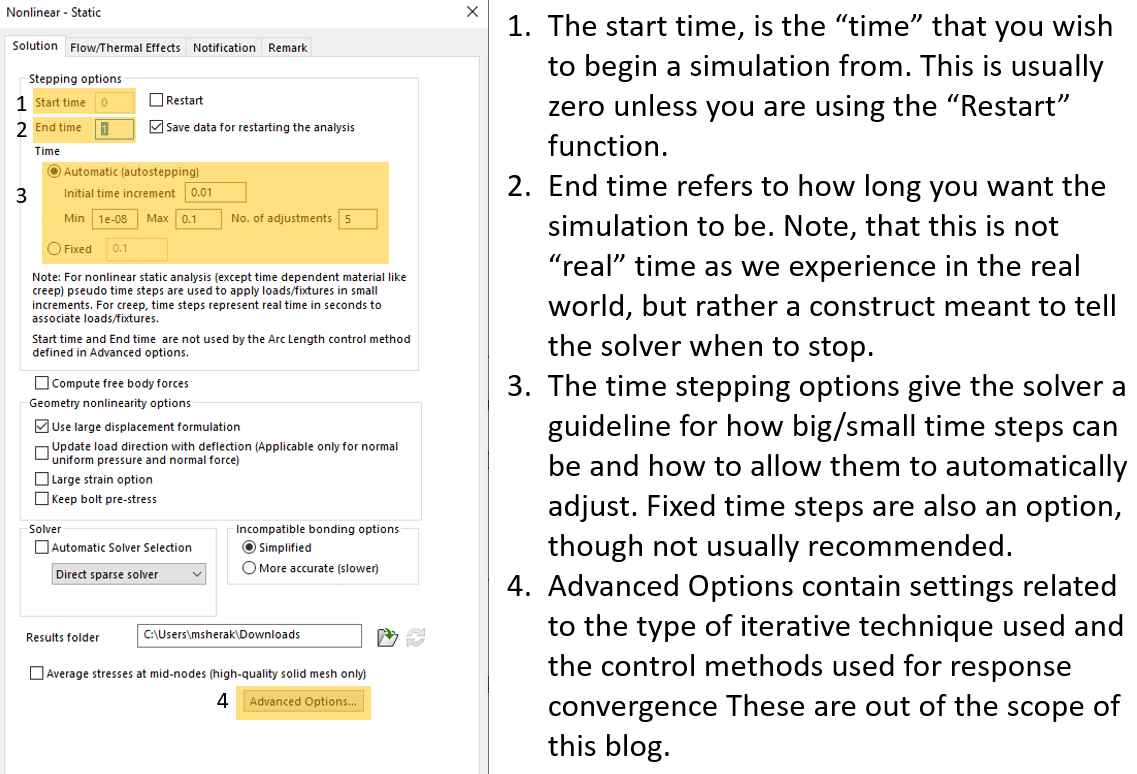
For this analysis, we will use the default stepping options.
Next, we must apply the correct material properties to each body in the assembly. This is similar to linear statics, except there are extra material models available. Choosing the correct material model and the associated material properties is covered in depth in the SOLIDWORKS Simulation Premium: Nonlinear training course.
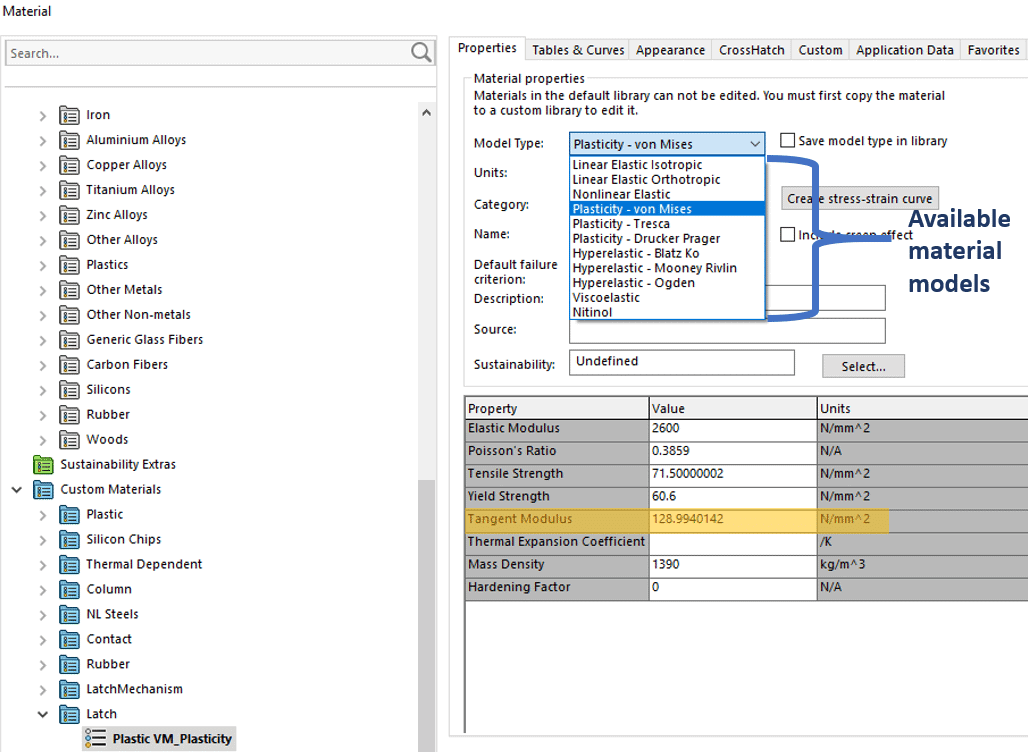
For our purposes, I have chosen a Plasticity-Von Mises definition. This allows us to assign a tangent modulus which linearizes the post-yield behavior of the material, for simplicity. This material will be applied to the white body in our model so that the post-yield behavior of the material is captured.
The red body will be assigned a material out of the SOLIDWORKS default materials library: AISI 316 Stainless Steel Sheet (SS). Materials in the library that have the suffix “(SS)” have a stress-strain curve associated with them. All we must do is select it and activate the appropriate nonlinear material model, same as above.
The blue body will be assigned a linear material that is much harder than the others. This will assist with convergence.
Next, the appropriate contacts are added. In this model, any face that will come into contact during the simulation has been assigned a “No Penetration” contact set. For more information on contact, and why these were done as “contact sets” read my blog here.
Fixtures are applied to the model to restrain it in place, as well as a forced displacement to engage the latch.
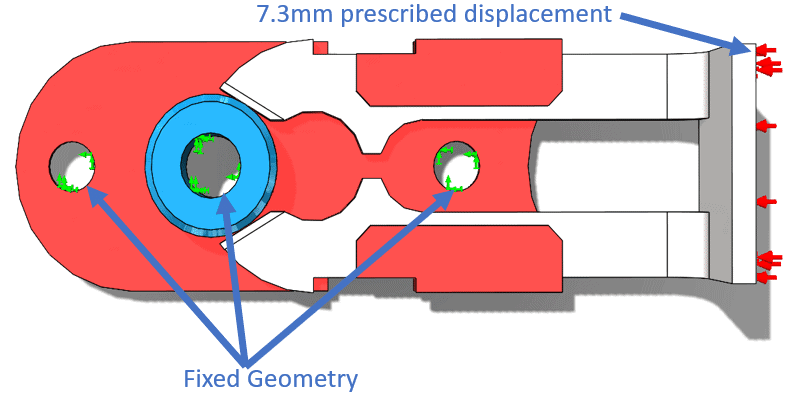
The forced displacement in this case is applied as a function of time. I want the latch to be forced closed, then pulled open again.
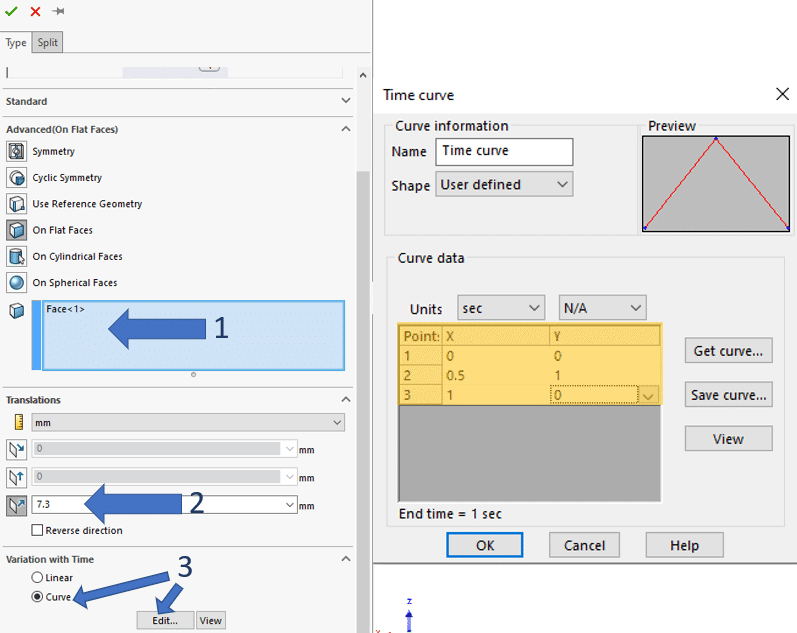
The options above show how to set up the required 7.3 mm prescribed translation to the part up until halfway through the simulation, then fully reverse that motion by the end of the simulation. Remember our “End Time” is one second, so at one second, we set our translation to be zero; indicating a return to initial position.
There are no other loads applied for this simulation.
For sliding contact, a well refined mesh in the sliding areas is strongly recommended. Once created, we can run the simulation.
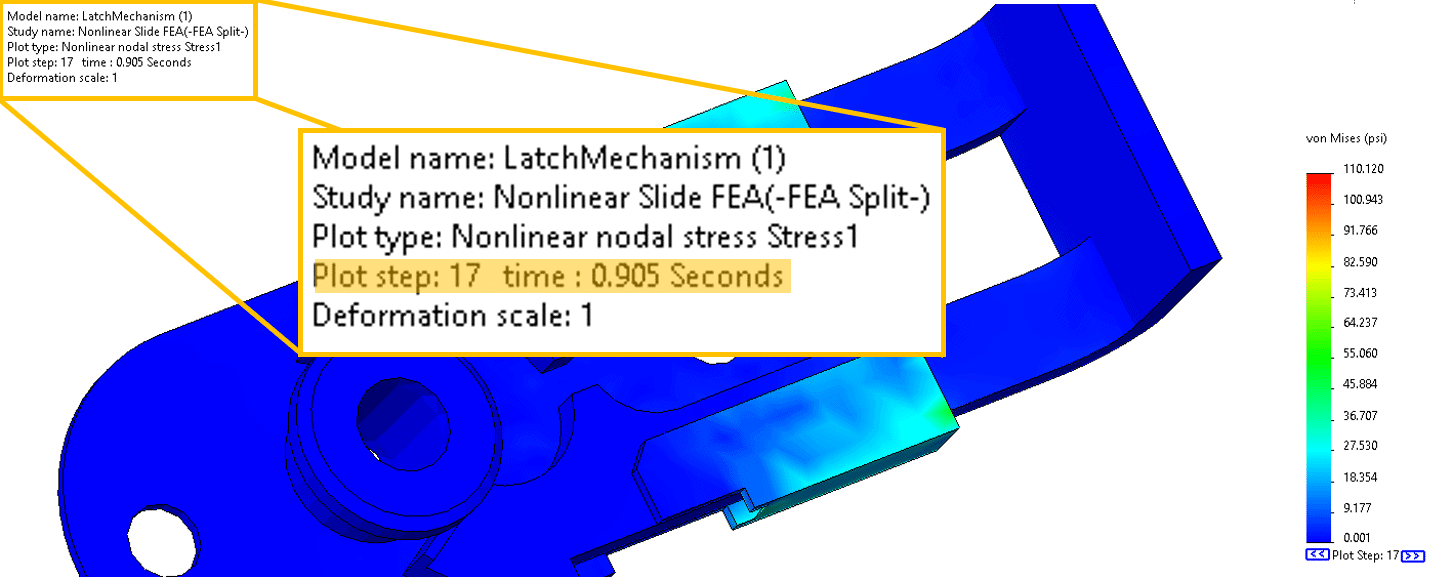
Below is an animation of the stress plot.

Post processing the “time” dependent results requires a bit of extra attention. Close attention should be paid to which time step you are viewing. This is easy to see this information in the upper left corner of the graphics area.
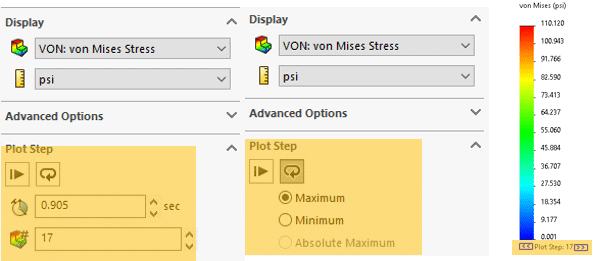
The time step can be changed by right clicking the active plot, then editing the definition of the plot and selecting the desired time. Or you can click the blue arrows underneath the plot legend.
There is much more capability in the post processing tools that may be covered in a future blog. In the meantime, I hope this blog has enlightened you to the things to watch out for when setting up nonlinear studies in SOLIDWORKS Simulation Premium. This blog has an accompanying video under the same title. Check out the Computer Aided Technology video page for more information and subscribe.
Matthew Sherak, CSWE-Simulation
Simulation Product Specialist, Application Engineer
Computer Aided Technology, Inc.